NARS Earth Angel

Monday, May 31, 2010
I have 3 weaknesses when it comes to eyeshadow, three colors that almost always make me pause and look twice. Olives, Plums and Taupes. Since this NARS Earth Angel duo has two of the three- it's been beckoning towards me for quite some time now. 
I have to get something off my chest first. I hate the name. Earth Angel? Ugh, this makes me think of some long haired hippie with a braided flower necklace laying on the ground making snow angels. I'm only half kidding, I'm marrying a damn hippie, but that doesn't keep me from wanting to throw his Birkenstocks and acoustic guitar at him and telling him that no, he can't light any more stinky incense. 
Back to shadow. One side is described as a "bronzed taupe" while the other is an "olive". I see a light taupe with hints of plum and an mossy olive.


UDPP, Right side of NARS Earth
Angel, Avon SuperShock liner in
Khaki Shimmer, Opera Volume Control
Masara
I'm gonna come out and say it, I'm halfway disappointed. Why just halfway? The taupe is delicious, as all taupes ought to be. Smooth, highly pigmented and different enough from the rest of my taupes to deserve love and attention.  It's the olive side that makes me stop dead in my tracks. It looks gorgeous swiped with a finger, but one of those shades were the shimmer disappears when you try to blend it and ends up looking dark and dirty. So yes, while the swatches look lovely, it's horrible to work with. The only real way I've managed to use the green shade is as a single wash of color over UDPP (paired up with olive liner, it's stunning!).
L'oreal HiP Cream Shadow Paint in
Secretive, Left side of Earth Angel,
WnW Creme liner, Opera Mascara
I don't understand, doesn't NARS hire anyone to actually -test- the makeup? It'd take just one application to demonstrate that while rich in the pan, the blending of the green isn't up to scratch. 
At $32, I felt like it was quite a bit of money for me to spend on myself for an eyeshadow duo, but luckily Mr. MakeupWithdrawal insisted as part of my birthday treat. 
So, anyone else own any NARS shadows? What are your favorites?

MAC Marine Life FOTD

Thursday, May 27, 2010
I was so excited to get Marine Life, it goes without saying that I absolutely had to use it today. 
Not sure if you can tell, but I got a little tan over the last few days (I went To the Beach! Terrible pun intended), so I'm a bit darker than my usual NC20. This is the brightest blush I own, and I love how it pops and goes with my favorite gloss of the season, Revlon Coral Reef.


Face: L'oreal Magic Perfecting Base, NARS Concealer Duo Ginger/Custard, MUFE HD 117, MAC Marine Life
Eyes: UDPP, Etude gold eyeshadow. Opera Volume Control mascara
Lips: Revlon Superlustrous lipgloss in Coral Reef + Smashbox hybrid lipgloss in Marigold


In case you missed it: Click here for the post about Marine Life. 

I love you, Mr. Seahorse! MAC Marine Life

Wednesday, May 26, 2010
I know, I know. Probably every beauty blog has pictures of MAC Marine Life High Light Powder from the To the Beach collection, I'm just adding to the commotion. Remember when I said three months ago that I -HAD- to have it? Since then, I must have told myself a million times that it was nothing special, the intricate gold is just overspray, blah blah blah. All this reasoning went out my head the moment I stepped in front of the Mall of America MAC. There it was, in a complimenting dark chartreuse case, in all its seahorsey glory. 
It didn't help that a really adorable male sales associate gushed over it with me. 
So here it is, laying on the table next to me. I've spent the last hour or so admiring it from a distance, working my courage up to actually use it. 
Though billed as a high light powder, it's really bright coral, so would look best used as a blush. 
I first lightly buffed the gold overspray away, so that my swatches would be indicative of the whole cake, not just the top layer. I apologize that these aren't done in natural light like I usually do, but I figured people would want to see it regardless!


Can't wait to use it in a FOTD, will post pictures soon!


Product shown was purchased by me, for my own use.

Vacationing! NOTD

Tuesday, May 25, 2010
Just a quick post to let you know what I've been up to! I've been visiting my parents in MN, quite the distance from Philly! And since it is my birthday week (and also my brother's), it's been crazy hectic because I actually haven't seen my family and friends for a year. 
Now, I decided to try gradient nails for the first time (I only recently started to appreciate how intricate and feminine nails could be, it's like tackling a whole 'nother beast). I also wanted to incorporate that lovely Sally Hansen Hidden Treasure that LPJ gave me- you know, that glorious flaked polish that's been on every single nail blog. I wanted something a bit more glamorous than my typical creme colors, so I choose China Glaze Flyin' High which is a beautiful teal in the bottle, but showed up a bit more robin's egg blue. 
This picture captures the nails when they're still a little rough around the edges (rather, the top!) because I hadn't applied a top coat yet. 
Gradient with SV Clear Base, SH Hidden Treasure
and China Glaze Flyin' High
Mr. MakeupWithdrawal has insisted that I do treat myself because turning 20 is quite the big deal, so I'll let you know what goodies I'll be bringing home!
All products featured were either given to me or purchased by me for my own use. 

Contouring 101

Thursday, May 20, 2010
He has nothing to do with makeup, but I sure wouldn't mind having his cheekbones, or the rest of him for that matter 
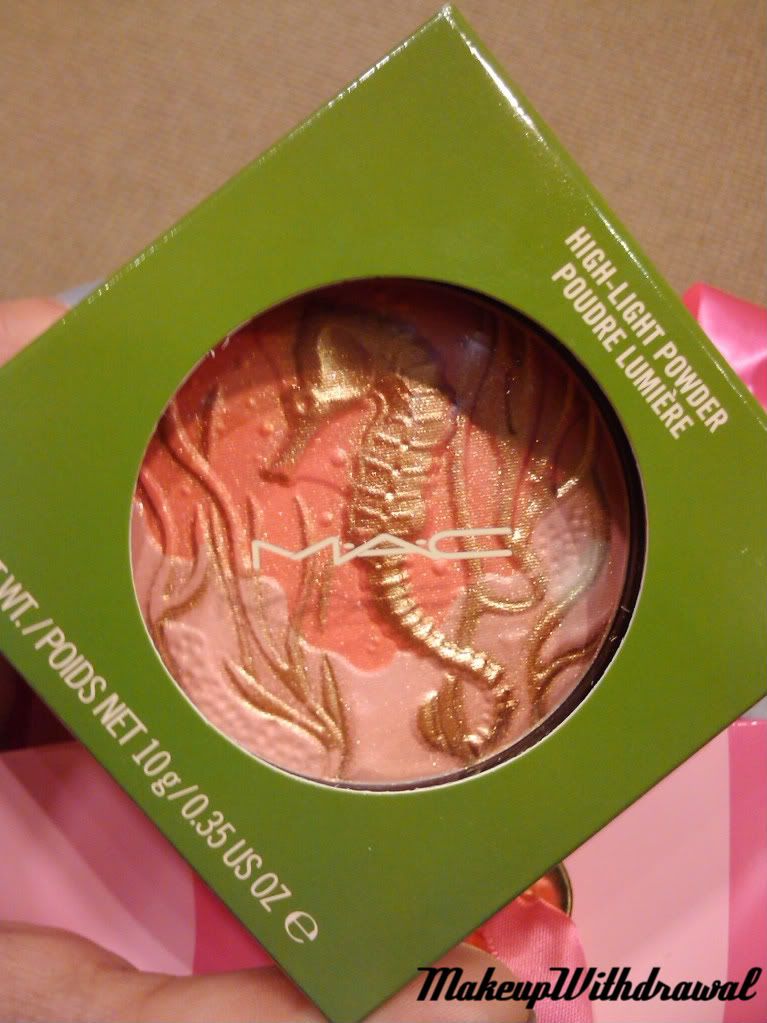
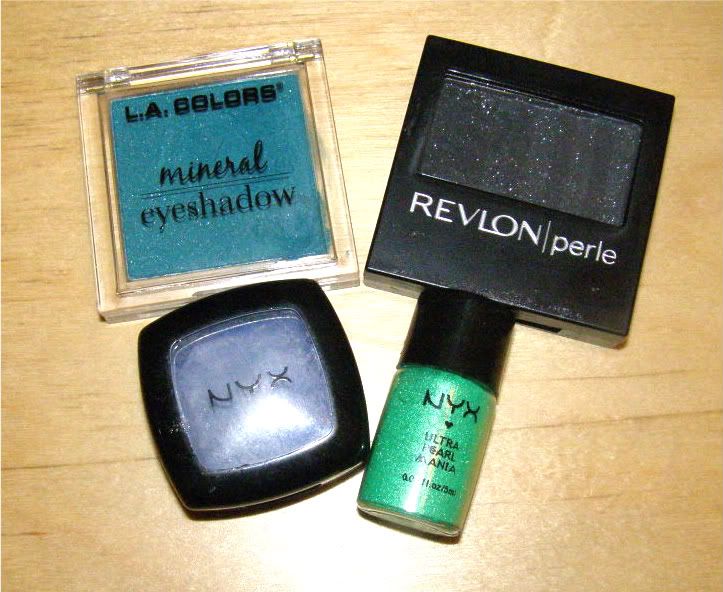
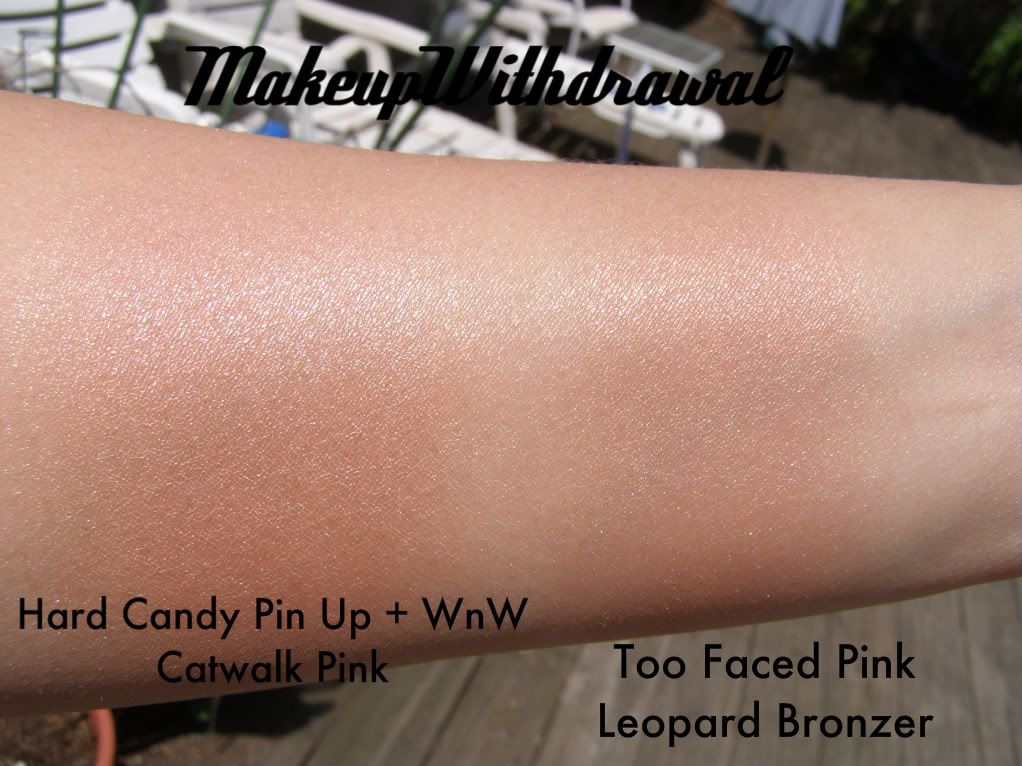
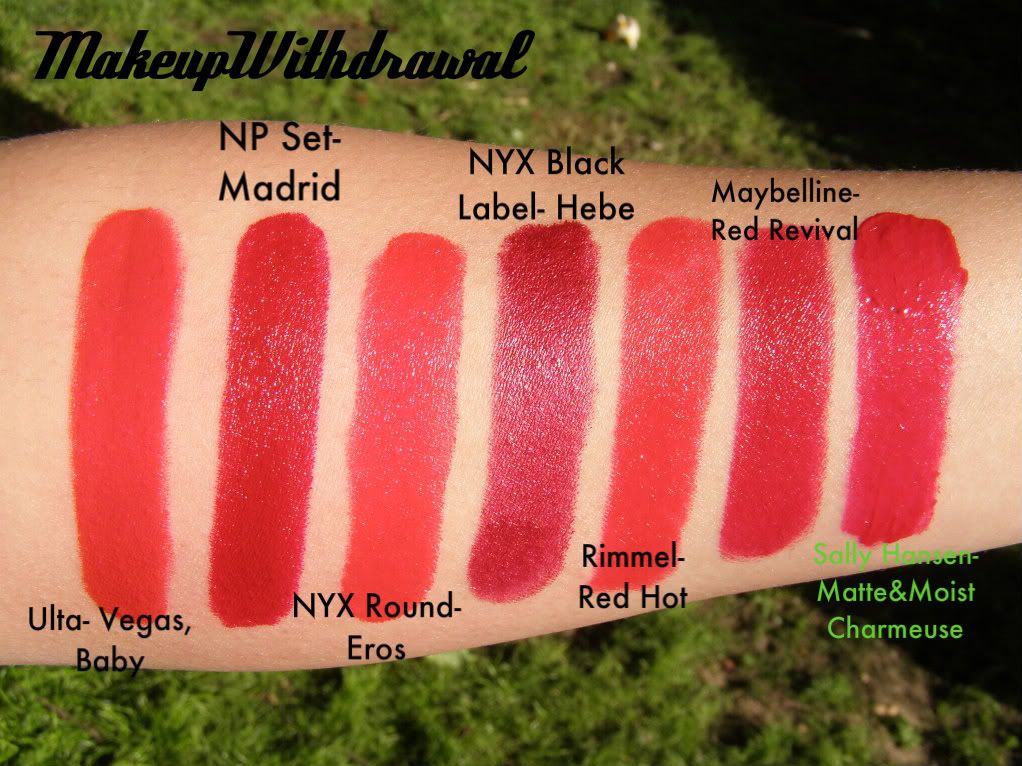
There are some days when I wished I had high cut cheek bones and hollowed cheeks like some waifish runway model. Though generally pleased with my face structure, when I want it to appear thinner and less baby-faced, I do a little contouring. 
What to use? Most people's first gut reaction is to reach for their bronzer. Keep in mind though that a lot of bronzers contain shimmer which attracts the eye- the opposite of what we want to do. The purpose of contouring is to create artificial shadows that when viewed, tricks the brain into thinking that it's recessed or in the background. This creates depth and interest in a person's features. If bronzer is indeed what you intend to use, go for one with a satin or matte finish, preferably cool rather than warm in tone. Also consider a product like NYX Taupe blush, which on most skin tones is dark enough to use as a contouring shade. NYX also makes a contouring/highlighting set- two thick formulas that come in a pump (both matte), one dark and one light.  
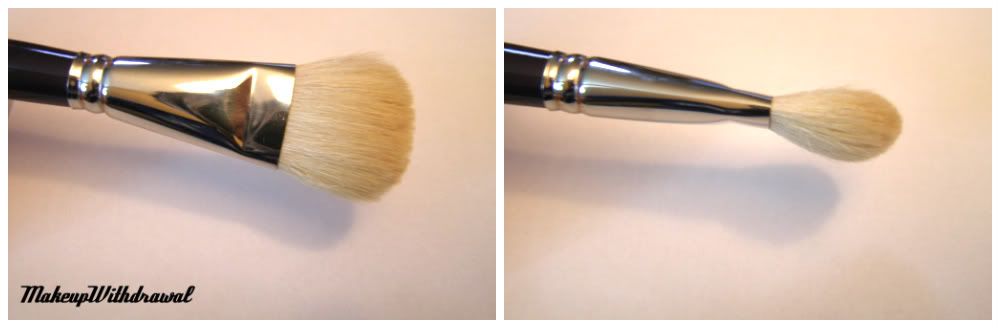
As for brushes, I use a thin mop style brush that's actually an artist's brush- found at most craft stores (Loew Cornell 1" Mop). It's made out of goat hair for optimal blending, and I like how thin it is for lots of control. 
There's not specific places to the contour that's universal- depending on your face shape you'll want to play around with the placement of the darker shade.
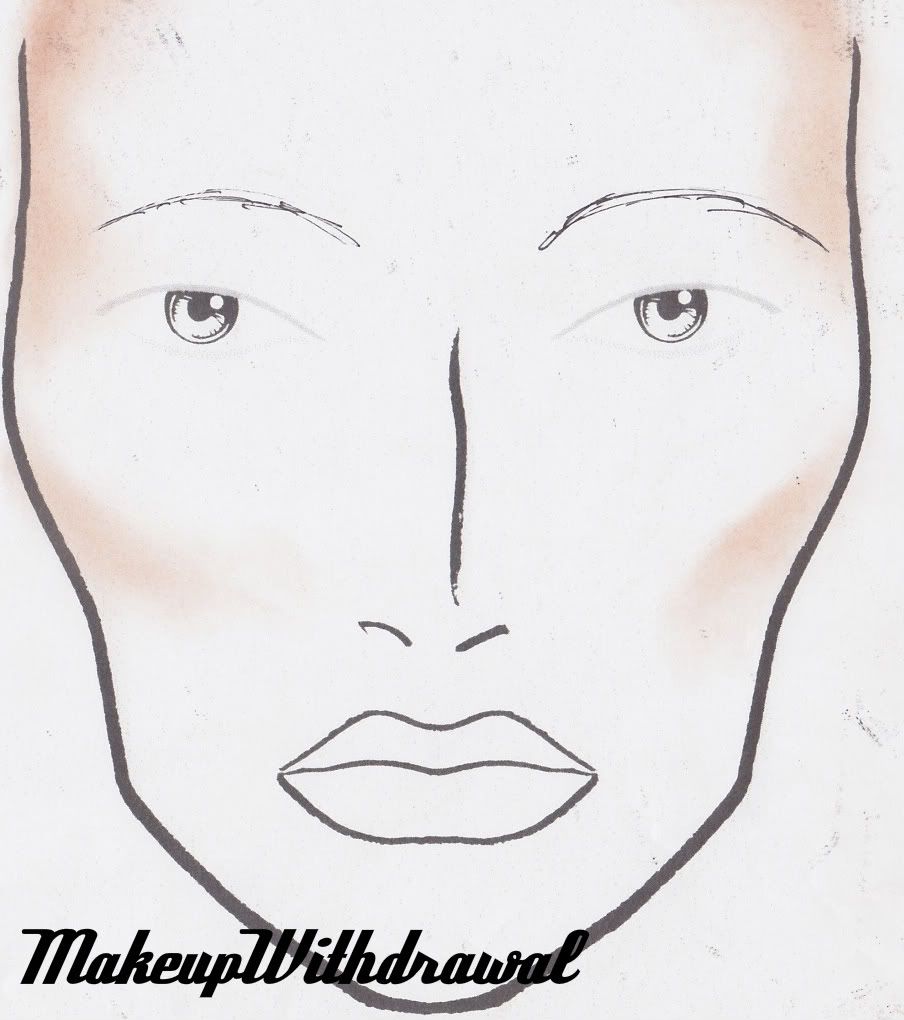
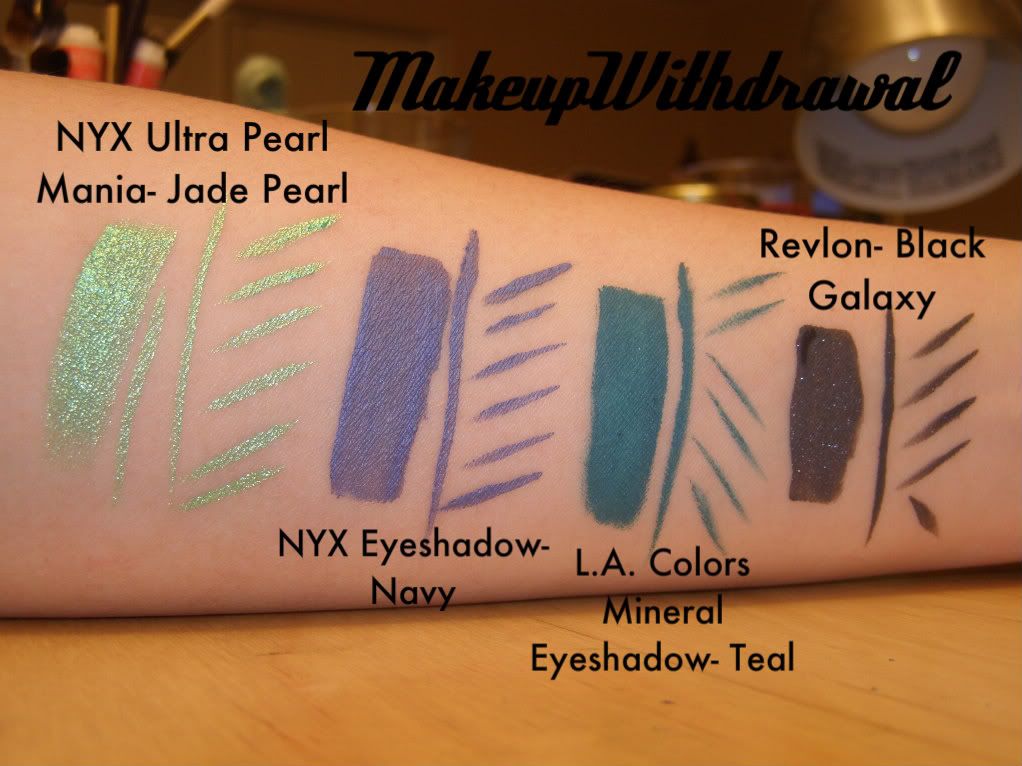
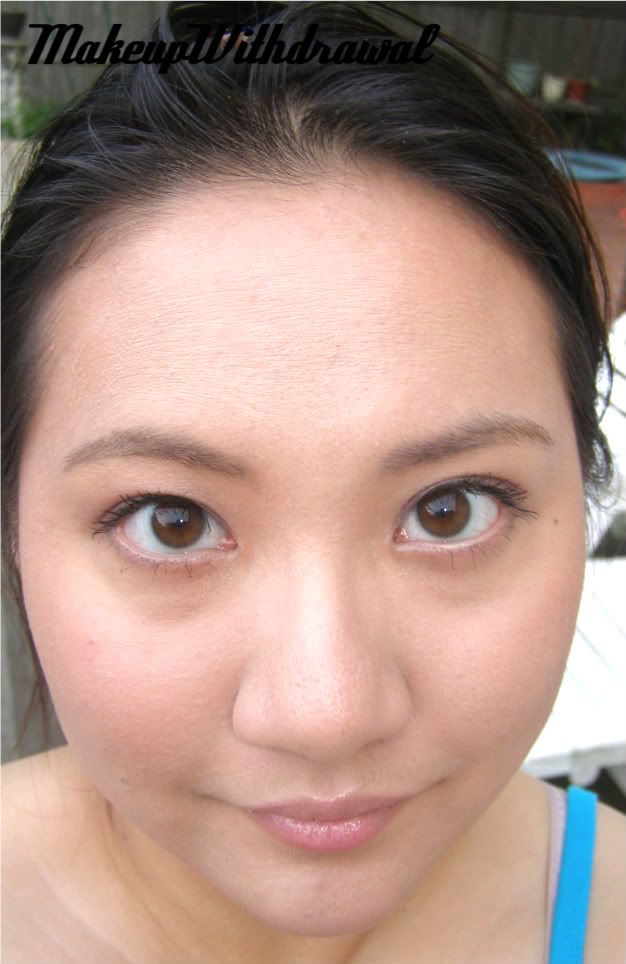
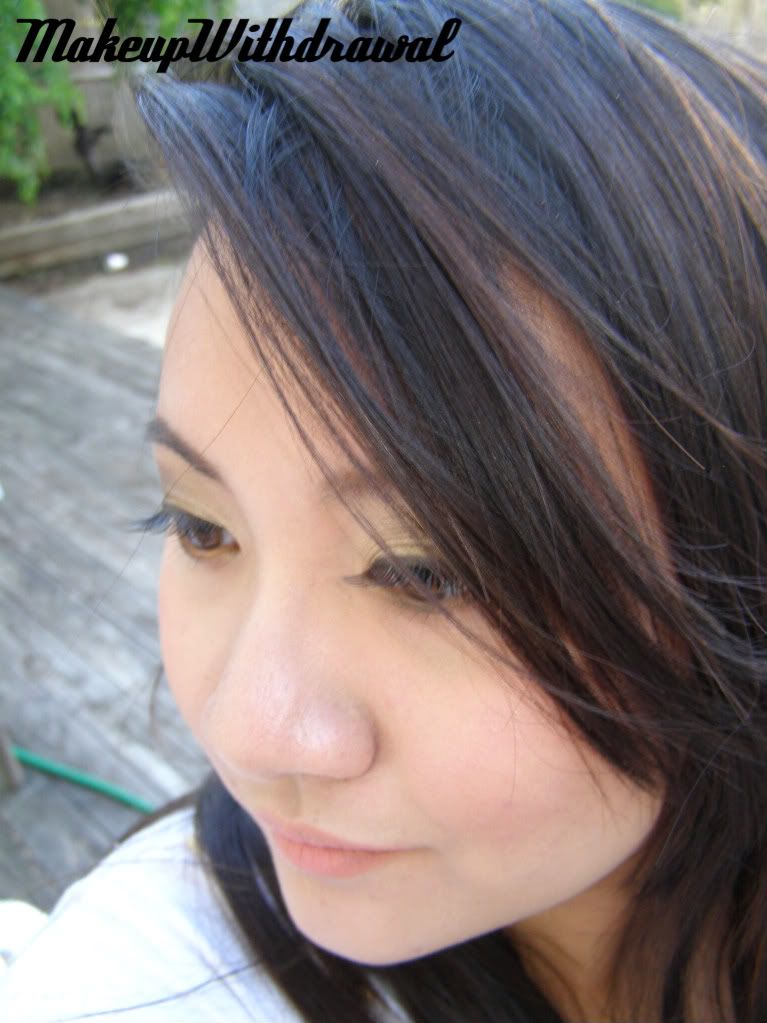
Very basic placement, around the hairline, a tad on the
temples and a touch under the cheekbones.
I think the best way to explain contouring is to simply show you with pictures. Here's a few face charts that ought to help.
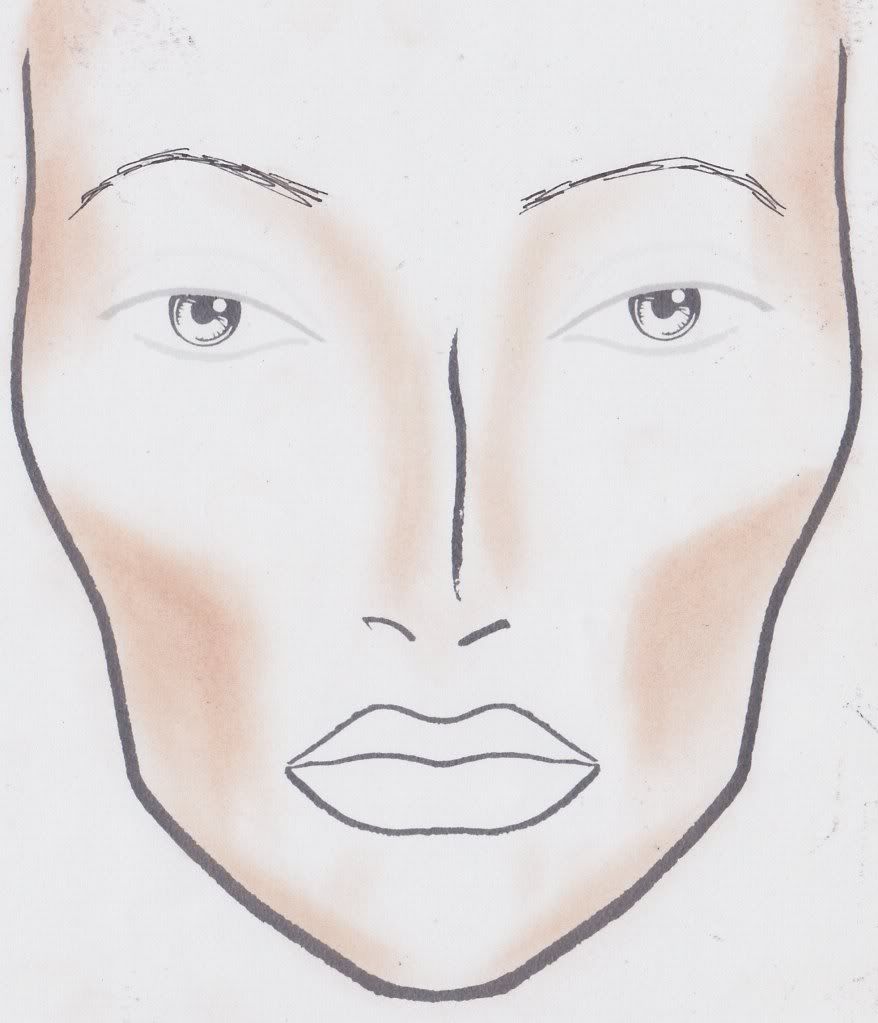
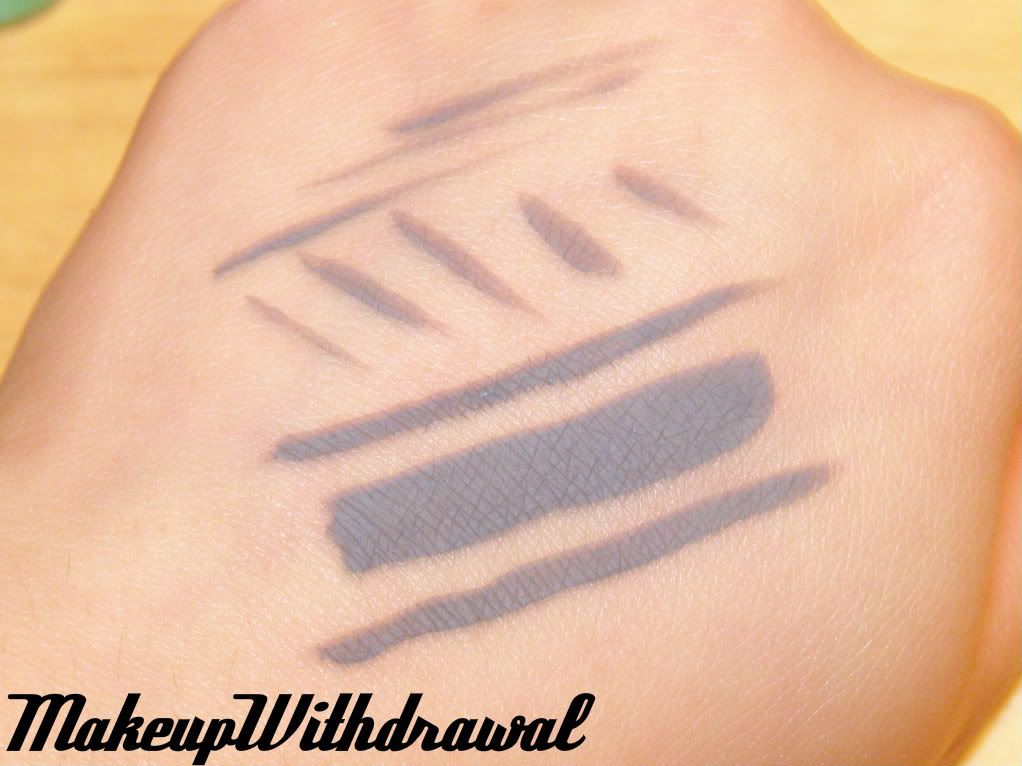
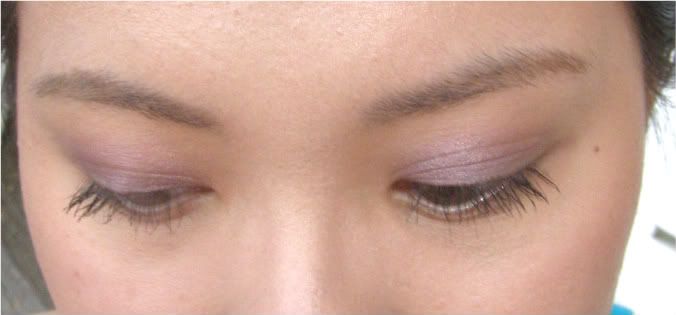
Hairline contouring and detailed nose contouring;
sweep a bit of the darker shade from under the brows down the sides of the nose and to the tip.

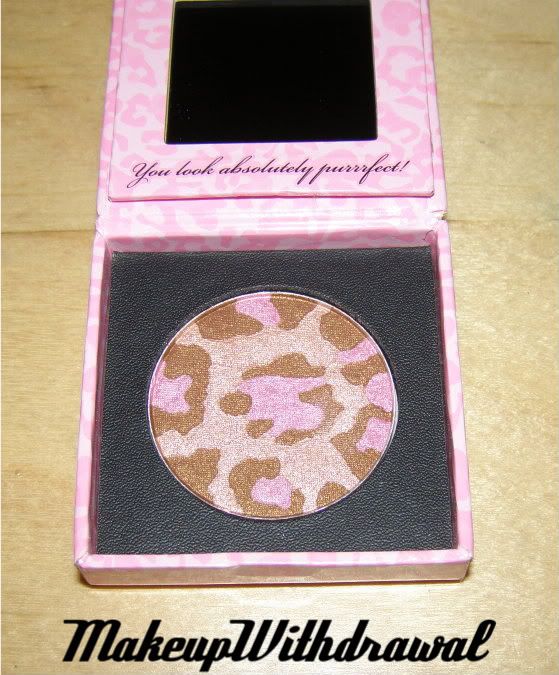
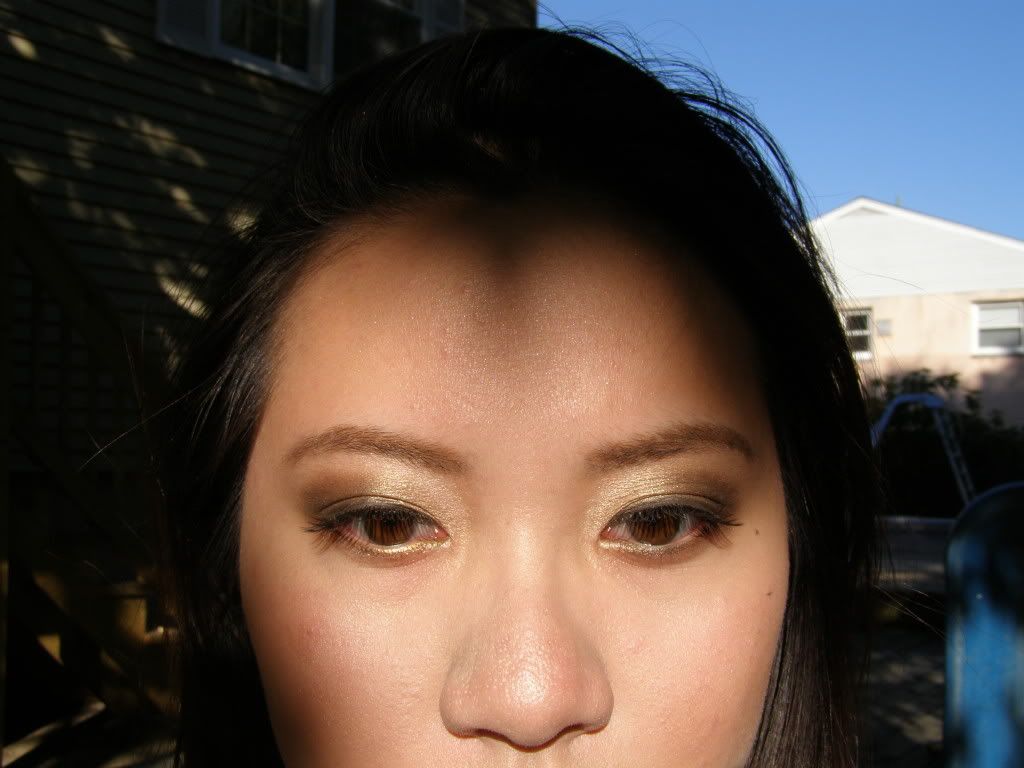
Whole nine yards: hairline, temples, super cut cheeks,
nose and even a bit on the jawline.
A few tips and tricks:
- Placing a darker shade at your hairline really brings the rest of your face forward.
- Jawline shading helps minimize chin size by making the eye follow the sides of your face down into a point, but if you contour the jaw, sweep a bit of the contouring shade down onto your neck to avoid that separate face/neck syndrome.
- Contouring the temples is perhaps the easiest way to give a rounder face more dimension. Starting at the hairline, carefully sweep the color towards, but not touching your brows. 
- Use a contouring color only a few shades away from your natural skin shade, to keep it from being glaringly obvious.
- Less is more- use a light hand when contouring, the more subtle it is, the more effective.
- Blend, blend, blend! It'll keep harsh lines from making your face look dirty or worn.

CVS 75% off Sale- L'oreal HiP Crayons

Wednesday, May 19, 2010
When word on the street hit MUA that CVS was having another one of those 75% clearance sales, I drove to my closest CVS hoping for a few good finds. I didn't want to come home with a buttload of stuff, but figured I could grab a few polishes or HiP pigments if any of them were on sale. 
Once inside, I combed over the the entire beauty section three times, searching for the magical green sticker that would indicate a product's willingness to come home with me (or so I like to think). And there, while looking for HiP pigments I saw something that I had never noticed before. 
L'oreal HiP Color Rich Cream Crayons (only two in stock). These two shadow/liner crayon sticks remind me an awful lot of those MAC Shadesticks, only you know, limited color selection and cheaper. Each one of them comes with a built in sharpener on the ends so that if you wish to do so, you might sharpen them to a precise point (I probably won't because it wastes product). 
I bought Meticulous, a sort of frosty tan color and Authentic, a rich dark green with shimmer. I instantly took a great liking to the tan, because it was just such a great all over the lid color and blended effortlessly into the lid. In fact, I might go as far as to say that this particular crayon will most definitely enable me to be lazy in the mornings because it's so easy to just quickly doodle a little on the lids, blend a little brown shadow in the crease and look put together in record time. 
I liked the tan one so much that I immediately went another CVS hoping to see more shades. I managed to get a jeweled deep blue, called Intricate. For some reason this shade isn't as pigmented as the other two, though the color is definitely buildable. They dry quickly on my lids (though if I blink before they set, they crease), stay put all day and don't fade.
I find that these sticks are best used as bases. The blue and green crayons look absolutely stunning with similarly paired shadows. Another great way to use them is to wear them under shimmery charcoal or black shadow, because it adds visual interest to an otherwise daunting shade. 
Wait, wait, wait- I didn't even get to the best part- They're regularly $9.99 but with the sale going on, I picked them up for $2.49 each. Great buy on my part! I can't wait to use them under the bright shadows I just got for my birthday!
All products shown were purchased by me, for my own use.

I am loved! Packages from Friends + NOTD

Monday, May 17, 2010
I mentioned the other day that I got a care package from Mae, and today I received a birthday box from LipGlossJunkee (how she's known on MUA). She had told me last week to expect it today, so from 11am this morning, I parked my butt right next to the mailbox. Seriously, I grabbed Mr. MakeupWithdrawal's collapsible lawn chair, a bottle of organic chilled lemonade, an issue of Marie Claire and eagerly waited for it. 
Here's pictures of both packages:


Mae's package include a mini Too Faced Pink Leopard Bronzer, four NYX Pearl Manias, three NYX Chrome shadows, two NYX trios (and a partridge in a pair tree!), an Express gloss and skin care samples! I've already talked about the bronzer, but will slowly review all the rest of the items.
This is LPJ's birthday present to me (she shouldn't have, really). Two Avon True Color Quads in Aquadelic and Electric Purple, True Color Blush in Coral Radiance. Milani singles in Rich Chocolate and Taffy (she's encouraging the obsession I have with tracking them all down), MAC Melon pigment, mini Urban Decay 24/7 in Graffiti, Avon SuperShock liners in Khaki Shimmer and Plum, Stila pencil in Topaz. Oh, and two Avon brushes; Rounded Shadow Brush and Eye Liner Brush. Last but not least, OPI Suzi Skis In the Pyrenees (Suede Finish) and Sally Hansen Hidden Treasure polishes (this one has been so hard to find for me). This woman knows my makeup taste better than I do, I swear. I can't wait to play with every item!
Thank you both so much! :)
And here's my NOTD!
A bit messy, but you get the idea.
It's that very same OPI polish that LPJ just sent me- Suzi Skis in the Pyrenees (which reminds me of my dog, who is a Great Pyrenees!). It's so odd, a matte formula with microglitter. But what's truly fascinating is the color, a charcoal base with silver microglitter. It reminds me of graphite in pencils. 
1x Seche Base, 2x OPI Suzi, 1x Essie Matte About You topcoat

La Femme Cake Eyeliner Sealer

Sunday, May 16, 2010
I may never have to buy another eyeliner again. Ok, aside being slightly over the top and blasphemous, I did find a product that is just plain awesome. La Femme Cake Eyeliner Sealer.
What it is: a small little squeeze bottle with half a fluid ounce of eyeliner sealer. This is great, great stuff. More useful than liquid gold. Actually, pretty much everything is more useful than liquid gold. I mean, what would you do with it? Pour it over your cereal and eat it? But I digress.
Here's the thing. You can use this liquid to turn any loose or pressed eyeshadow into liquid liner. That means I have about 200 new liners to mess around with.

Here's a few examples:
And these are just cheap eyeshadows! All under $5. Heck, the LA Colors shadows are from the Dollar Store. But look at the way that teal ends up being a fantastic matte liner that doesn't budge all day and is easy to manipulate because it's thin like ink.
You just simple add ONE drop (it'll be enough, trust me) of the sealer to any cake liner or shadow and mix it. Preferably with loose shadows (scoop some out so that it doesn't contaminate the rest). On shadow cakes, it will kind of ruin the texture of the shadow, so you'll want to limit the spread of the sealer and just use it in one corner. The more shadow to liquid ratio, the more pigmented the liner will be. Mess around with it! I recommend using a really small angled brush or bend eyeliner brush with it.
La Femme Cake Eyeliner in Grey


La Femme also makes eyeliner cakes, and this product goes really nicely with those. Another similar product is Ben Nye's sealer. However, I found that Ben Nye's version wasn't as long wearing and the liner fell off (in strips too, like wall paper or something, extremely odd) mid day.
I wouldn't recommend this for the waterline, because it does sting a little. The best part about this product is the price. I bought the sealer for a mere $3.50! Since each application takes literally one drop, 0.5 oz will probably last me for years to come.
So? What think you?

Too Faced Pink Leopard Bronzer (A Dupe?)

Saturday, May 15, 2010
Pink Leopard, packaged in cardboard with mirror.


My friend Mae sent me an amazing care package, and easily the cutest thing inside was a mini Too Faced Leopard Bronzer. Words can not describe how disgustingly cute this bronzer is, hence the picture. I also like to imagine that somewhere out there, there are hot pink leopards lurking around, waiting to pounce on unsuspecting victims. 
Now, Mae had told me that she used hers more as a blush, because it does have a bit of pink to it. I see why, it's a shimmery pinky peachy champagne that isn't a true bronze color. Lovely. Soft, finely milled- it looks great on the apples of my cheeks to give a fantastic glow. 
Wait a second, something seems familiar. I realized the reason I liked this bronzer so much was that it left my face with a similar ethereal luminous effect as my beloved Hard Candy blush in Pin Up. How do they actually compare, side by side?
Click on image to enlarge
Pin up is pretty close, right? But darker. So is Catwalk Pink, only pinker. Either one would make a decent substitute, but if you're REALLY hardcore you could buy both and swirl them together for a nearly identical dupe. Bonus points for being so dedicated.  Wet'n'Wild MegaGlo Catwalk Pink: $4. Hard Candy Pin Up Blush: $7. 


Even if you bought both those products, that's still less than the real deal. However, the full sized Pink Leopard comes with a equally adorable brush in the compartment under it. At $28 though, I think I'll happily use up the mini (and gush every time I whip it open, I'm such a sucker for specially designed cakes) but opt for something more unique. 
Quick tidbit: a bird pooped on me while swatching these. Seriously, is there anything I won't do for a good picture?
Once again, special thanks to Mae for gifting me with this ridiculously lovable blush!
Thoughts: Have it? Want it?

Urban Decay Set Contest Winner! And a FOTD

Friday, May 14, 2010
Congratulations to Jenny from the skinnies who won the contest!


Thanks to all that participated, I really appreciate all the readers of my blog and can't wait to hold another contest soon.
Now, a quick FOTD!


This is a look that I just slapped on right before I went outside to tidy up the pool before a storm hit the area. Very low key, slight hints of plum with barely there lips. You know, I think this foundation is a bit pinker than my neck, though it matches my face well.
In fact, this is probably as natural looking as my makeup gets. 
Face: L'oreal Studio Secrets Magic Perfecting Base, Revlon PhotoReady Foundation, NARS Concealer in Custard, La Femme blush in Soft Beige. 
Eyes: UDPP, Rimmel Sexy Curves Mascara, Milani Icy Plum 
Lips: Urban Decay Midnight Cowboy lipstick
Brows: Wet'n'Wild Arch Envy in Ash

Fyrinnae Pixie Epoxy

Thursday, May 13, 2010

If you get only one thing from Fyrinnae (why anyone would walk away from Fyr with only one item, I have no clue. I guess that statement is more of a literary device) it should be this delightful item. Pixie Epoxy? Eh? The first time I heard of this, I thought it was fairy superglue or something. It's a sticky, milky looking gel that comes in a lipgloss tube, with a doefoot applicator.
It's not a primer or a base, but rather a product that creates a tacky surface for loose eye shadows (or even glitter!) to sit on. Genius. Really. This is a product you -must- own if you're into pigments or mica samples (which aren't true eyeshadows, I have a post about them coming up soon) because it provides adhesion. For instance, I own a lot of mica samples from TKB- beautiful, sparkly colors that get all over the place. (Similar to glitter herpes). Without Pixie Epoxy, the amount of fallout would make them simply impossible to wear.  
It's simple enough to use, you apply the tiniest bit of the gel (seriously, smallest amount possible, if you over do it, it cakes together) to exactly where you want your loose shadow to go, I smear it with my piny finger so that it goes on in a thin layer.. Unlike primer, which most people apply over the entire lid, you only want to stick it where you really need it. Let it sit for a second, it gets tacky and then pat the shadows on until you can't feel the sticky surface any longer. No windshield wiper motions though or your surface will smear. Because my lids are slightly hooded, I find that the amount of eyelid friction going on will cause it to crease after about 8 hours or so, but that's a small price to pay to utilize shadows that were previously unusable at all. With a primer underneath the Epoxy (yup, I do both!) I get about 10 hours wear out of them. 
Have this amazing, magical gel? What do you think?


Reminder: Urban Decay Giveaway Contest ends tomorrow! Enter here.


All products featured were purchased by me, for my own use.

NYC Blush Sticks,Ulta and Essence Eye Shadows & Orly

Monday, May 10, 2010
I had mini baby haul to celebrate the end of the semester (for the majority of my classes). I allotted myself about $15 or so, and this here is what I ended up with. Last night I grabbed two NYC Blushable (that's not even a real word! >:(  ) Creme Sticks in Wild Berry and Pink Flash (the two LE shades). I used a coupon and it was BOGO1/2 at CVS, so I paid about $4 total.
Direct swipes, unblended.
Please ignore the stray sparkles! They transferred from my sleeve.
They're awfully bright, aren't they? Don't be scared, though fabulously pigmented, they blend out smoothly so if you're going for a kiss of color, you can get that too. I have a hard time describing how the finish is, because they don't exactly get powdery for me... it just kind of sets so that it doesn't move anymore (great staying power!) yet isn't cakey nor is there visible drying, somewhat emollient still. I also love the packaging, the twist tube means it'll be easier to keep clean, and you get a huge amount. I wish stores near me sold the rest of the permanent ones, because I'm definitely wanting more!
This morning, after getting an 'A' in Sculpture, I went and spent about $9 at Ulta. I went because I was primarily interested in getting Ulta brand eyeshadow in Twilight (after a friend raved about it and insisted I needed it) but didn't know if I wanted to get 3 more, since they were B2G2F.  Luckily for me, digging through the clearance shelf yielded that same Twilight- but in different packaging for 99 cents! Since I'm depotting it, I don't care too much about the gross lilac plastic it's housed in. I can't even really describe this shade. It's the darkest taupe I own, with frosty reflection but somehow very unique- I don't think I've stumbled upon anything quite like this before!


Messy NOTD- Orly Mirror Mirror x2, Seche Vite Top Coat
I don't know if I've mentioned this, but I've been on the lookout for a creme medium gray nail polish. I'm not sure why to be honest, but I found Orly Mirror Mirror which matched my criteria exactly for $5.
I think this may be my first NOTD, I'm terrible with polishes! You'll have to excuse my wretched cuticles, they're still recovering from working with plaster and clay, which is terribly drying. 
Last but not least, I wanted to test out the new Essence line at Ulta. I believe it's from the UK, correct me if I'm wrong. They boast good quality, bright colors with ridiculously cheap prices (we're talking Wet'n'Wild cheap). The whole line felt a little tweenish to me, but hey- you know me, I care about what's on the inside, not marketing. I liked that the shadows had testers, and I was immediately drawn to Metropolitan, one of the few sparkly shades. Added bonus- 36mm size, perfect for depotting! It's a chocolate brown with gold glitter. Actually, too fine to really be called glitter, too big to be called shimmer... gold glimmer, then. Its really finely milled and very smooth, but without a primer, creases like crazy on my oily lids. Big thumbs up, I'll be picking more up next time!

All in all, not too shabby for a $13 dollar haul, right? I'm starting to get more into nails, I'll see where it takes me!
Just a reminder, my giveaway is still going on! Enter here.

All items featured were purchased by me, for my own use. 

Scarlet Lipstick (A Love Story)

Saturday, May 8, 2010
There is nothing more classic than red lipstick. I'm utterly convinced that there is a perfect red out there for every one, a shade that will instantly take any dull, lifeless look and add instant glamour, sex appeal and panache. The trick is finding that shade (and the application). 
Here's a few of my favorite reds (a few of you mentioned that you'd like to see lip swatches, and I deliver!). 


Ulta Vegas, Baby is a beautiful pomegranate red. 
NP Set in Madrid is a darker, blue based red. Hint of fuchsia, perhaps?
NYX Round lipstick in Eros is my favorite- poppy red with a hint of shimmer. 
NYX Black Label lipstick in Hebe is a shimmery wine red. 
Rimmel Red Hot is a perfectly balanced true red.
Maybelline Red revival is a cooler, blue red.
Sally Hansen Matte&Moist Charmeuse is a liquid lipstick, a cool deep red. 


So what's your favorite red? 


All products shown were purchased by me, for my own use

Asian False Lashes + FOTD

Friday, May 7, 2010
A few weeks ago, I gave in to the temptation of cheap false lashes and ordered some from eBay (Hong Kong based sellers). I did my homework prior to it and wasn't expecting much, but at about $4 for a set of 10 pairs (I got two sets) including shipping and handling, they had me; hook, line and sinker.
Now, while browsing for info about these cheap bulk lashes, I learned two things. First, a lot of Asian false lashes are synthetic. These have their own pros and cons- durable, easier to clean (if you are so inclined) but stiffer and are harder to manipulate to adjust to your own eye shape.
Second, natural lashes made from genuine human hair are more natural, but the quality isn't that great. Human hair gets crimped and damaged more easily and for some reason, it seems like they just aren't made all that well. Both sets that I got today are made of natural hair.
Here's the two different styles of falsies that I got from two different sellers. They appear to be made from the same manufacturer, but since I lack the ability to read anything more than basic Chinese, I don't know the brand name.
Now, I had to trim both of them, because they are mad with extra long bands so that they're easy to store. No problem, unlike NYX false lashes- the bands of these lashes are fine and easier to work with.
I actually liked the #118s more than the #106s which are supposed to be more 'natural'. Though the #118 have more dense lash clusters, and looking at them in the box one would assume that they would give the wearer a pornstar-esque look, in actuality the #106s are so voluminous that they look ridiculously feathery. 


Here's a FOTD I did with the #118s:


I used:
Face: L'oreal Magic Perfecting Base, MUFE HD 117, NARS concealer in Custard, Rimmel blush in Apricot
Eyes & Brows: NYX Brow Powder in Ash, UDPP, MAC Devil May Dare Warm Palette (which was kindly RAOK'ed to me :D! ), L'oreal HiP Kohl Eyeliner in Gold, Prestige Total Intensity Liner in Bold Brown
Lips: Urban Decay Lip Primer, Wet'n'Wild Just Peachy matte lipstick. 


Reminder: My contest is still going! Be sure to enter!