Showing posts with label Konad. Show all posts

Stamped: Ferns over LeChat Dare 2 Wear Enchanted Forest

Friday, May 25, 2012
Heya folks!

Another automated post, as I'm still on vacation.
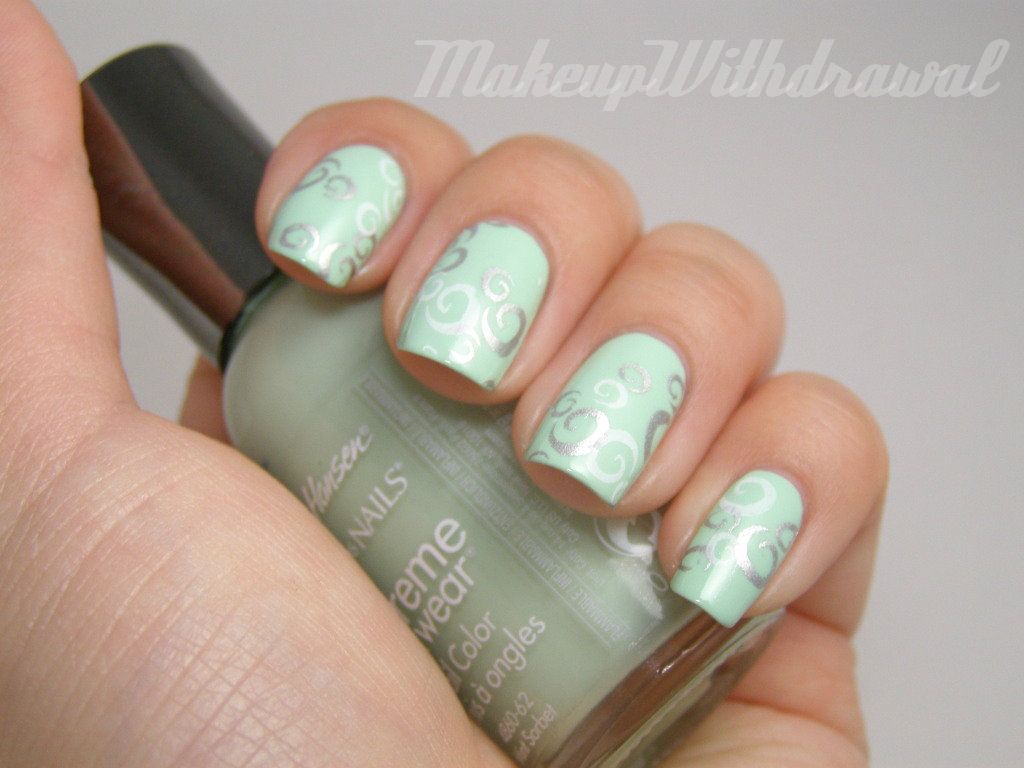
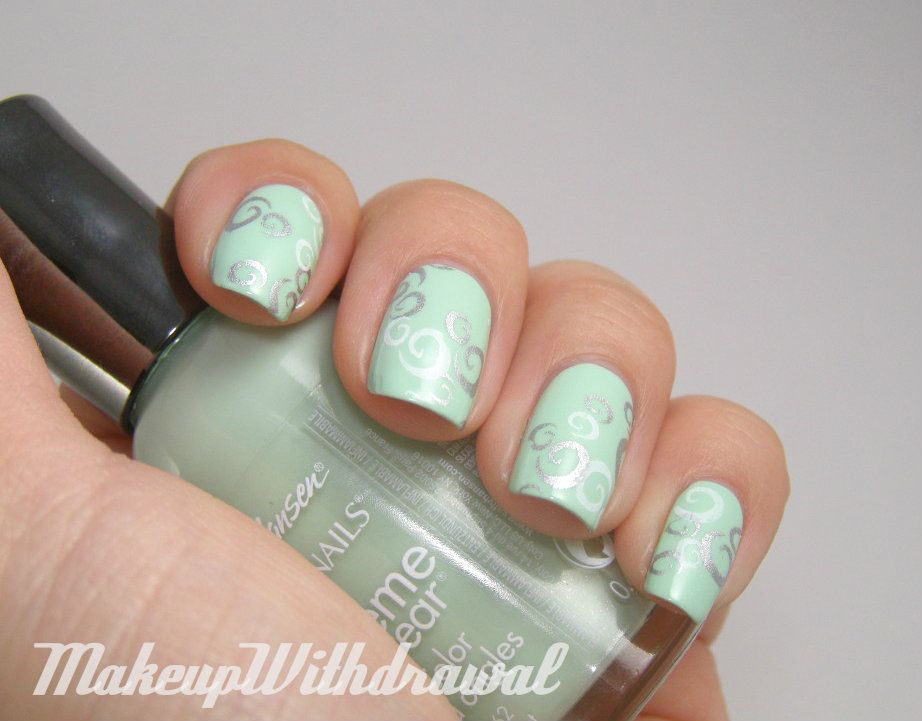
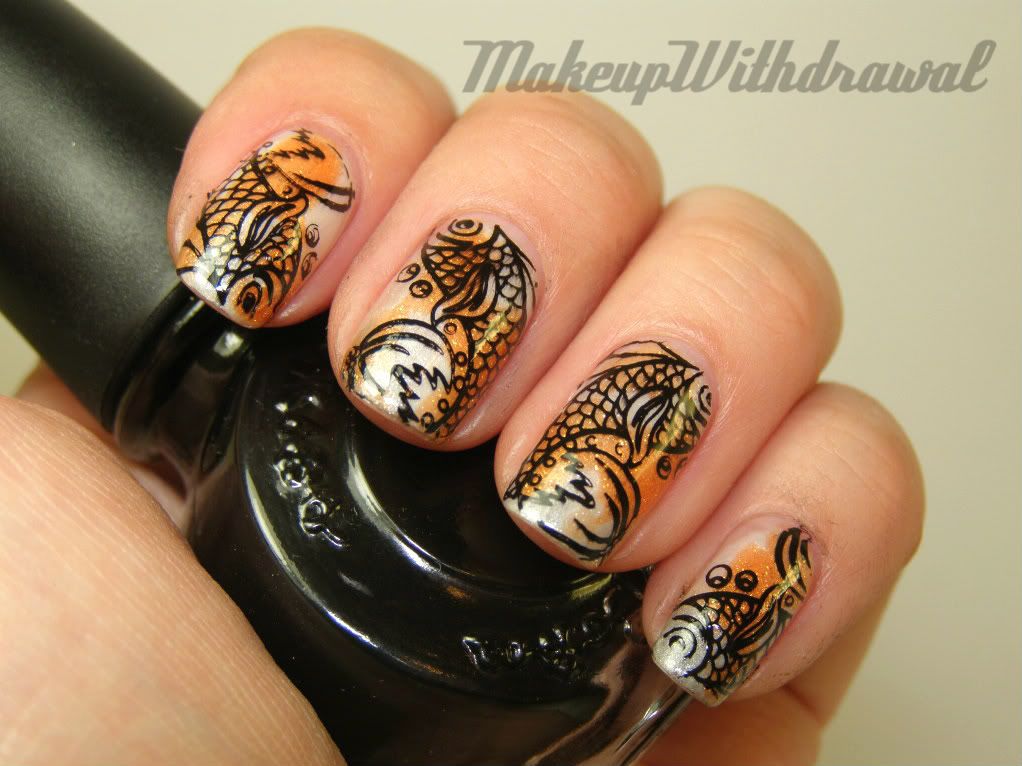
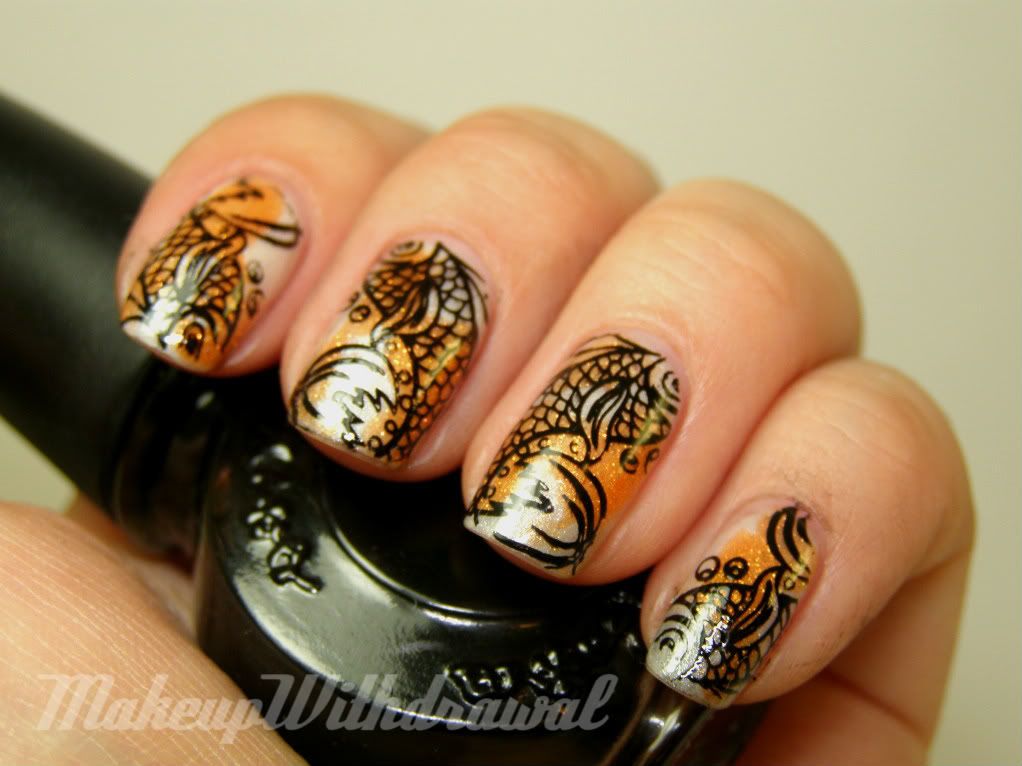
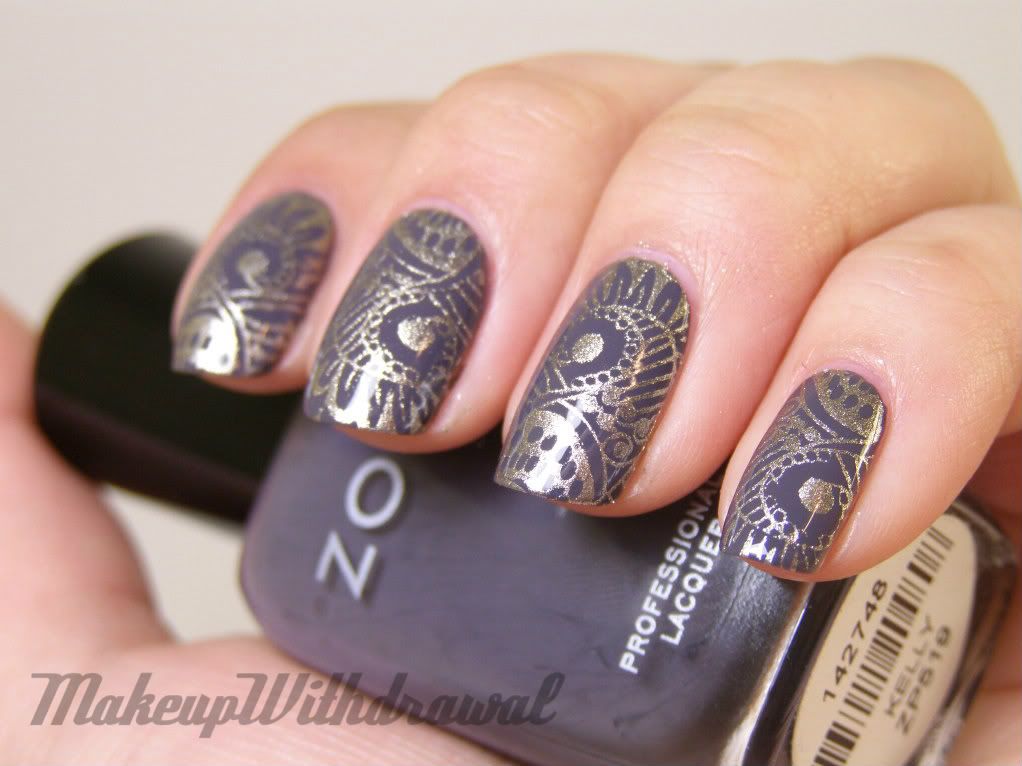
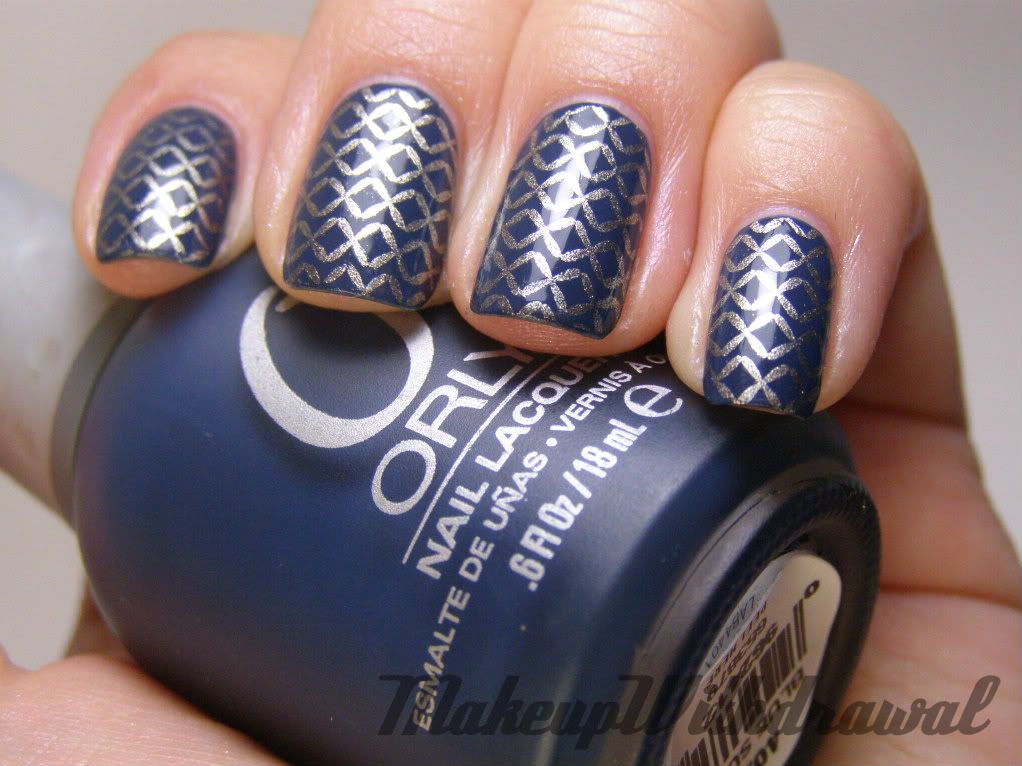
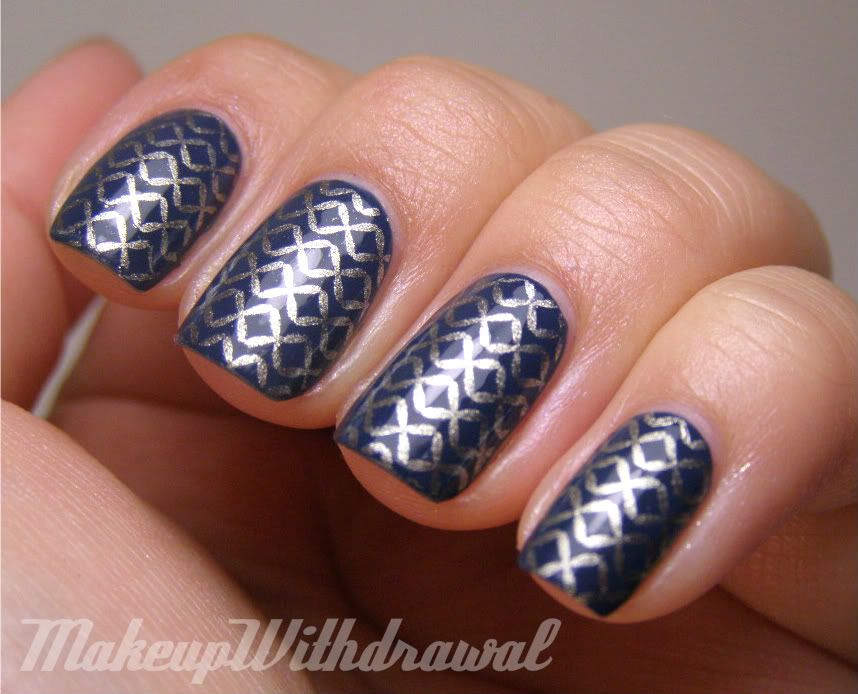
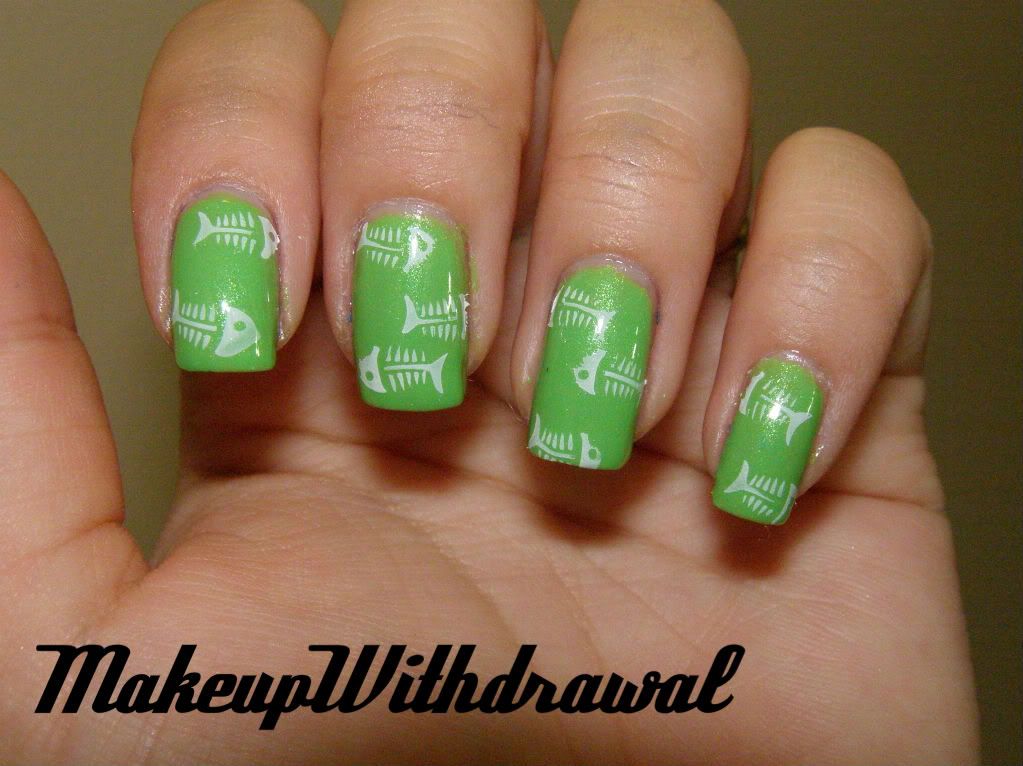
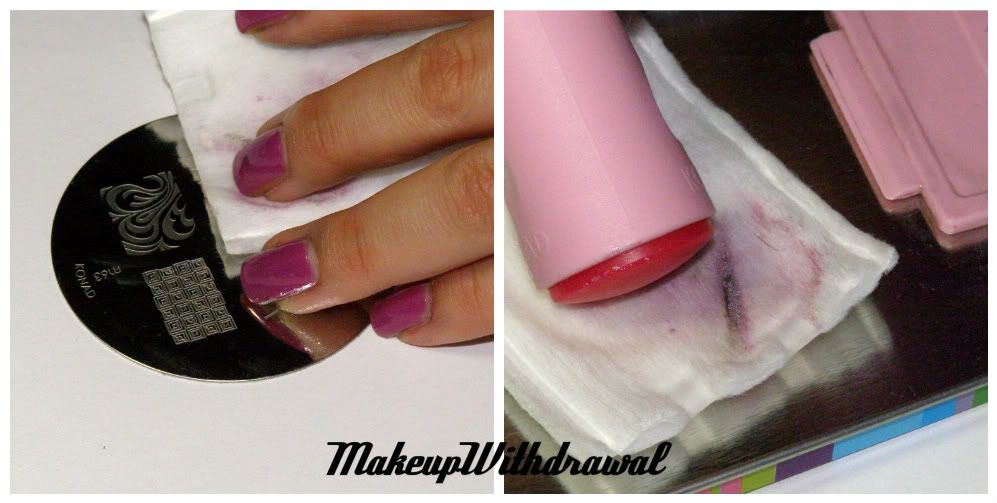
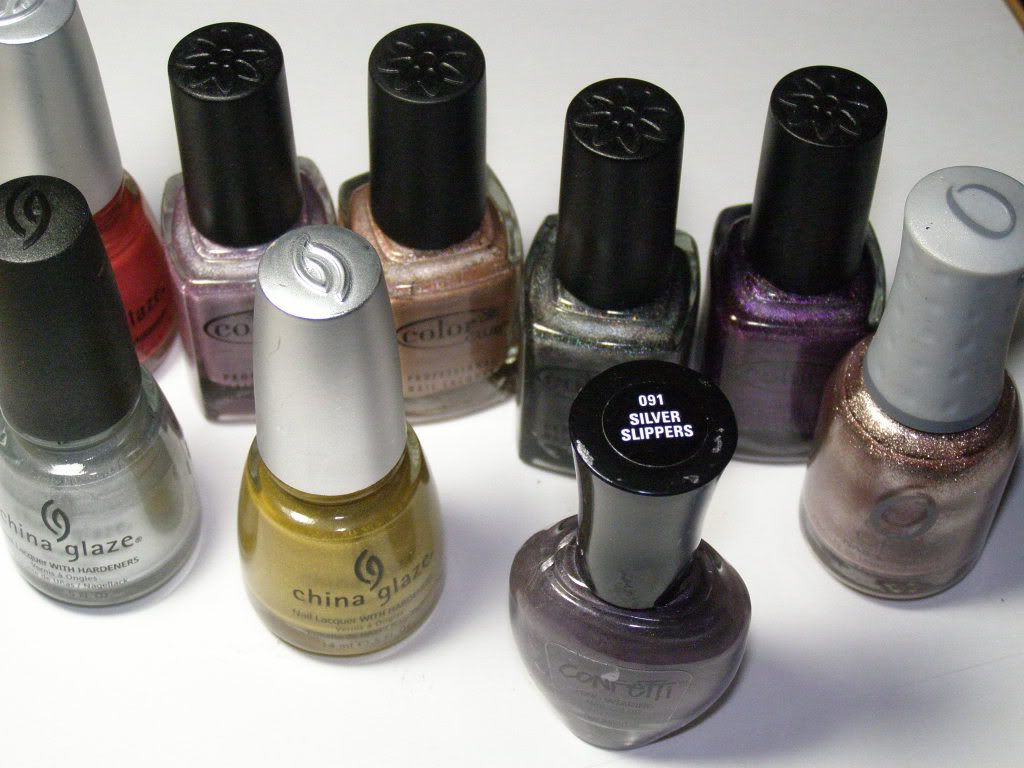
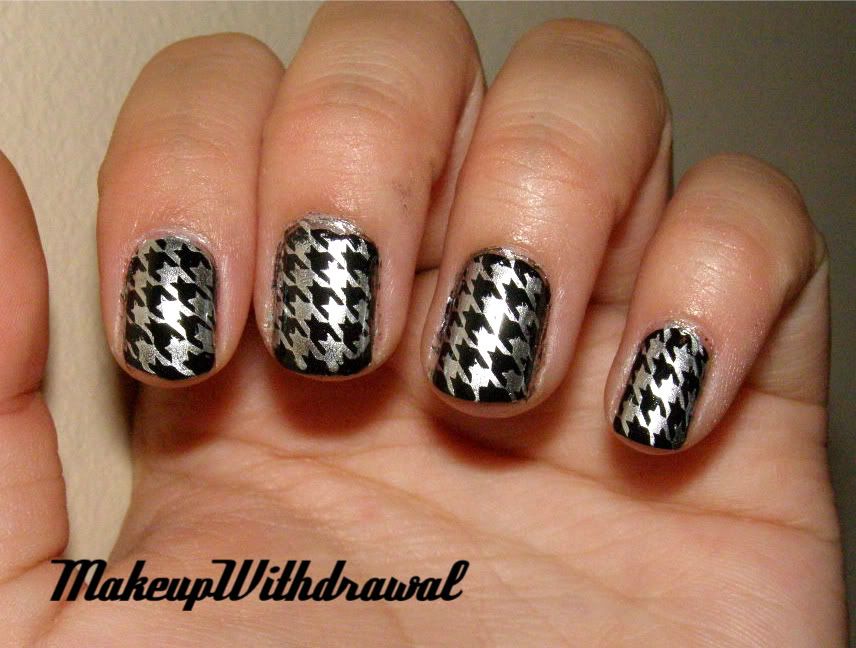
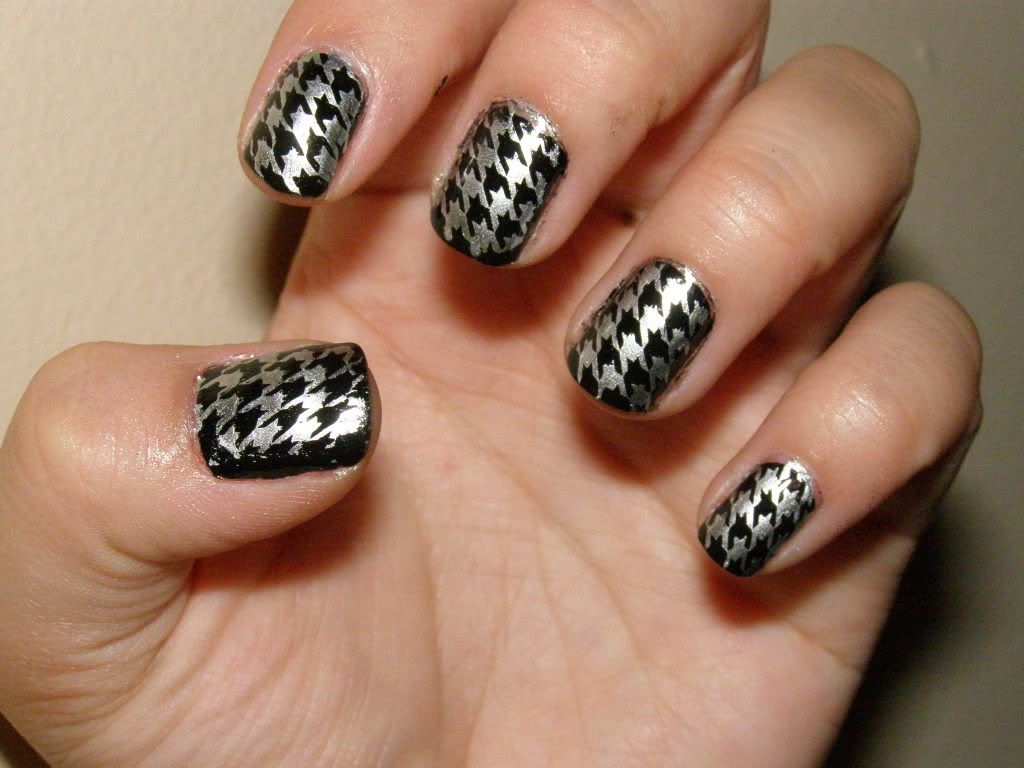
This is manicure I did earlier last week. I had picked up two Sally Hansen Quick Color Pens (you know, those horrid click pens full of polish) in Green Chrome from Big Lots because I had heard that they were excellent for stamping. They were $1.50 each, and it was a fun little project to tackle.
I had read instructions online about how to dissemble them, but what I ended up doing was a bit more crude. In order to decant them into an empty bottle that I had laying around, I simply took a hot soldering iron and burned a hole through the top of the barrel. Burn, baby, burn. Hey, it worked!
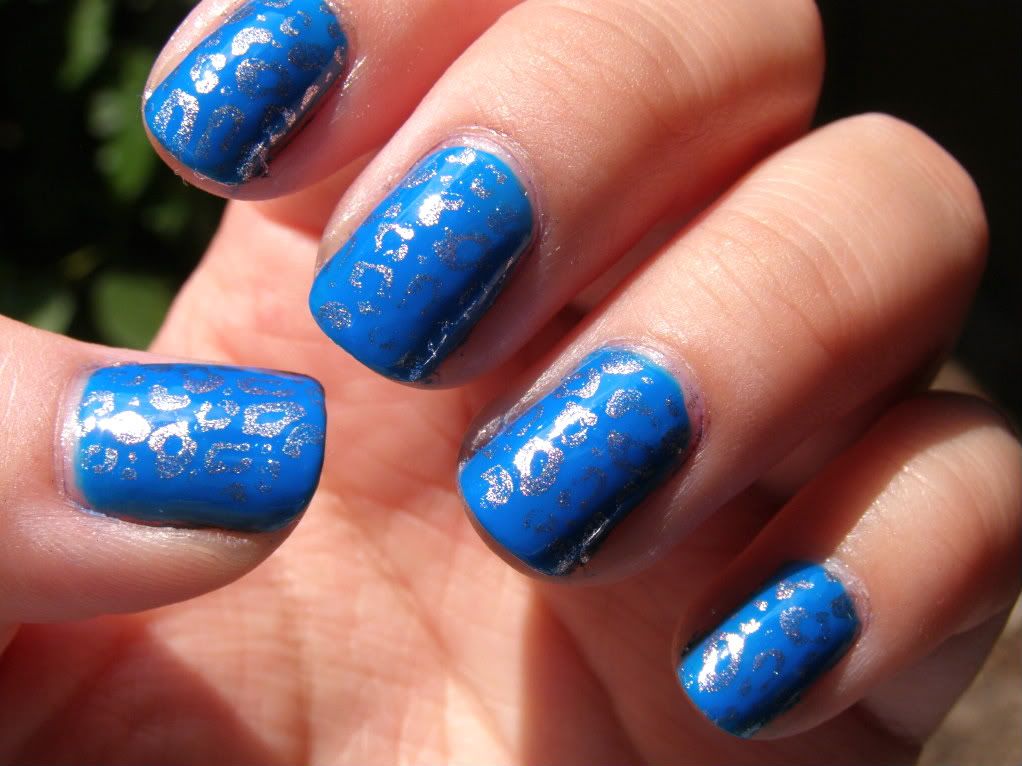
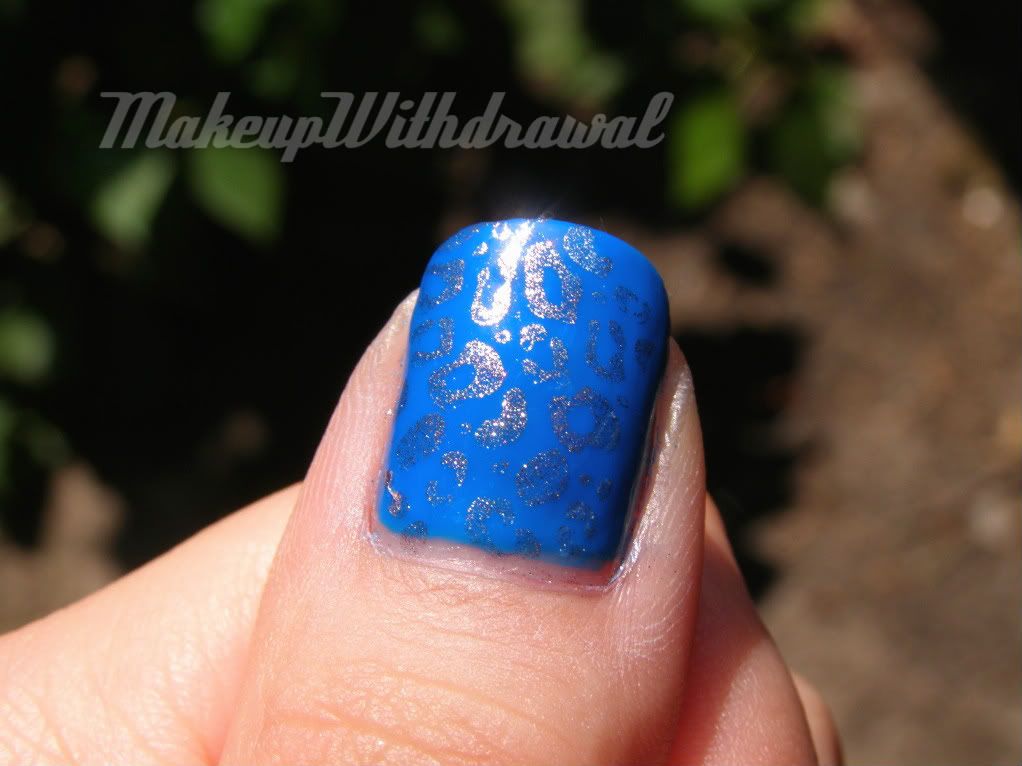
As it turns out, the Green Chrome was phenomenal for stamping. It was thin, but very pigmented and transferred very well.

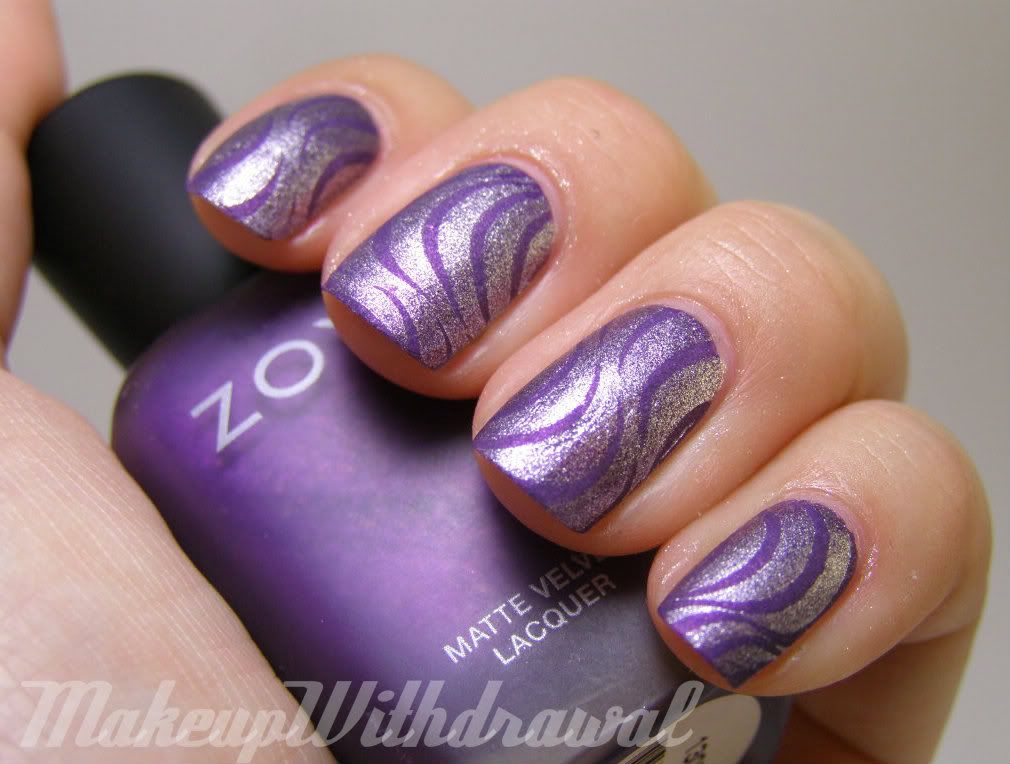
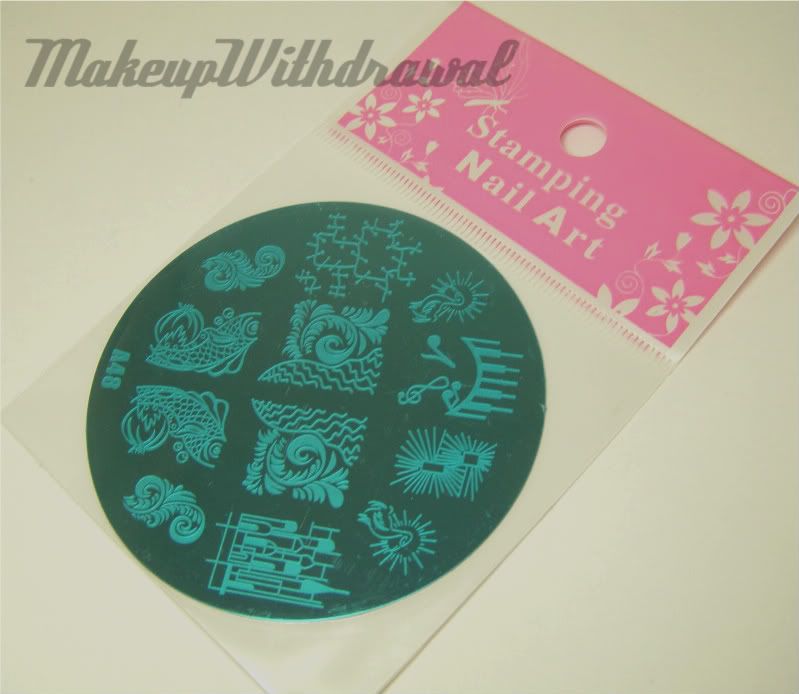
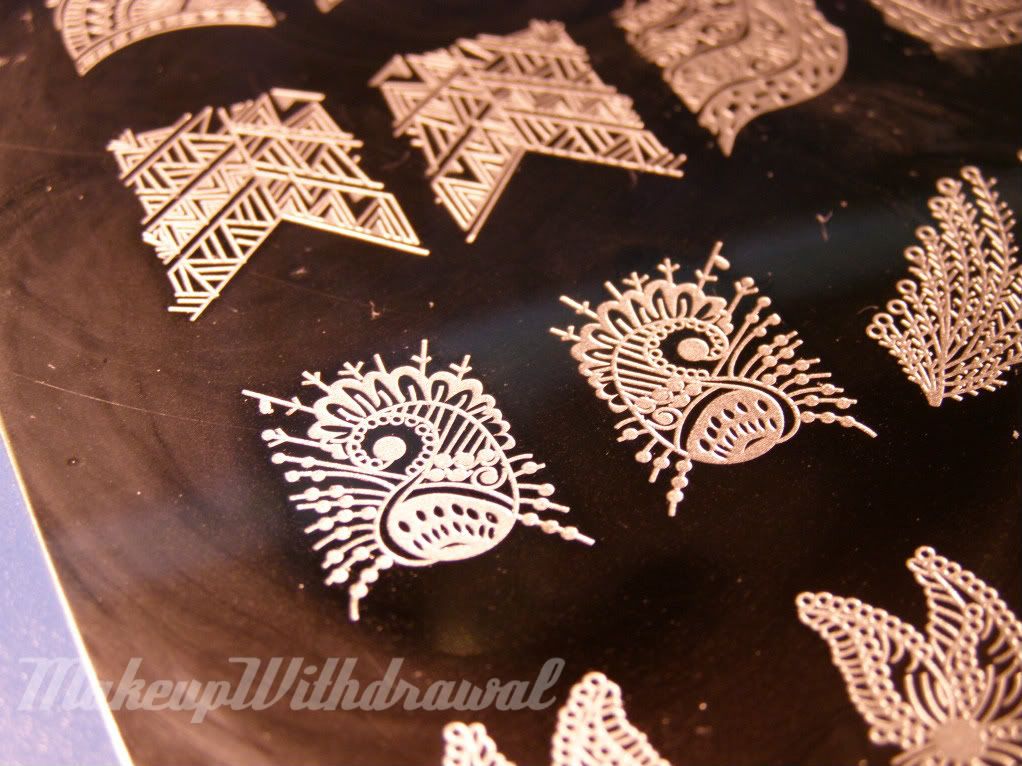
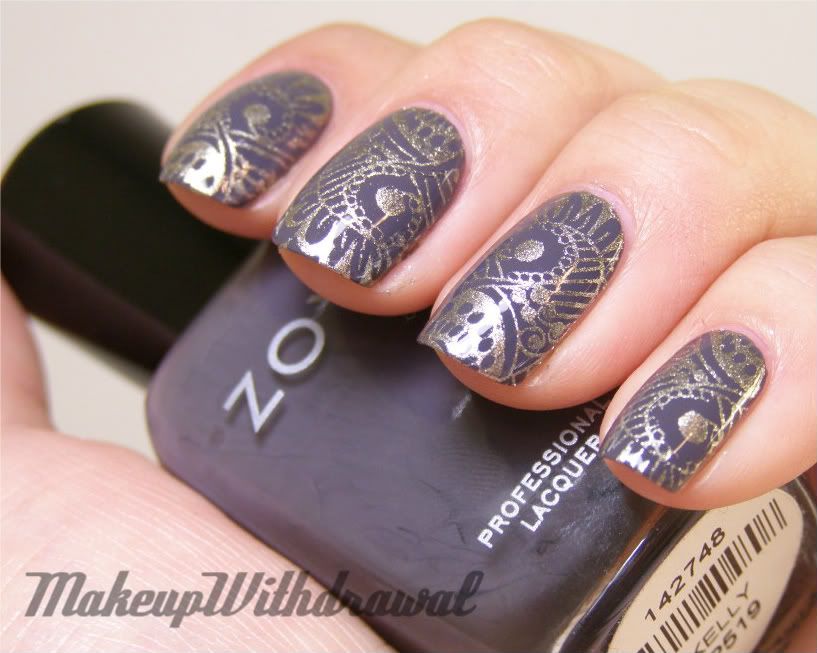
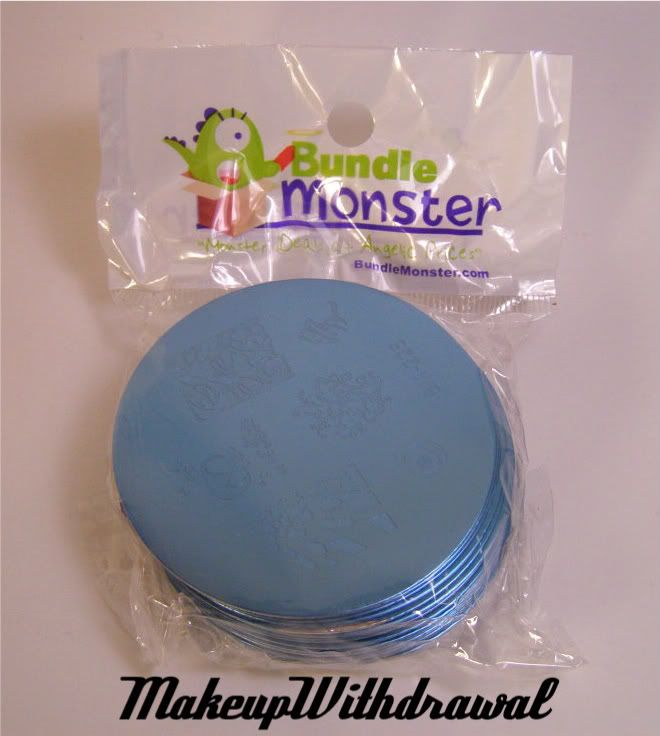
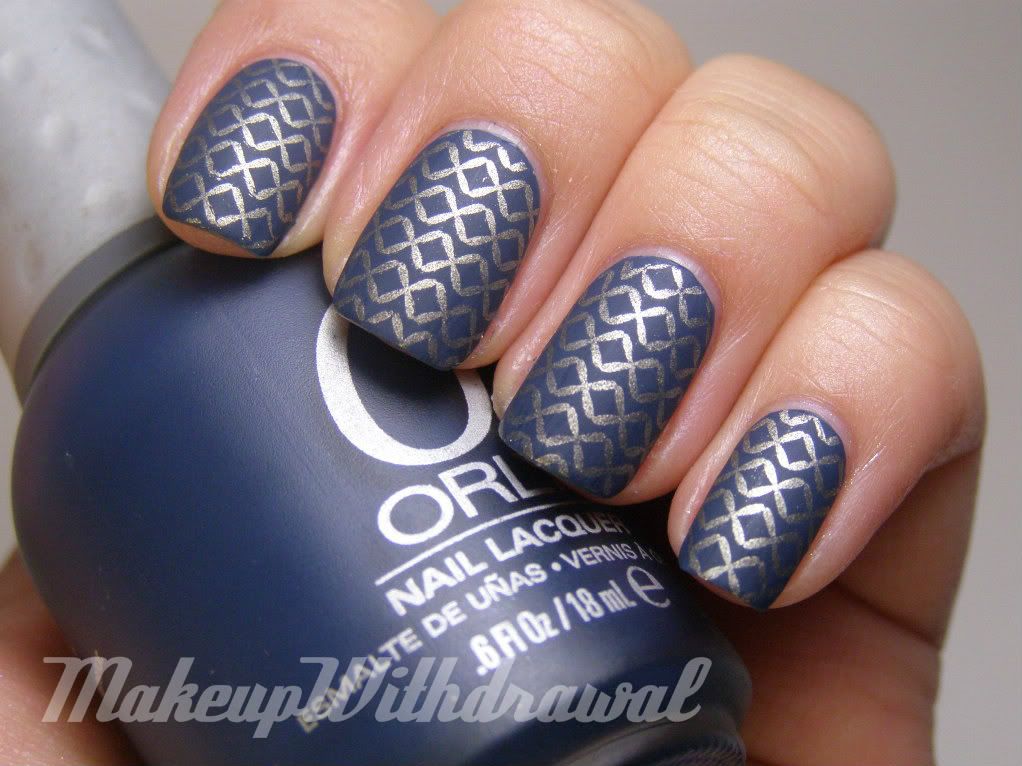
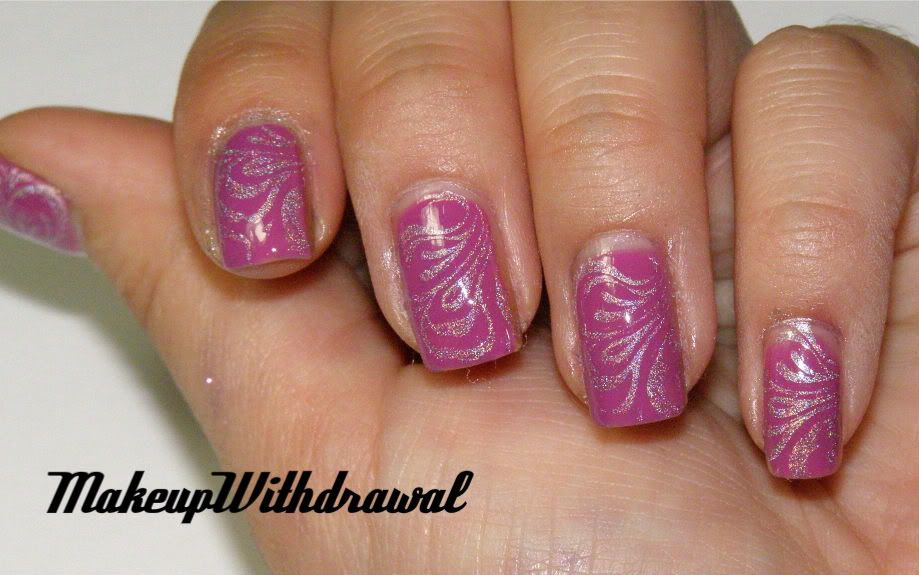
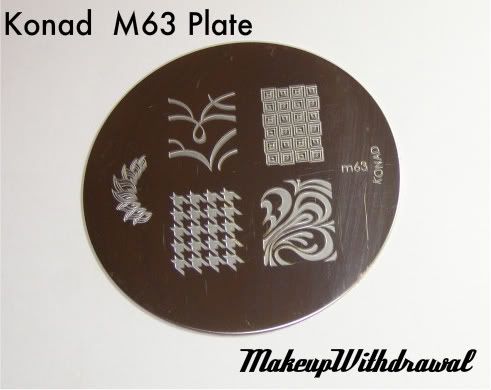
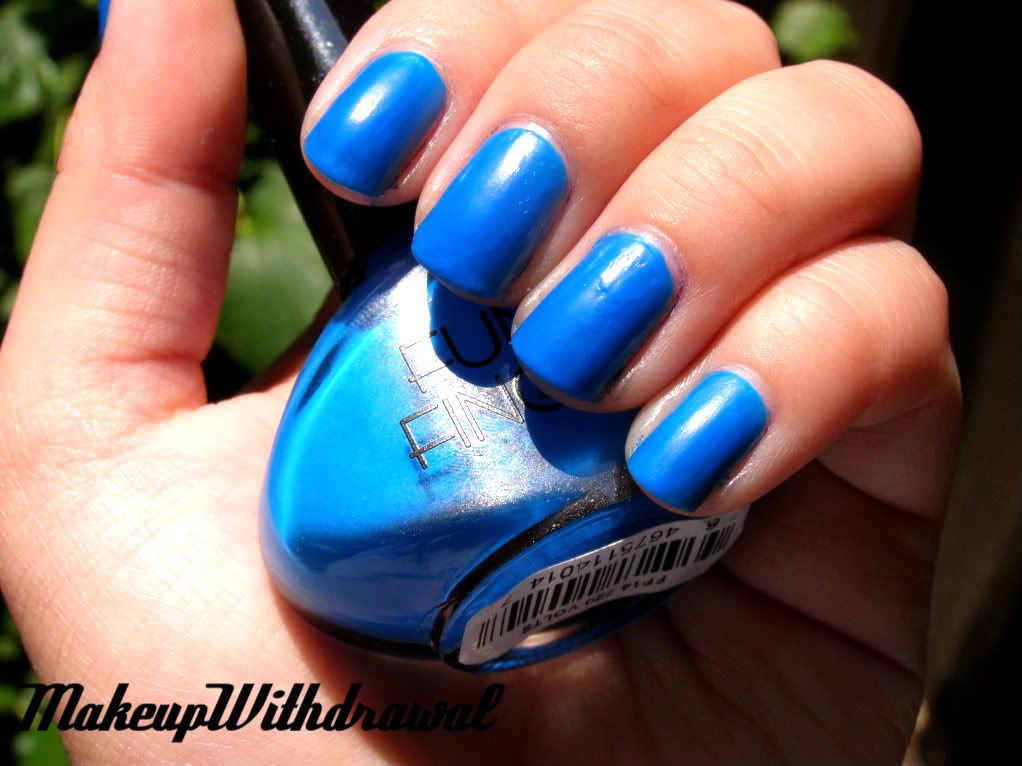
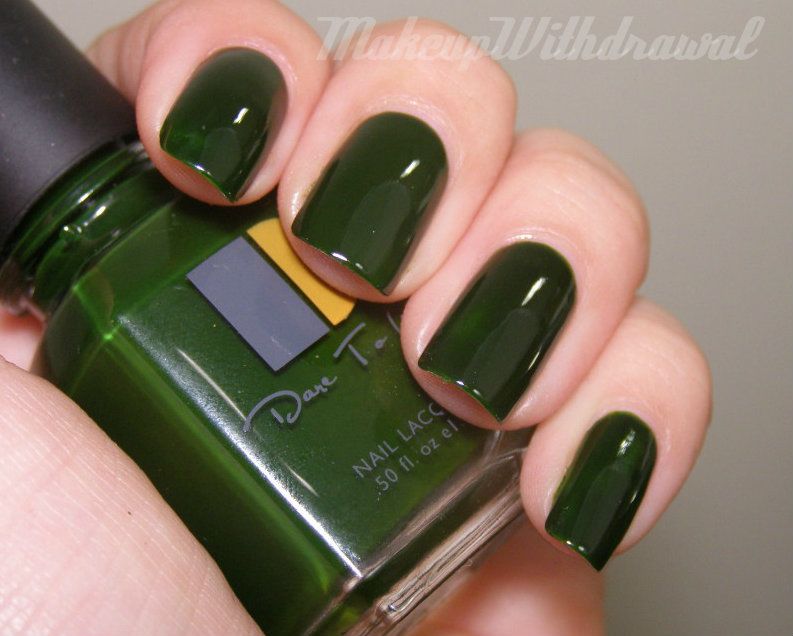
Here, I stamped using Plate XL C over LeChat Dare 2 Wear Enchanted Forest. Here's Enchanted Forest by itself.

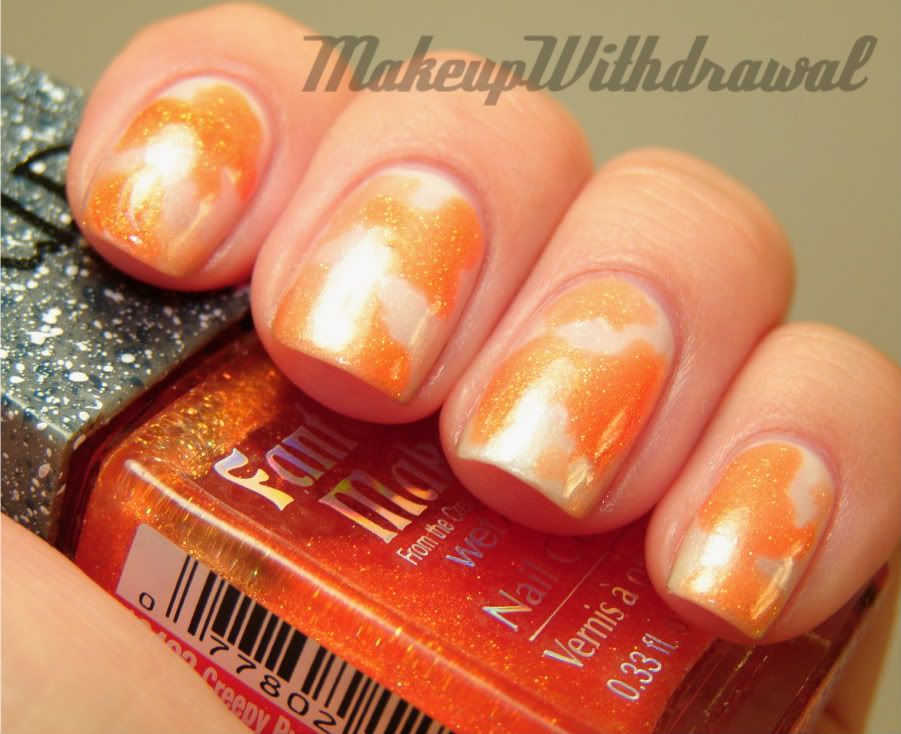
I'll have a proper review of my LeChat polishes later on, but let me just tell you- this polish has instantly become one of my favorites. A gorgeous, ivy green jelly. Here, with two coats it is almost opaque- the splotchy patches on my pinky and ring finger come from the flash- you know how flash makes things look more translucent than they actually are. In real life, it looks absolutely perfect.

Take care, have a great long weekend (those of you that have Monday as a holiday, that is)!

By the way... small birthday giveaway coming up tomorrow. Nothin' fancy. Just a little sumpin' sumpin'.

**This is a scheduled post, I'm on vacation! I'll be back at the end of the month, and it might take me a while to read all the comments. Thank you for reading and for your patience!**

Products featured were purchased by me, for my own use. For additional information, please refer to my Disclosure Policy.

Stamped: Inspired by Something Vintage

Sunday, May 13, 2012
So if you follow me on Twitter, you might have seen this Instagram picture of a neat thing that I picked up.  My city holds this annual garage sale that hundreds of households participate in every year. I happened to be browsing around with my friend Chelsea, looking for hard to find polishes (hey, Kris from My Lucid Bubble found bottles of Clarins 230, a girl can dream) when I spotted THIS.

What is this, might you ask?

A fully functioning portable hair dryer from the 1960s, that's what! Even if it hadn't worked, I'm pretty sure that I would have forked over the $2 (that's right- a mere two dollars) for this interesting piece of hair history. I'd show you the inside, but it's still dusty because I didn't clean it out yet. If you're curious, google "Oster Vintage Salon Dryer".

Today's mani is based off of that pastel mint color.

I used Sally Hansen Mint Sorbet as the base. Using plate BM 224 from my Bundle Monster set, I stamped Sally Hansen Silver Sweep and Konad Special White all over in a random fashion. For some reason, I had a rather hard time stamping with this particular design, as though it was not etched deep enough.

Have a great night, thanks for checking out this manicure.

Products featured, including that raggedy hair dryer, were purchased by me, for my own use. For additional information, please refer to my Disclosure Policy. 

Stamped: Zoya Savita With Daisy Fuh-Glee

Monday, April 30, 2012

Last weekend, I went on a little adventure. I had emailed LeChat to find out where Dare To Wear polishes were sold in my area, and on Sunday a friend and I set off to find this mysterious local beauty supply. It wasn't exactly in the best part of town... but it was an amazing little dusty! Today's manicure features Zoya Savita as the base and I stamped it with a polish that I found from this little beauty supply.


It's from Daisy Nail Lacquer. I'd never heard of this brand, but the polish was very cheap, $1.85 or something like that. It was actually Big 3 Free, much to my amazement. I bought it because it was a nice lavender foil, and because of the name.

Fuh-glee. I'm not making this up, I swear.

Anyways, Fuh-glee stamped very nicely with BM plates 205 and 210.

Products featured were purchased by me, for my own use. For additional information, please refer to my Disclosure Policy. 

Don't Get Koi With Me

Tuesday, April 10, 2012

Ok, I'm obsessed with stamping again.  This is a design from a plate called "A48". I'm not sure what brand this is, but I believe it is the same brand sold by the German Magno Nails. I bought mine from a seller on eBay for $4.50 (free shipping US!). I mostly bought this plate because of the fish design.

To start, I used a base of L'oreal In The Buff which I think might be discontinued by now. It's a very soft, sheer, shimmery off white. I then took Wet'n'Wild Fantasy Makers Creepy Pumpkin and randomly splotched the nails in different places. Then I stamped the design on top with Konad Special Black Polish.


The overall look was a sort of orange marbled mix. You know, the color of koi!

Have a great night, thanks for checking out this manicure!

Products featured were purchased by me, for my own use. For additional information, please refer to my Disclosure Policy.

Stamped: Sally Hansen Metallic Momentum over Zoya Kelly

Monday, April 9, 2012
I received my XL C stamping plate last week, and I promise to tell you all about that really soon. In the meantime, take a look at one of my first manicures done with this plate!

I used both of these designs, though it is actually the same image flipped over the axis. Sorry the plate is smudged, but those of you who use nail plates can testify that it seems that no matter how well you clean it, it's impossible to get as clean as it was when it was new!

Zoya Kelly is the base, a beautiful smokey purple-y grey. I used Sally Hansen Metallic Momentum to stamp, which was a LE polish from a few years ago. I like using this one to stamp so much, I actually bought a back up just last week. I was scared I was going to run out.

Have a great night, folks!

Products featured were purchased by me, for my own use. For additional information, please refer to my Disclosure Policy.

Napoleon Nails

Friday, April 6, 2012


Good evening!

This is a manicure that I wore yesterday. I recently purchased a fauxnad plate from Born Pretty Store that is a knock off of the Konad M78 plate. It's not too bad, but I feel like the fauxnad image is more more curvy than the real one.
When I saw this design, I really wanted it because it made me think of one of my favorite desserts.
Image Credit
A Napoleon, as we called it in Philadelphia diners.
Morgan and I had a disagreement over it. He and his Australian relatives call it a vanilla slice. I did some googling and it's also called:
-mille-feuille
-custard slice
-gâteaux Napoléon
He tries to correct me whenever I call it a Napoleon, and I adamantly tell him he's wrong when he calls it a vanilla slice.
What ever you call this delicious pastry concoction of puff pastry, layered with pastry cream and topped with chocolate and white icing, it's delicious. And now I want some.

I used my white franken for the base, and since I don't own a proper brown polish (I need to fix this!), I stamped with a mixture of an Art Club brown stripper and Wet'n'Wild Black Creme.


Have a great night, and a fabulous weekend!

New Bundle Monster Plates!

Friday, October 21, 2011
Hello dear readers!
I hope you're having a wonderful week so far.  I had the last two days off of school and have been busy relaxing. Yesterday, I received a present in the mail- the new Bundle Monster stamping plates! I lost my first set of plates in New Jersey during my move, but someone super cute ordered them for me as a gift. .
I was going to take pictures of all the plates, but their shiny surfaces are really hard to capture. So here is the link to the Bundle Monster site, where there are really accurate pictures. There are 25 plates, each with six designs. What a value!
Each plate is numbered, with a three digit number (201-225). 
I like these plates A LOT more than the original set. The images are larger, which works out since the first set's images were too small for a lot of my fingernails. 

Here's my first design! I used Orly Blue Suede as the base color and Sally Hansen Metallic Momentum to stamp. This is a design from plate BM203. 

Then I decided to top it off with a matte top coat, Hard Candy Matte-ly In Love because originally, Blue Suede was matte. 


I'm quite pleased! Though it took me a few tries because I hadn't stamped in such a long time. I had actually lost my scraper, but Jana from Jeweled Tips was nice enough to give me a new one! How awesome is she?

I highly recommend these plates over the first Bundle Monster set of plates (21 in that pack). The good thing is that if you do have the first pack, no designs are repeated. You luck out if you have smaller nail beds!
These were ordered from Amazon and had free shipping. 

Have a great weekend. 
Love,
-Mimi

Product featured was given to me as a gift. For additional information, please refer to my Disclosure Policy. 

NOTD: Green with White Fishbones

Monday, September 6, 2010
This is the first design I did with my Bundle Monster plates. Actually, I don't know what it is but Wet'n'Wild French Creme (white) didn't stamp very well with this design, I think because it's rather small. Or maybe the etching is too shallow, beats me. Anyways, it took a lot of tries to get this one done, and it's a bit patchy.
On the bright side, I found out that China Glaze Entourage (the base green) doesn't stain through Essie Protein Base, so I can use it again! Stamped with BM04.

Everything You Need to Know About Konad (Pt. 2: Tutorial)

Friday, September 3, 2010
Ok, so this is the second half of my Konad/nail stamping posts, the part that actually tells you what the heck to do.
I'm assuming that you've read Part 1 and have all the supplies, so I'm not going to familiarize you with descriptions of the tools. Any of the images can be enlarged by clicking on them.

Konad Tutorial


Step 1: Apply your base coat, and your base color as you would regularly. After that, apply a top coat to seal in your color. This is a pretty important step, especially if you're new to stamping because chances are, you might mess up the first attempt at stamping and will want to remove the messed up image. The top coat allows you to take a q-tip or cotton pad and whisk away the image without disturbing your base color, and making you start over from scratch.

Step 2: Make sure the lacquer on your nails are COMPLETELY dry. I'm serious. A semi dry nail can smudge quite badly as you stamp the image onto them. It's better to wait a few extra minutes for your polish to dry than it is to rush and smudge them later, and having to redo that nail.  Also, if you'd like to avoid having to clean up your cuticles, apply Vaseline or a cuticle oil to them, being careful not to get any on the nail itself.

Step 3: Make sure the plate is clean (wipe it down with your remover if needed) and apply your stamping polish to roughly the first 1/2 of your design. You don't need to cover the whole design because the act of scraping, which follows- pushes the excess polish into the gaps.


Step 4: Holding the scraper at an angle (not 90 degrees, angle it at 45 instead), carefully scrape across the image. Don't worry if the image is a little streaky, that usually doesn't pick up when you stamp.


Step 5: Quickly stamp the image onto your stamper, using even pressure. You want to work quickly because you don't want the polish to dry out, the image will not transfer well if it does.


Step 6: Line up the side of the image with the side of your nail. You want to stamp the image from side to side, rather than from tip to cuticle, it'll help align your image better. Press the stamper onto your nail in a slight rolling motion across the surface (as opposed to just stamping it really hard onto your nail).

Step 7: Inspect the image, if it's not to your liking, you can quickly wipe it off with nail polish remover (gently) and start over. If not, clean off your stamper, scraper and plate by wiping them down with remover. Repeat steps 3 to 7 for every nail.

Step 8: Now clean up, removing any extra polish that got on your cuticles. Finish up with a clear top coat. Voila! Finished!
Pre-cleanup!
So, was that comprehensive enough?
I love, love nail stamping because it allows me to get clean, precise designs onto my nails when I'm too lazy to hand paint them on. You can get great semi sheer images that are intricate and really cool looking. Try mixing matte and glossy polishes, as well as holographic ones. You can also layer designs for even more unique nails!

Have any questions? Or comments? Or tips for those who are new to it? How about favorite plates and polishes combos?

Everything You Need to Know About Konad (Pt. 1 Materials)

Thursday, September 2, 2010
Ok, I should amend the title to "Everything Mimi Knows About Konading". I've been using the Konad system of nail stamping for about four weeks, and I'm pretty darn proud with the progress I've made so I wanted to show you all how it's done. Chances are, you've already seen other bloggers/YouTubers talk about it (because I'm always the last person under the sun to try anything) but I wanted to have a very detailed tutorial nonetheless.
First, though, I wanted to talk about the materials. You'll need:
Plates- Konad (which is the brand) sells a whole range of plates for about $7 a plate, each plate with 5 images. Some have little symbols, while others have fancy tip designs, and others have designs that are meant to cover the whole nail. Bundle Monster, another brand makes a whole set of 21 plates (each with 6 images) for $17.99 or so. I got that set as well on Amazon with free shipping, a pretty good deal. There are also other generic plates out there, sold on eBay that the nail world calls 'fauxnad' that are octagon shaped. Essence (found in Ulta) even has a little nail stamping kit with a plate (and in Europe, have expanded their line to several more).
Konad double ended stamper and Essence regular style.

Stamper- The tool that allows you to transfer the image. There's a few different stamper styles out there. There's the cute little pink one sided stamper with its scalloped edges, a double sided stamper (one regular sized side for all over the nail images and a smaller side for tiny images) and even a stamper-scraper combo all in one. I prefer the double sided stamper, just because it's easy to grip.


The plastic scraper looks really
similar, only you know, plastic.
Scraper- This is what you need to scrape off excess nail polish, a crucial part of the process. There's two, a regular scraper with a metal blade, and a plastic scraper. I really would recommend the plastic one (as recommended by StrawberryMochi, thanks!) because I had tried the metal one and it scratched the crap out of the plate I was using.


Polishes- Konad sells special polishes that they recommend using them to get the best result. They're $7 each and honestly, I never bought into them. I've used regular nail polish and it's turned out just fine. The key though, is to use very dense, pigmented polishes.
I've used Wet'n'Wild Black Creme, Color Club holos, holos from China Glazes' OMG collection as well as Romantique collection metallics and even Orly Foil Fx collection, etc.

So let's run through some costs real quick:
Essence Stampy Kit (one metal scraper, one regular stamper, one plate with 6 designs) at Ulta: $2.99
Konad plates: about $7 on eBay or WowSoCool.com
Bundle Monster plates: 21 plates for $17.99 on Amazon or BundleMonster site
Konad stampers, scrapers from $2.50-$7, depending on style and retailer

Other materials you'll need include: nail polish remover, cotton pads, a base color, a top coat and optional- Vaseline or natural oils to cover your cuticles if you're picky about getting polish on them.
I'd also recommend working on a polish safe surface.

Stayed tuned for Part 2, the actual tutorial!

NOTD: Funky Fingers 220 Volts + Konad

Wednesday, August 11, 2010
So, I saw this amazing blue at 5Below the other day, and I had to have it (I ended up getting 10 polishes, gah!). I had never heard of Funky Fingers before, but I looked it up on my phone, and turns out that the same company that makes Color Club makes Funky Fingers.
In the bottle, it looked kinda like a jelly. However, once I started to apply it- I found it really odd. It went on kind of runny and sheer, and dried to a semi-matte. I actually had to use 4 coats because it didn't level at all, but the color if not the finish was beautiful. It turned out to be a nice cerulean blue! Edit: I've since learned that these are called neons, d'oh.
However, the finish really really irked me. So I decided to Konad over it and use Seche Vite to gloss it up.
Here's what it looks like with the Konading:


I used Orly Rage Foil FX for the Konad as well as plate M57. I'm uh... kinda not digging this overall look.
Something about it rubs me the wrong way. But at least the Konad turned out alright, and I need all the practice I can get!
What's your favorite blue nail polish?

First Konad of the Day! Silver/Black Houndstooth

Monday, August 2, 2010
So I got my first Konad plates on Saturday and I had just had to try them out. These pictures are actually of my second attempt, the first try was a big hot mess, basically. I learned a lot, including that repeating images don't fit onto my thumb nail, they're too small.
As always, my clean up skills are pretty terrible, but I did like the overall effect!

1x Essie Protein Base, 2x Wet'n'Wild Black Creme, M63 plate with China Glaze Millennium.

All items mentioned were purchased by me, for my own use.