Showing posts with label Dupes. Show all posts

Concealer Standoff: NARS Radiant Creamy vs [A'Pieu] Creamy Moist

Monday, January 16, 2017


Recently I made an order from the Korean website SweetCorea and my order included not one, but two shades of a concealer that I had been interested in for a while. Word on the street (ok, the internet) is that the [A'Pieu] Creamy Moist Concealer was a comparable offering to the NARS Radiant Creamy Concealer but at a much lower price point.

Wet'n'Wild Take On The Day Mattifying Powder - NARS Light Reflecting Powder Dupe?

Monday, February 10, 2014

Good evening! A while back I picked up the new Wet'n'Wild Take On The Day Mattifying Powder in Pedestal and have been wearing it to compare with my beloved NARS Light Reflecting Pressed Powder. Alas, I wanted to post pictures sooner but it's pretty much been cloudy/raining nonstop since I've had it.

It's priced at $4.99 and is one of the new Wet'n'Wild Fergie products for 2014, can be found as a part of the permanent wall display. The fact that there is a color name (Pedestal) makes me wonder if WnW intends on releasing more shades and named this shade anticipating the need for distinction. Who knows.

That Looks Awfully Familiar (Sinful Colors UFO over Color Club With Abandon)

Monday, June 4, 2012

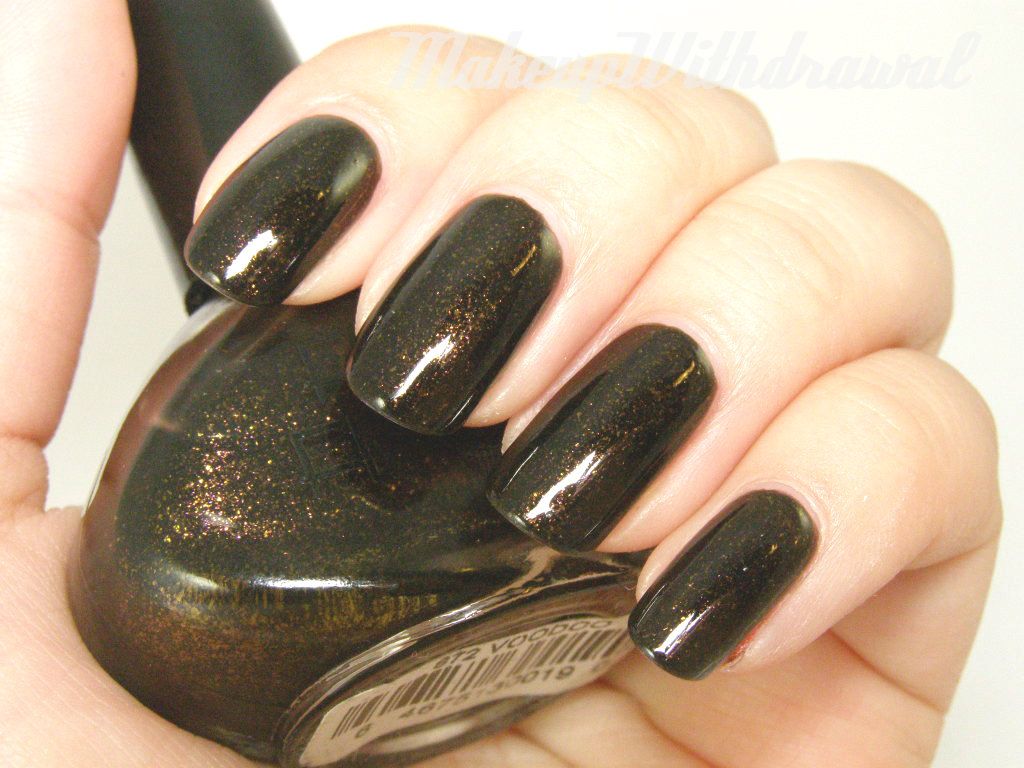
I can't be the only one who has accidentally bought the same color twice. When I was at that sketchy little nail supply store, I picked up a bottle of Color Club With Abandon. When I got home, I realized that it looked exactly the same as a bottle of Funky Fingers Voodoo. Derp! I guess I'll have to give this new bottle of With Abandon away or something.
I keep forgetting that Forsythe- the company that makes both Funky Fingers and Color Club, often just renames the same colors and puts them in different bottles.

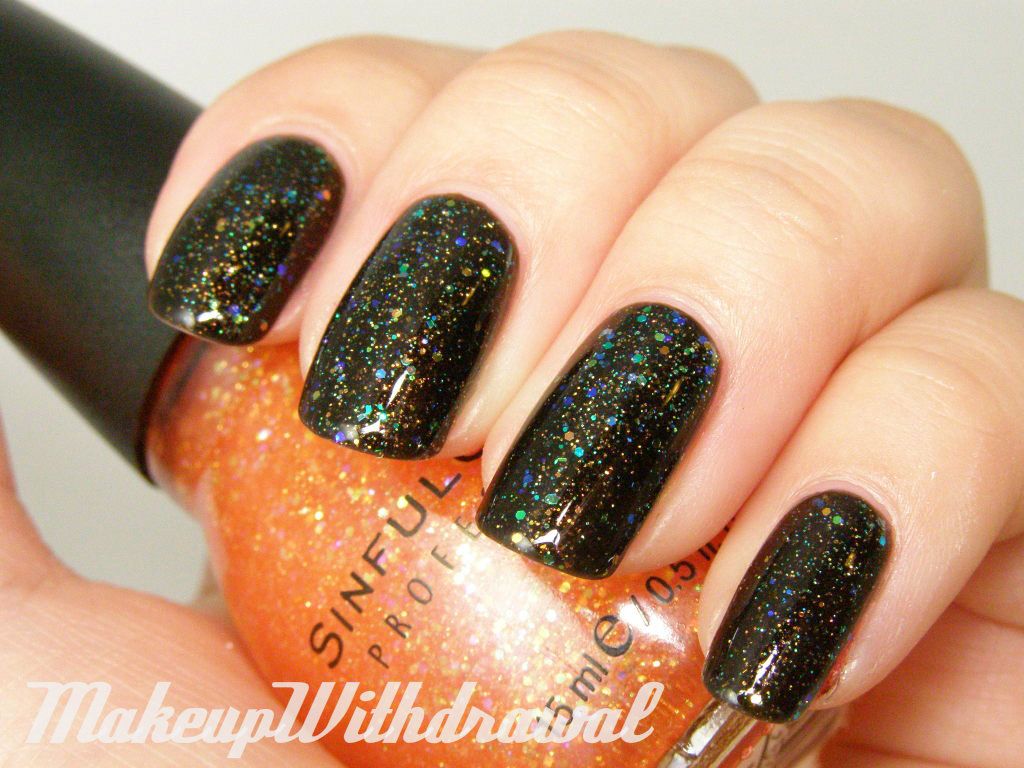
It's still pretty though- a sheer dark, almost blackish brown base with micro flakes of copper and magenta. Due to how watery it is, it takes at least three coats to become opaque. Or one coat over black, if you prefer.


I decided to layer one of my recent acquisitions- Sinful Colors UFO. I was so happy to have found this at that Rite Aid in Sacramento because I do believe that it has been discontinued for some time. UFO is a super sheer orange with micro and round glitters- a mixture of orange and opalescent glitter that flashes green and blue. It's really quite pretty, but sort of "busy" looking- there's a lot going on at the same time.

Have you ever repurchased something you already owned by accident?

Products featured were purchased by me, for my own use. For additional information, please refer to my Disclosure Policy. 

Jessica Iridescent Eye

Tuesday, May 29, 2012

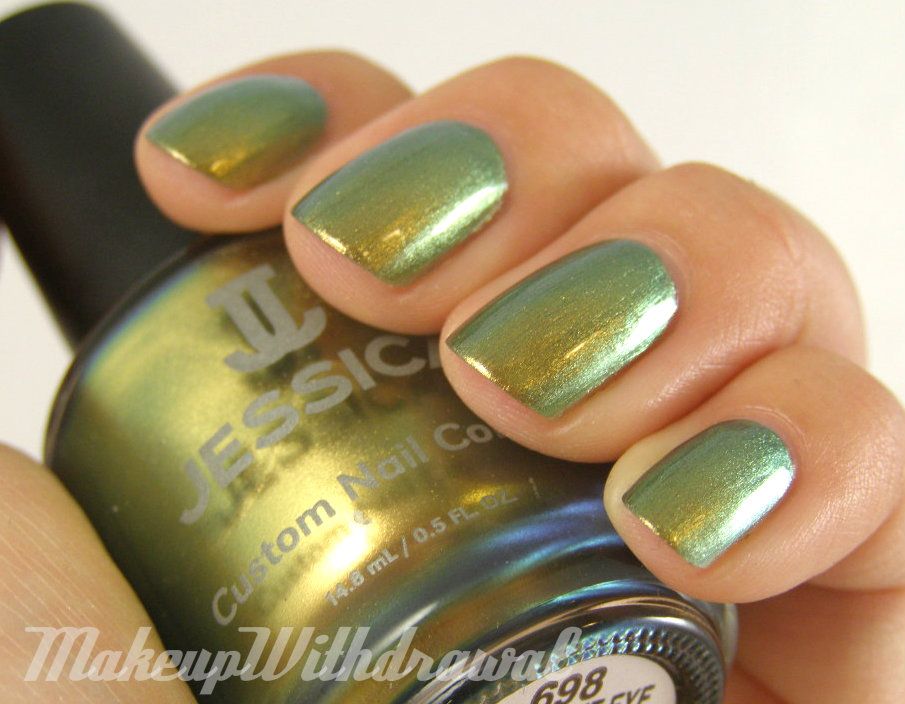
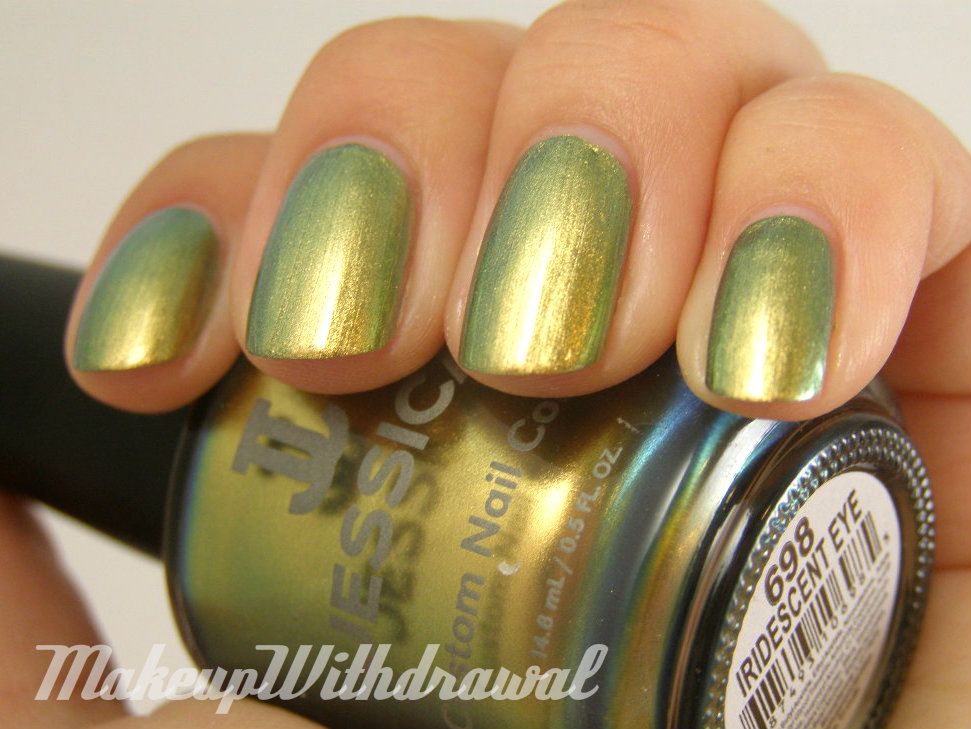
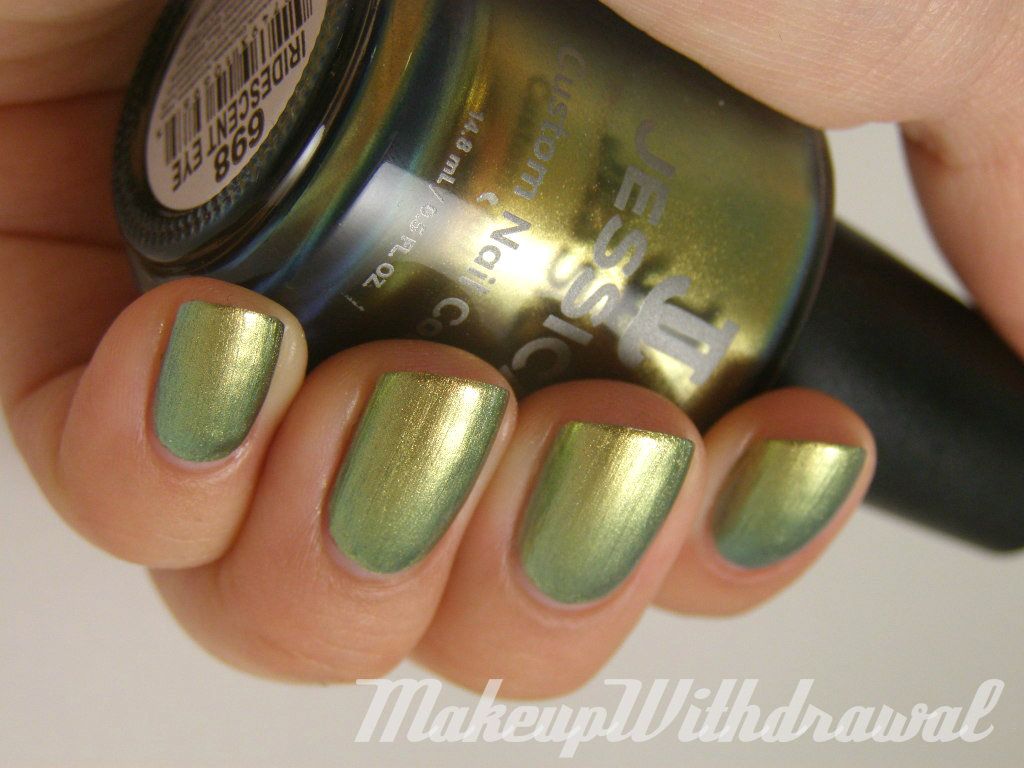
Behold! The fruits of my uh... venture into a shady little nail supply store. I have never seen Jessica polishes in person before, so I was really excited to this very full display a few weeks ago. In the very bottom row, I spotted Jessica Iridescent Eye, Chanel Peridot's doppelgänger. I wasn't willing to shell out a ton of money for a Chanel polish, but I very happily forked over three dollars for Iridescent Eye.


The first time I wore it, I wasn't happy with how streaky it looked. I mean, it wasn't as bad as a frost but the gleaming polish made me feel like I had done a horrible application. The second time I wore it (these photographs) I used Nfu Oh Aqua Base and was much more pleased with the results. I'm fascinated by how utterly duochrome-y and vividly bright it is.

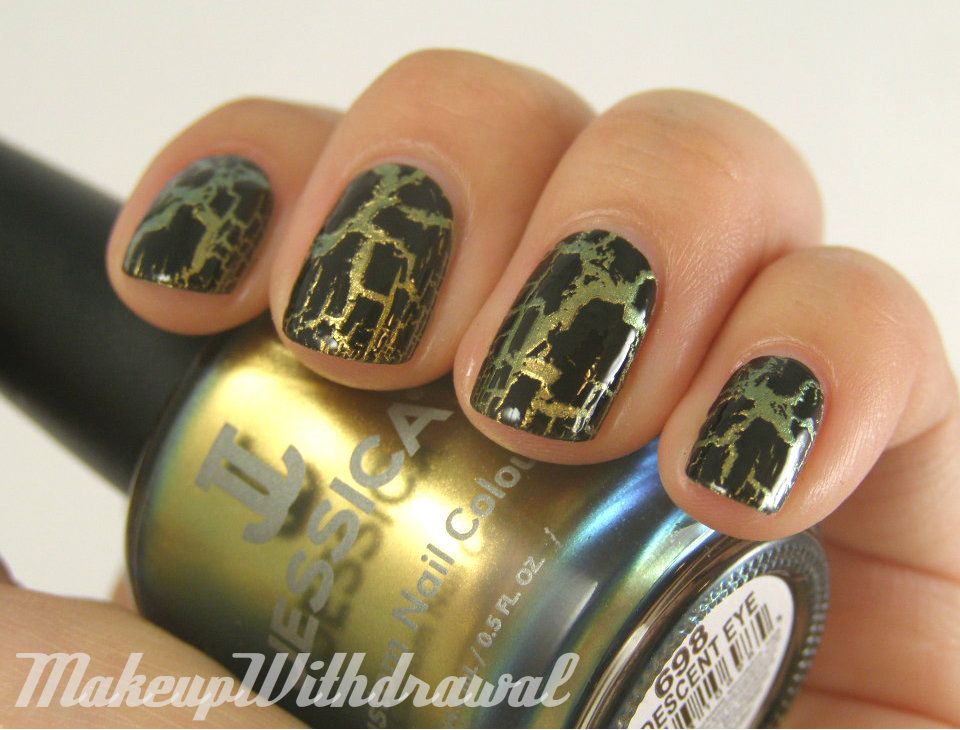
Crackle... I'm so over it. I literally have not used crackle polish since the trend first exploded. However, it looks mighty nifty over Jessica Iridescent Eye. Here, I'm using Barry M Instant Nail Effects.

What do you think of this color? Do you own Chanel Peridot, Jessica Iridescent Eye or any of this color's reincarnations?


Products featured were purchased by me, for my own use. For additional information, please refer to my Disclosure Policy.

New Spoiled Polishes

Thursday, December 15, 2011
Hullo!
I'm finally done with my finals. I'm so happy that they're over. A month of pure relaxation! Oh wait, except for the part where I'm working a ton. Other than that, I'll be doing just dandy.
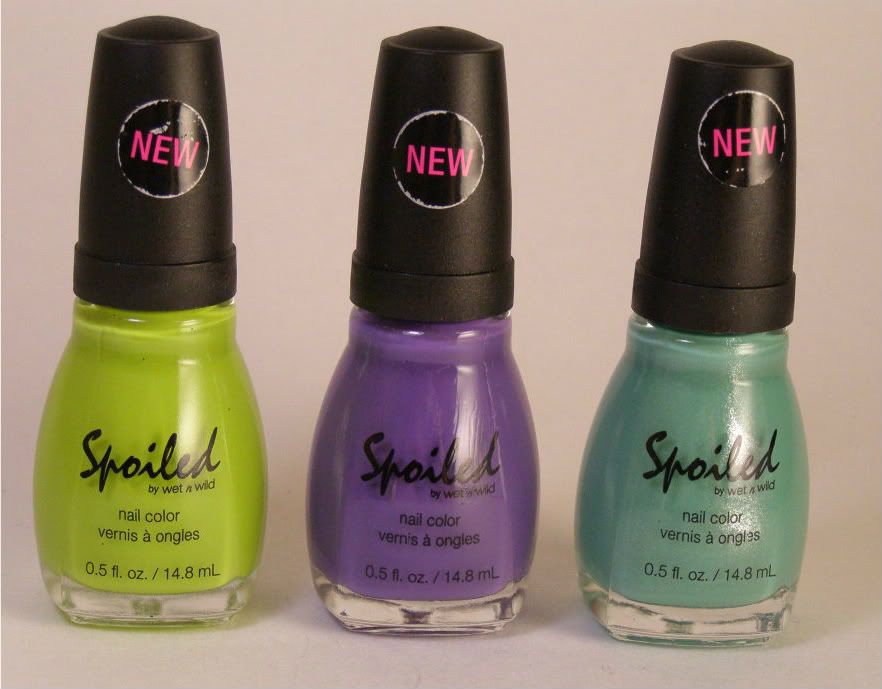
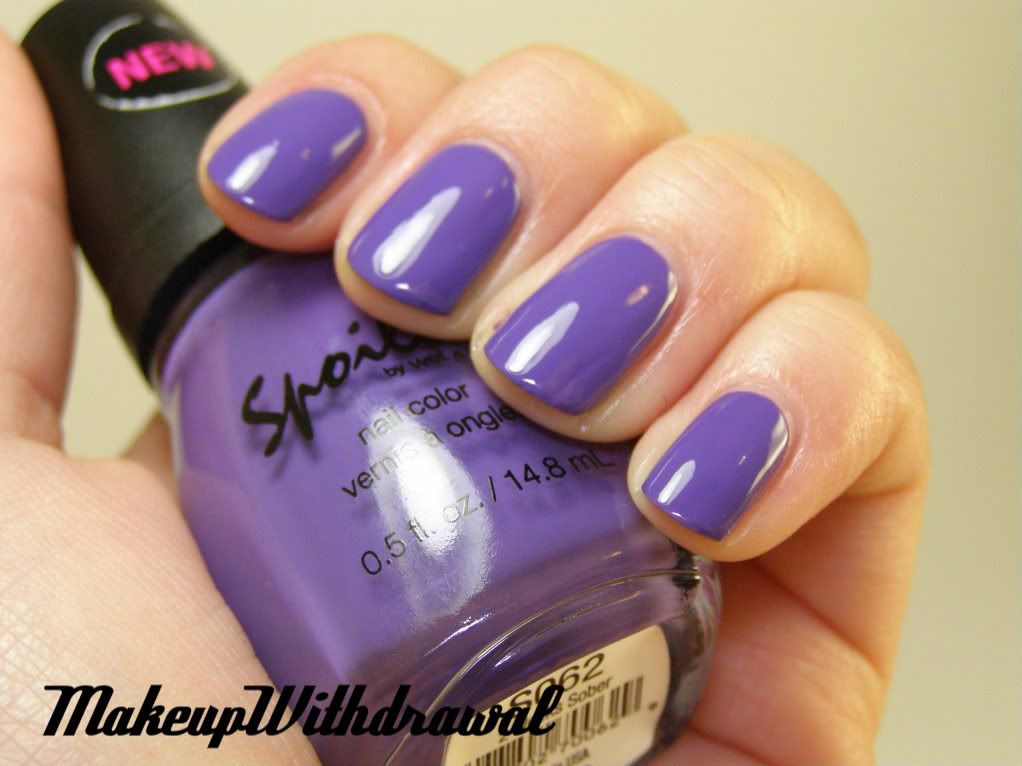
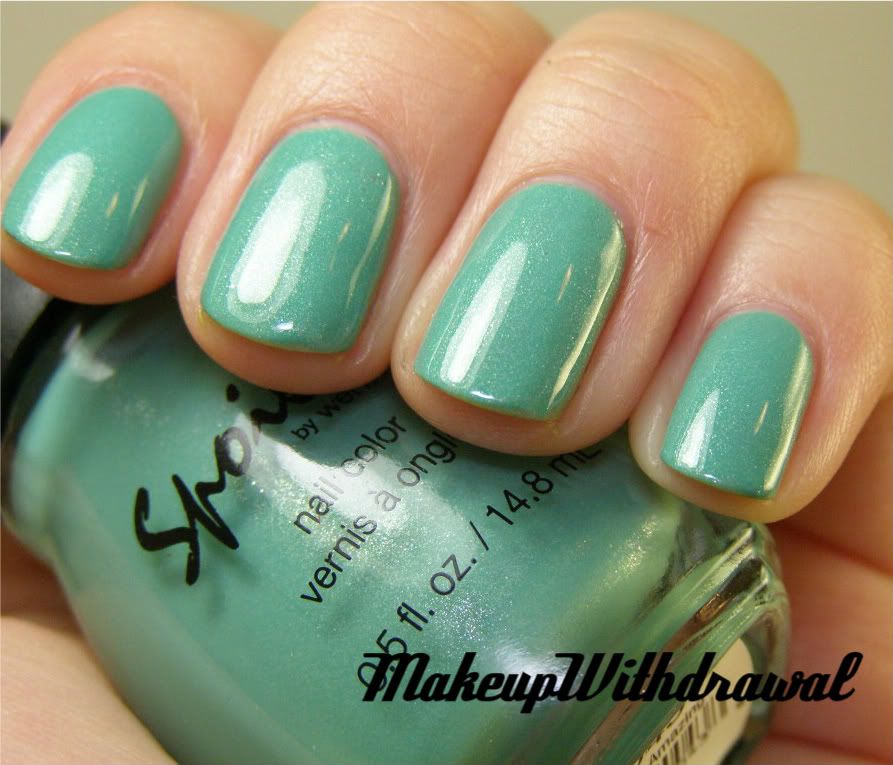
Today, on my way home I stopped by a CVS and found the new Spoiled line by Wet'n'Wild.
Hmm, these colors look mighty familiar.... oh wait, I could swear that half of them are clones of Sinful Colors. I definitely saw something that resembled Call You Later (fine mixture of green glitters), I Miss You (magenta mix of glitters) as well as a dupe for a lot of vibrant shades. They do have some really intense, fluorescent neons though.
Not very unique, but oh well. They're cheap. $1.99.


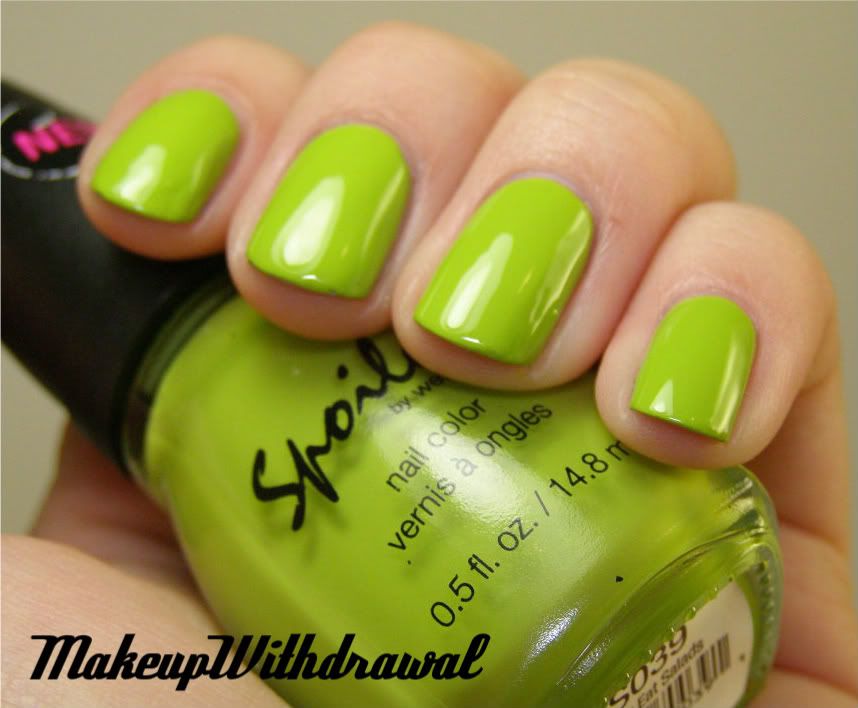
This one is called I Only Eat Salads. A vibrant chartreuse creme, I love it. Pretty much a dupe of Sinful Innocence.


This one is called 2 Weeks Sober. Strikingly similar to Sinful Verbena, perhaps a touch darker. Purple creme, not totally saturated. This is what I expected Zoya Mira to look like (it's more red based).


Finally, we have Toad-ally Amazing, which looks like Sinful Mint Apple. Same light minty color, with a touch of fine shimmer.

The formula on these was pretty good. All three were two coaters but I had to do three because of the wretched, horrible, disgusting, disagreeable, annoying, irritating, ... you get my point, brush.
It's truly awful. Scrangie thought it was a quality control thing, but after examining more and more brush heads and reading reviews, I've come to the conclusion that they're supposed to be like this.
Fluffy, jagged, with this odd sloppy round cut. I've never met a worse brush for nail polish. The bristles drag the polish, leaving furrows. Luckily the formula leveled well. I'm still annoyed at the brush though.

I kinda like them. I'll probably buy more if they're ever on sale, to use for water marbling and such (come on, I can't be the only one who shudders at the idea of using Zoyas, OPIs or my 'good' polishes) because that process wastes a lot of polish. Unless they dramatically change the brush (why would they do that on purpose? They want us to have ugly nails?!), I don't think they'll ever be my favorite. It's nice to see Wet'n'Wild do full sized bottles though.

Have you seen these new Spoiled by Wet'n'Wild polishes yet?

Products feature were purchased by me, for my own use. For additional information, please refer to my Disclosure Policy.

Revlon Facets of Fuchsia

Thursday, September 15, 2011
Hullo Readers!
Today, thus far has been fantastic.  It's Customer Appreciation Day at Jimmy John's, so I very happily stopped by during lunch time for my $1 B.L.T.  While munching on my bacon laden sub, I decided to take pictures of my newly acquired Revlon Facets of Fuchsia.  It's the first polish I've purchased in a LONG long time, since roughly the end of May.
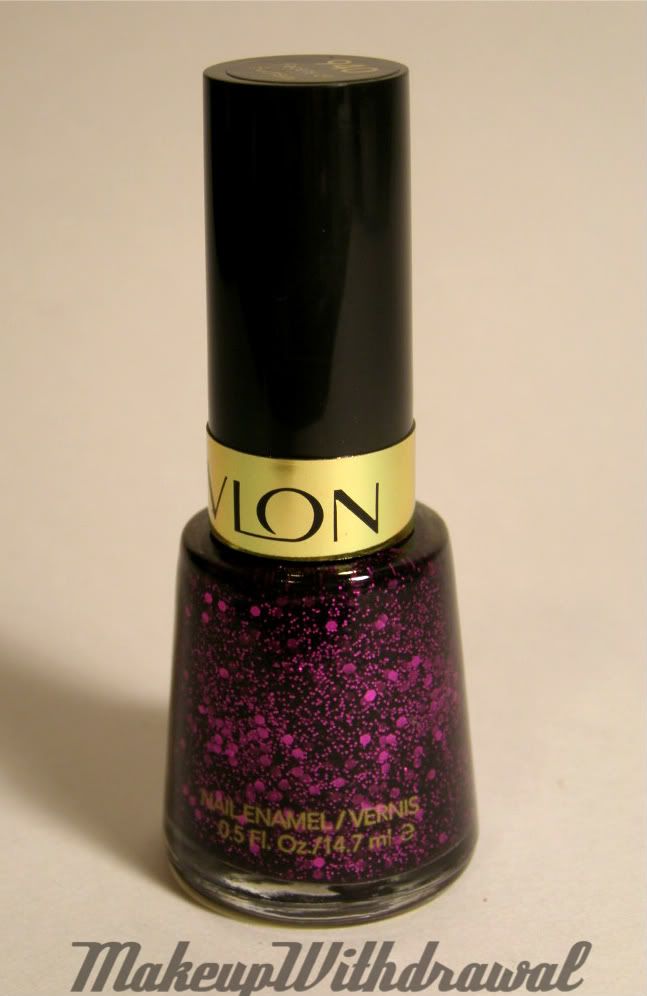
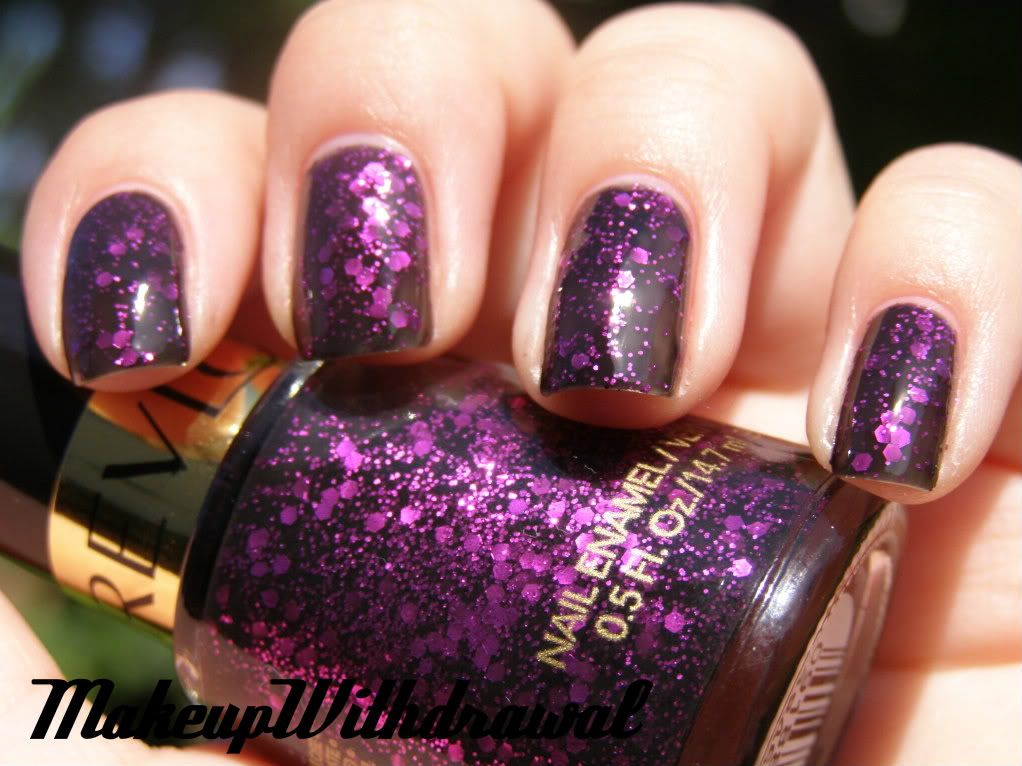
Ah, Facets of Fuchsia (by the way, I can't spell 'fuchsia' correctly to save my life), I NEEDED you.  You're the poor man's Deborah Lippmann Bad Romance. When I first saw Bad Romance last year, I decided that it was one of the most beautiful things I had ever seen, but I couldn't live with the price tag of a DL polish. Now that this drugstore imitation has come along, I can finally have this gorgeous combination of black jelly and magenta hex and small square glitter.
Behold! Three coats of Facets of Fuchsia:


You can still see through the smoky black jelly base. Ok, what if you're not into that? No problem. Solution: one coat of black polish underneath one coat of Facets of Fuchsia.

1x Wet'n'Wild Ebony Hates Chris, 1x Revlon Facets of Fuchsia
I like it this way too, it amps up the contrast between the two colors. I also tried it over a shimmery purple (didn't get a photo) and absolutely loved how it looked- glowy from within.

I hope you manage to find this collection from Revlon called Expressionalists in a store near you, I would definitely recommend picking this shade up!


Products featured were purchased by me, for my own use. For additional information, please refer to my Disclosure Policy. 

Rococo Gold Leaf Nail Lacquer Dupe (DIY Gold Bling)

Thursday, July 8, 2010
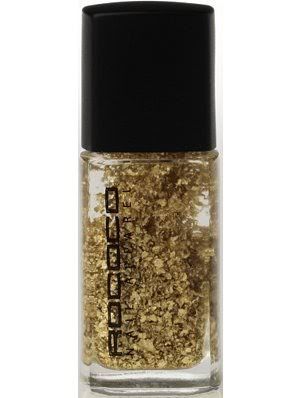
stock image from Space NK
See this nail polish? You know what that is? Pure, distilled decadence. Also known as Rococo Gold Leaf Nail Lacquer, it kinda of speaks for itself.  Now, considering that it looks expensive, it makes sense that it also comes with a hefty price tag- $32.50 to be exact. There's no way in heck I'm going to spend that much on a single bottle of polish (Mr. MakeupWithdrawal would kill me first) so I was pretty excited when I saw instructions for a DIY dupe of this gold foil polish. 
MissHavisham from MakeupAlley graciously allowed me to share her recipe, and I attempted it myself. 
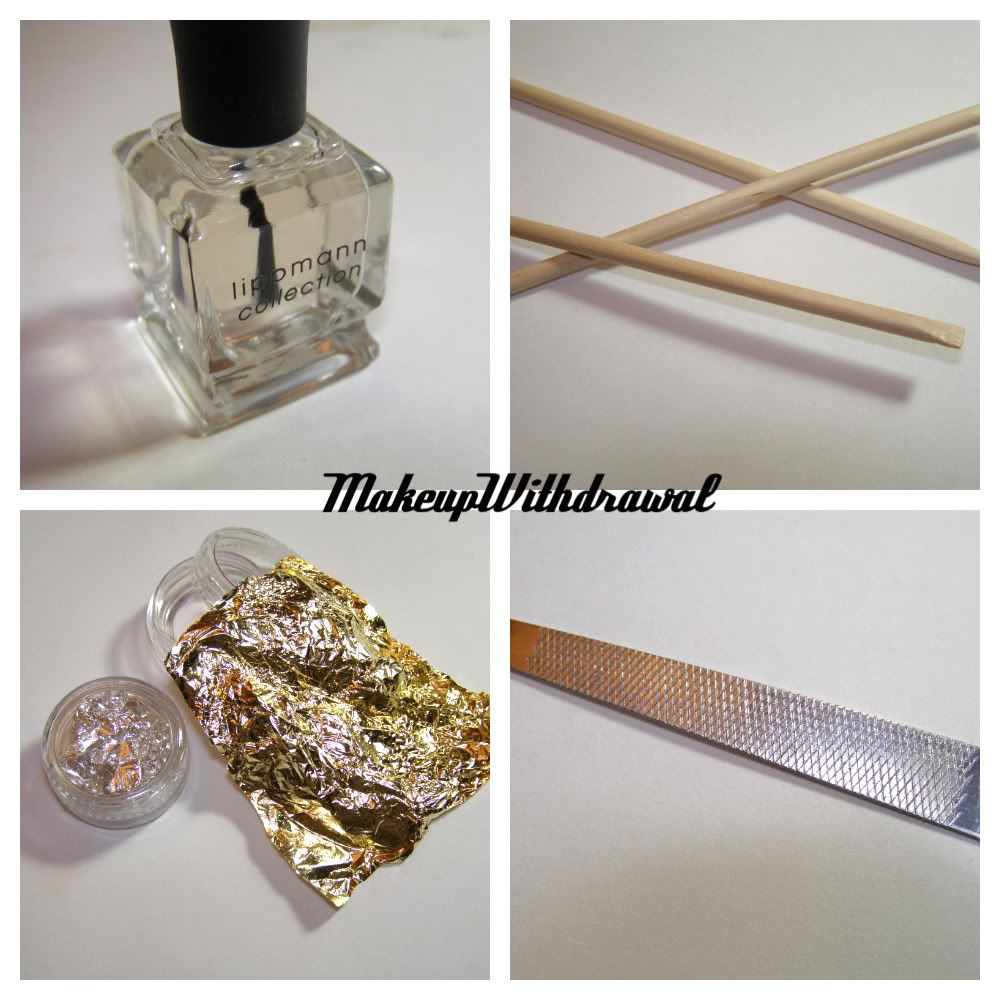
Materials: 
-Nail safe gold foil 
-metal file
-clear polish
-manicure stick
-buttload of patience
Optional: latex gloves
These are the original directions:
"I laid one sheet [of gold foil] down at a time on a piece of paper. Wear gloves or else it'll stick to your skin and you won't be able to get it back off. Also, try not to breathe on it or POOF they fly everywhere. Then I ground them up with the side of a metal file. This takes forever. Then I made a little funnel out of paper, and used the sheet of paper to carefully pour them into the funnel into the bottle of topcoat. (I used a spare LeChat Dare to Wear I had laying around) If they don't go right in, just gently poke with an orange stick. And I used the brush from the topcoat to pick up any remaining stragglers. That's about six sheets in that bottle. And they do settle to the bottom, so shake shake shake before using. Someone else said they had tried to make this and the leaf had turned green in the polish, but I think because I bought leaf specifically for nails (to be used in acrylics, I think?) it won't. It hasn't happened yet and its been in there for two days. *crosses fingers*"


Here's how I did- 
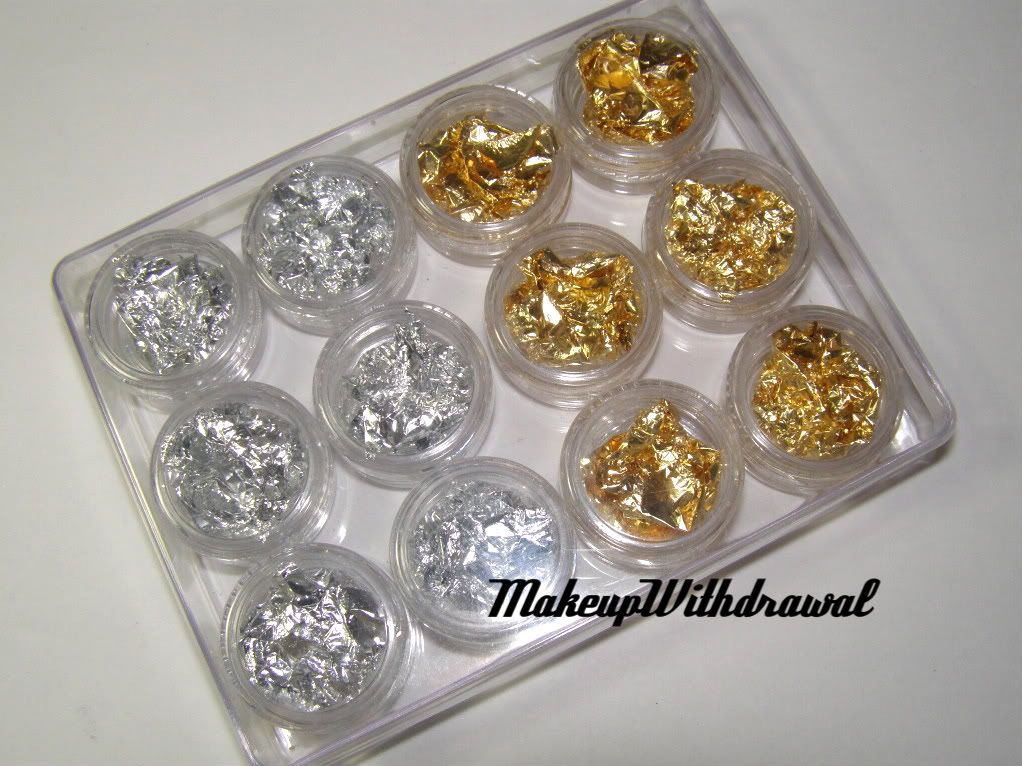
First, the nail foil. You can get gold foil from Micheals, but since I was worried about possible oxidation, I ordered nail foil from Ebay for about $4 (including s/h). *NOTE*- Make sure the foil is intended for use with acrylics or nail art, to make sure that it will not oxidize* I was sent 2 colors, silver and gold. Each sheet was about 3"x3" and packaged in its own little sample jar, and very fragile. I did one sheet at a time, and tore it into 4 sections, and worked on one section at a time. 
Using the manicure stick, I pushed the foil against the file and ground it down. It was time consuming, the duration of about 2 episodes of True Blood to do 4 sheets of foil. I didn't wear gloves, but didn't get anything stuck to my hands, think it's because I was working with a tiny bit at a time. I managed to funnel it in without mishap. 
I used 2 sheets of foil per bottle, and I guess I could have used more but I liked a less dense formula. 
Here's the silver and gold:


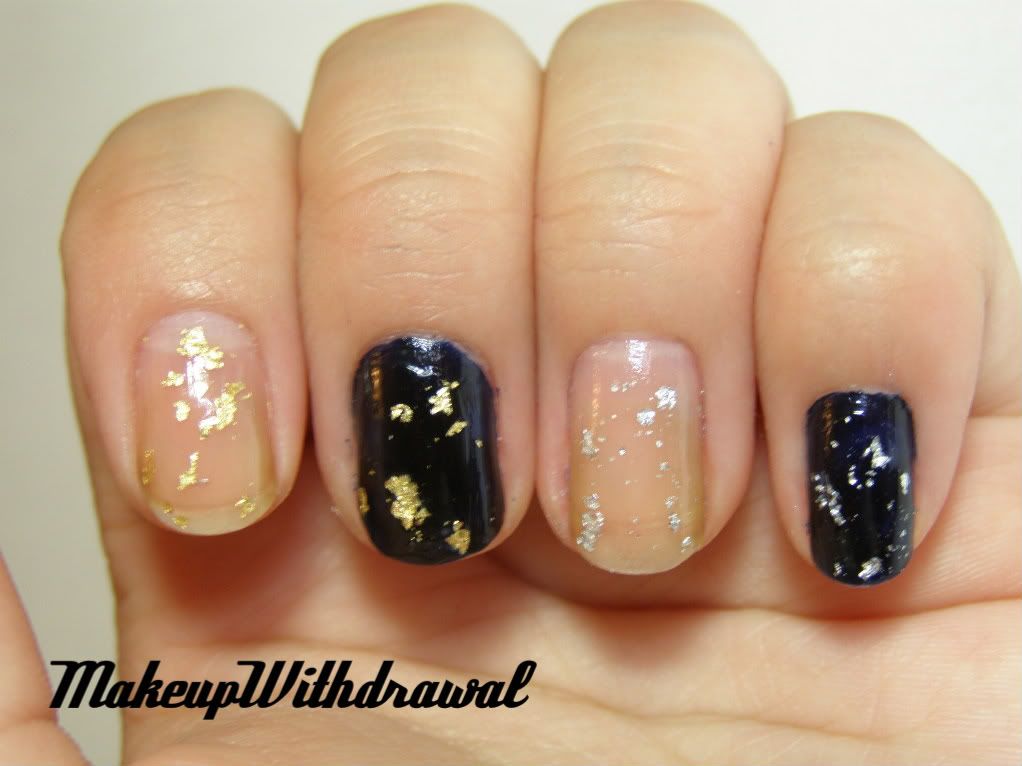
And finally, here's what it looks like on my nails! Sloppy, I know. But I wanted to get this post up and running.
Left two nails: gold foil, right nails: silver foil
Dark color is Wet'n'Wild Nocturnal 
So let's do the math: $4 for the foil + 2 hours of my time + 2 bottles of clear coat = 2 bottles of expensive looking Rococo dupe. Seems pretty good to me! Thanks again to MissHavisham for this amazing recipe.


All products mentioned/shown were purchased by me/given to me for my own use.

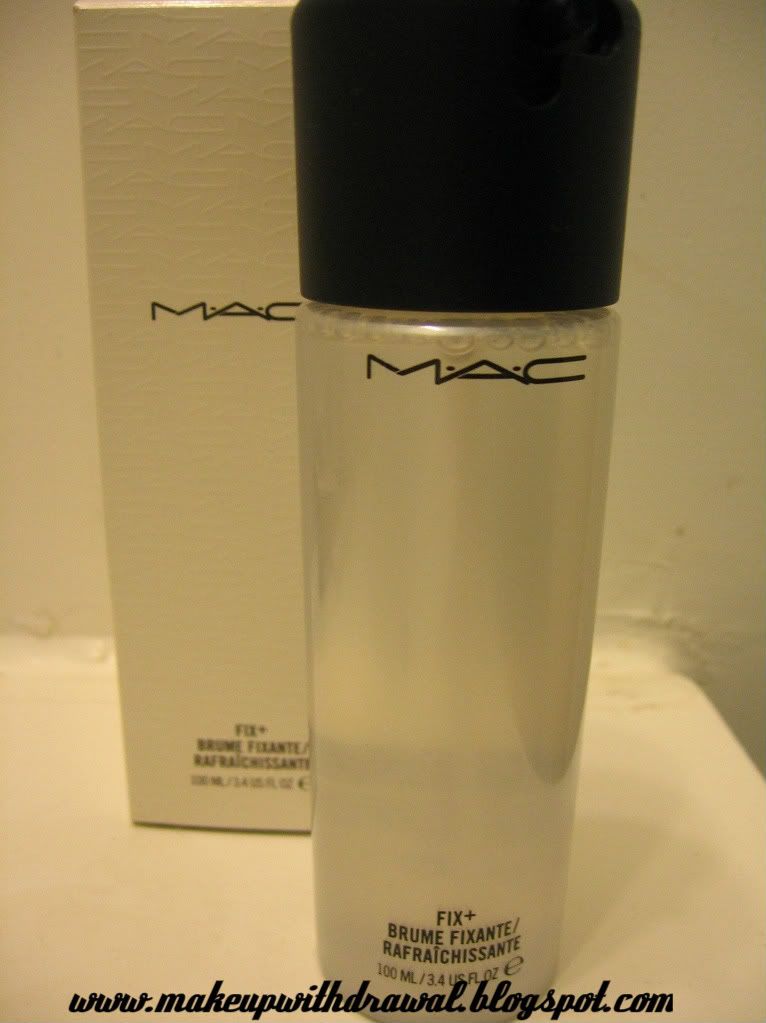
Good Bye, MAC Fix+

Monday, July 5, 2010
MAC Fix+, 3.4oz for $18
I used to love Fix+. I've used it every time I've applied foundation for the last... oh jeez, I don't even know. I talked about its uses in an early post, if you recall. A bottle lasts me about 6 months, so at $18 a bottle it is actually one of the cheaper skincare items that I used. Well, I ran out of the stuff two weeks ago, but didn't get around to buying a new bottle. Instead, I decided to add some rosewater to the empty Fix+ bottle and found a great dupe. Application wise, I can't tell the difference between the two at all. It doesn't feel any different on my skin, it's as effective at keeping my foundation from caking and refreshes my makeup just as well. Basically, what I'm saying is that heck, I was very wrong and that to me Fix+ is now just an expensive bottle of scented water.
Sure, there are vitamins and oils and such, but have they really effected my skin in any way? Nope, don't think so. While some people like the scent of this liquid, I personally don't really care for it.
Heritage Products Rosewater,
8oz for around $5
Some homemade versions of Fix+ call for glycerin, but I found that unless your skin is excessively dry it probably won't be necessary in addition to the rosewater. But if your skin is dry, Heritage Products (the brand that makes the rosewater that I buy at Whole Foods) actually does make a rosewater glycerin spray for about $5.

All products shown were purchased by me, for my own use.

Swatches (MAC Prepped for Glamour + Smashbox Sets)

Wednesday, April 14, 2010
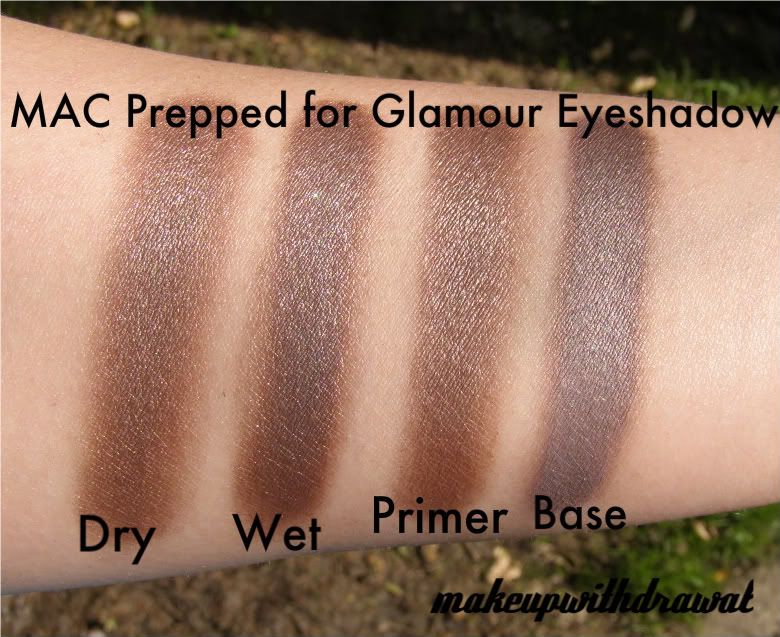
Hullo! Just like I had hoped, the weather cleared up today and I was able to take swatch pics under the beautiful cloudless sky. First, the brand spankin' new MAC eyeshadow from the Prepped for Colour Collection: Prepped for Glamour.
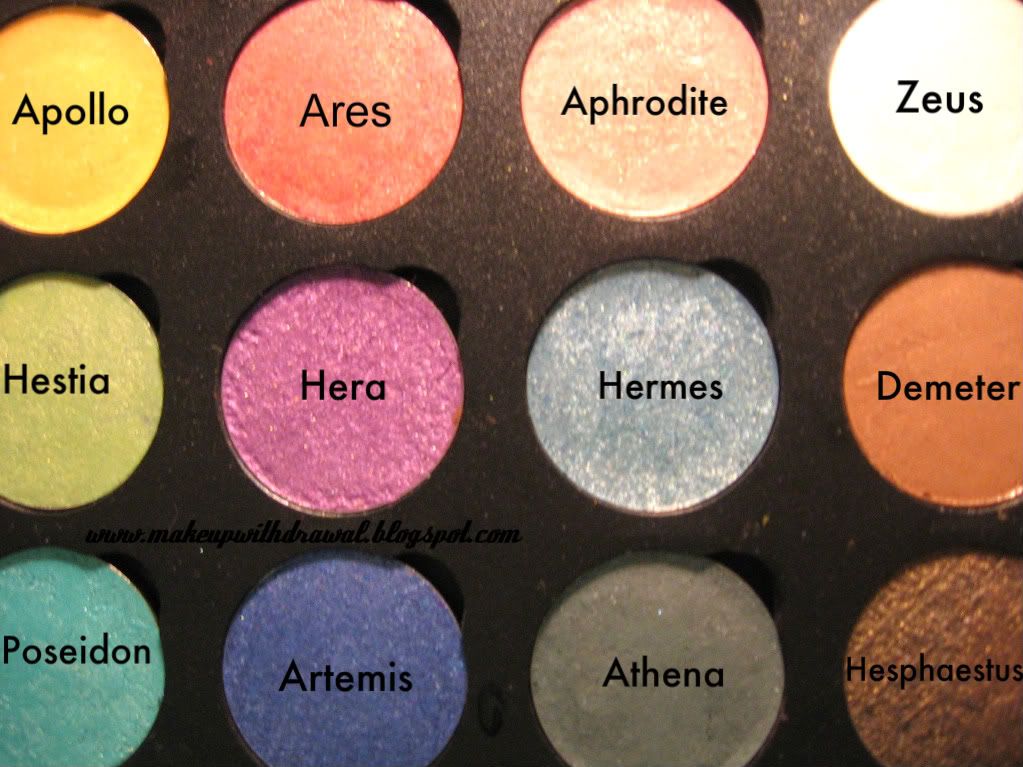
Notes: Prepped for Glamour is a Frost formula, a chocolately taupe. 
MMmm, taupe. Does this remind you of anything else? It does? Satin Taupe?! Yes, this shade is very close to Satin Taupe, though a true taupe connoisseur such as myself can see the subtle differences (read: I can rationalize owning both). Alas, since the time that I tripped and broke my MAC palette and some of the shadows inside, I currently do not have Satin Taupe (I'm not sure how I'm living with myself, I'll get it back soon) so I can't do a side by side comparison- though KarlaSugar can!  I did play with them side by side at the MAC counter and I can tell you that ST is darker and much more frosty whereas PfG is more chocolate and less grey- and is more satiny than it's brother. 
Next we have the Smashbox Green Room set I picked up for $16. 
I was a little wary of this set, because it was all about bronzing and I don't really do that very well. I have yet to meet a bronzer who didn't make me look orange. However, the two bronzers/contour colors in this set were quite nice. Golden Glow was a little orange, so I'm going to wear it like a peachy blush instead of an all over color. Deep Bronze (which I accidentally labeled as Deepest Bronze) is quite dark in the pan and there's no orange at all. It makes for a fantastic contour color on my skin! What a great find, because I've been looking around for a subtle, blendable shade just like that. Both of the bronzers are very soft, matte with a little shimmer. The Hybrid 2 in 1 Color & Shine Gloss in Marigold is a dual tube of clear gloss and gold sparkle. Though the glitter is by no means chunky, it's still a bit too much for me. This collection came out in 2008.
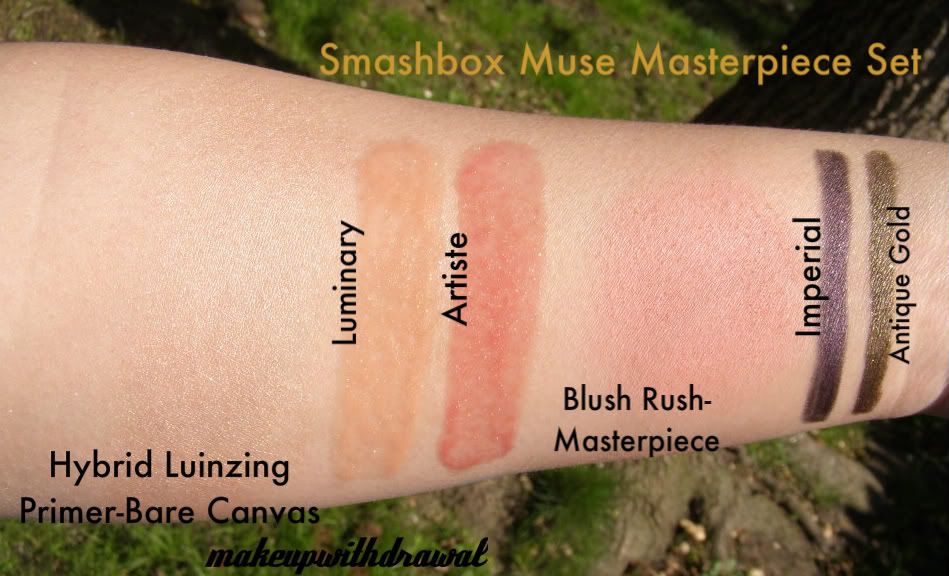
Last but not least, may I present to you the Smashbox Muse Masterpiece Set for $24.

This was a great value, I thought initially, but it might turn out to be just 'meh'. The Lip Paints are both are a little sticky though but they are really nice and glassy like glaze on the lips-  a little bit of color each, very subtle. The Hybrid Luminzing/Primer (whoops, another typo!) is a little strange. The packaging is a little weird, so that it's hard to get equal amounts of each product to dispense. I eventually figured out to plug each little hole one at a time to get an even amount. It's not a very good primer, to be honest. It's basically just golden sparkle sauce. I'll be using it as a highlighter. The blush I'm also a little iffy about. Mainly because I've been hearing such good things about Smashbox blush- the smoothness, how pigmented it is, etc. To be honest, I've found drugstore blush that's better quality than this (to be exact- the Jane blushes). Perhaps I got a bad egg. It is really blendable though. Both the liners are really creamy-  Imperial is a dark violet (the exact same shade as Wet'n'Wild MegaChrome Eyeliner in Antique Amethyst, only the texture is different) but it's so dark that indoors, you can't appreciate the color. Antique Gold liner is simply amazing, it's a really complex shimmery dirty gold/bronze/olive that looks different from different angles and under different lighting- easily my favorite item of the whole set. This was the Spring 2009 Collection. 
So, until next post, I bid thee 'adieu'! Thanks for reading! 
<3
All items shown were purchased by me for my own use.

The Glory of Walmart (It hurts me just to say that outloud)

Sunday, March 21, 2010
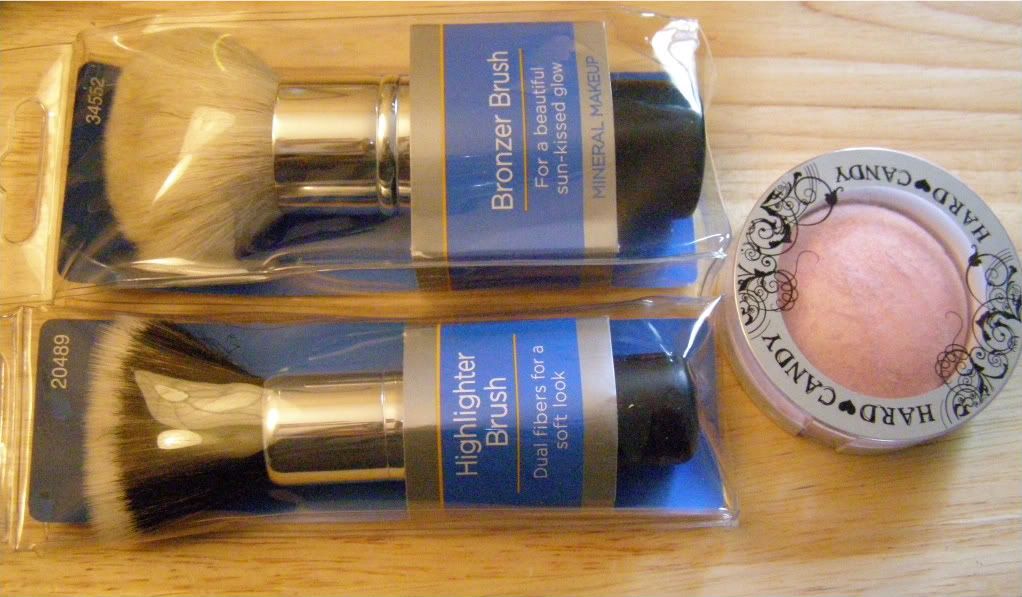
I never thought I'd be planning trips of Walmart, but I yesterday I found myself with a sweet tooth (so to speak), yearning for some Hard Candy. I bought another blush to add to my collection, having already Pin Up and Living Doll. I also spotted the HD brushes that have been spotted at Walmarts around the country.


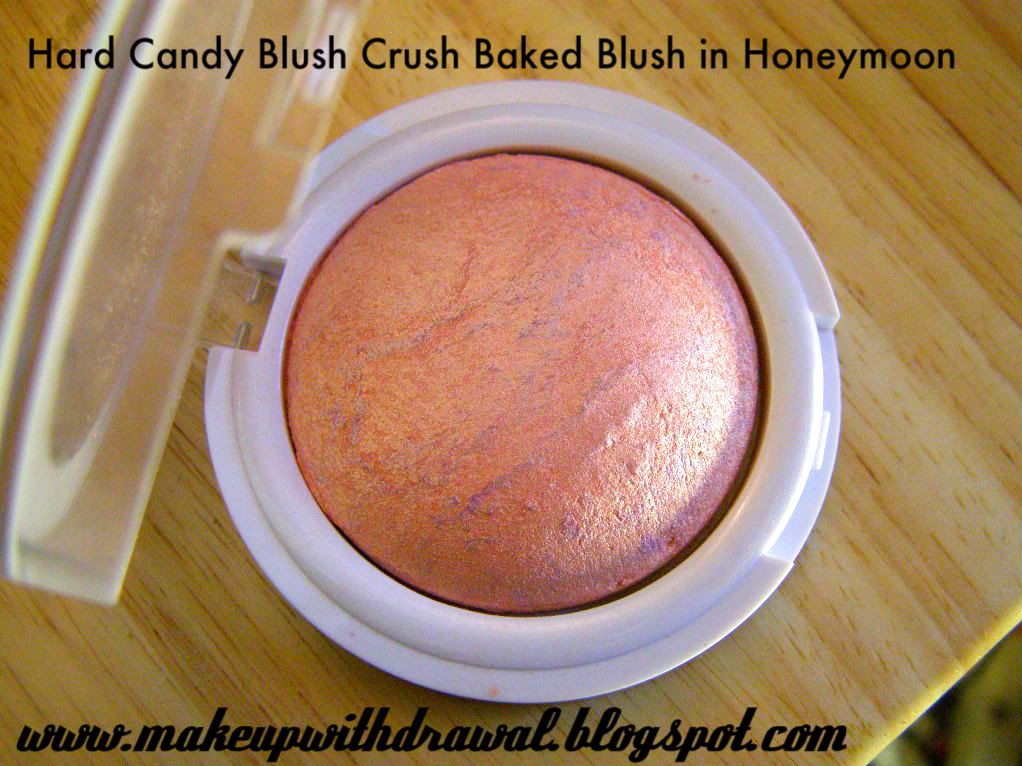
First, the blush. I've experienced good things with Hard Candy's blushes, and I thought Pin Up and Living Doll were getting lonely in my blush drawer, so I wanted to buy them a friend. I grabbed the last Honeymoon and was a bit apprehensive about it, because it looks light neon orange with lavender veins. But then, I remembered how I'd been proven wrong about Pin Up (which looks dark orange with black veins, but shows up as a lovely peachy shimmer flush) and decided to give it a go. Now, I've been reading reviews about it on MUA, and here's what irks me: people confusing the terms opaque/sheer and pigmented/nonpigmented. It seems to me that pigmentation refers to how dense the coloring of the product is (more of a term I'd use to describe the quality), and opaque/sheer describes how see-through it is. That being said, a product can be both pigmented and sheer. This would be the case with Honeymoon, it's light and shimmery, but you'll only need a little bit of it. Also, I wouldn't really call this a blush because it's so light in color (and once blended, almost exactly my skin tone) that it actually ends up being a glowy highlighter. I'm surprised that it doesn't make me look orange at all (I honestly thought I'd end up looking like a sparkly Oompa Loompa ). Hooray, another member of my Hard Candy family.


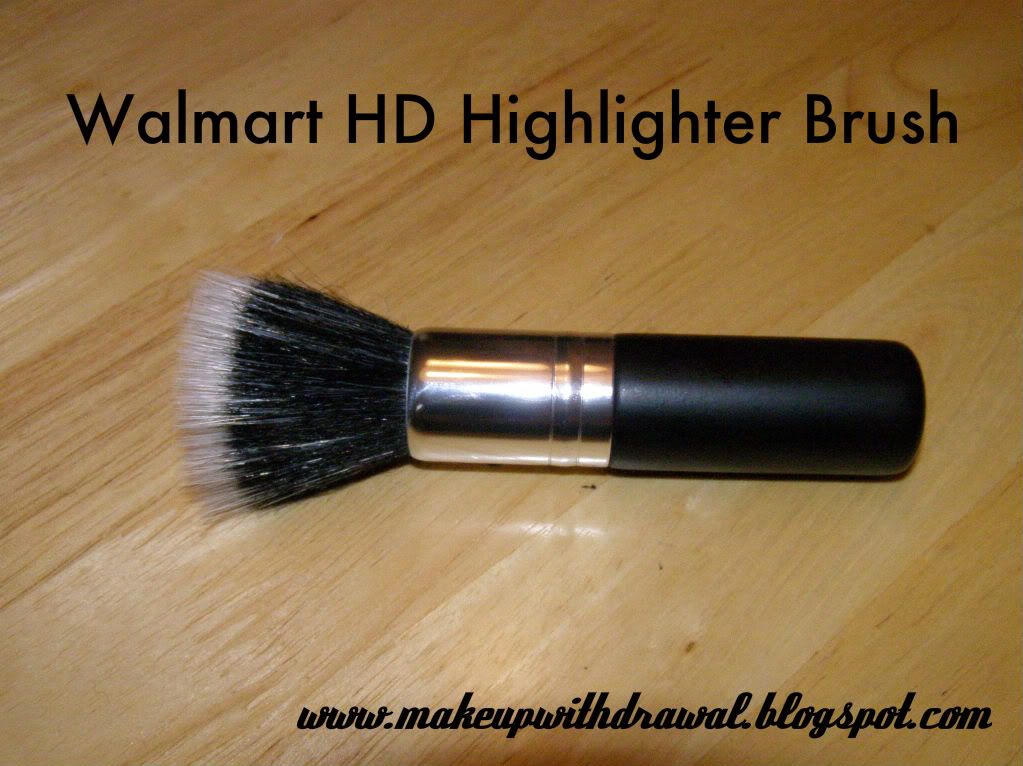
Now, the brushes. First up, we have this nice skunk for which I paid about $6 after taxes. I bought it because Target discontinued my favorite duo fibre brush (Studio Tools skunk, which is a dupe of the MAC 187, so in essence I bought a dupe of a dupe of a brush, whose price I couldn't justify). I'm feeling rather ambivalent about it. I don't think it's as nice as the ST one, the black fibers are not as stiff or hardy so the brush head is overall more malleable. It shed a couple hairs when I washed it, and under warm water some of the bristles went haywire and curled. However, it's as dense as the ST skunk, but slightly bigger so I don't mind having it in my arsenal of brushes, especially for the price I paid for it. I do wish that the handle was longer, because it's too short for my brush holder and dwarfed by my other brushes. Great for travel though, fits nicely into my makeup bag. Edit: After using this brush a few more times, it appears that it sheds quite a bit. I wouldn't recommend it. 

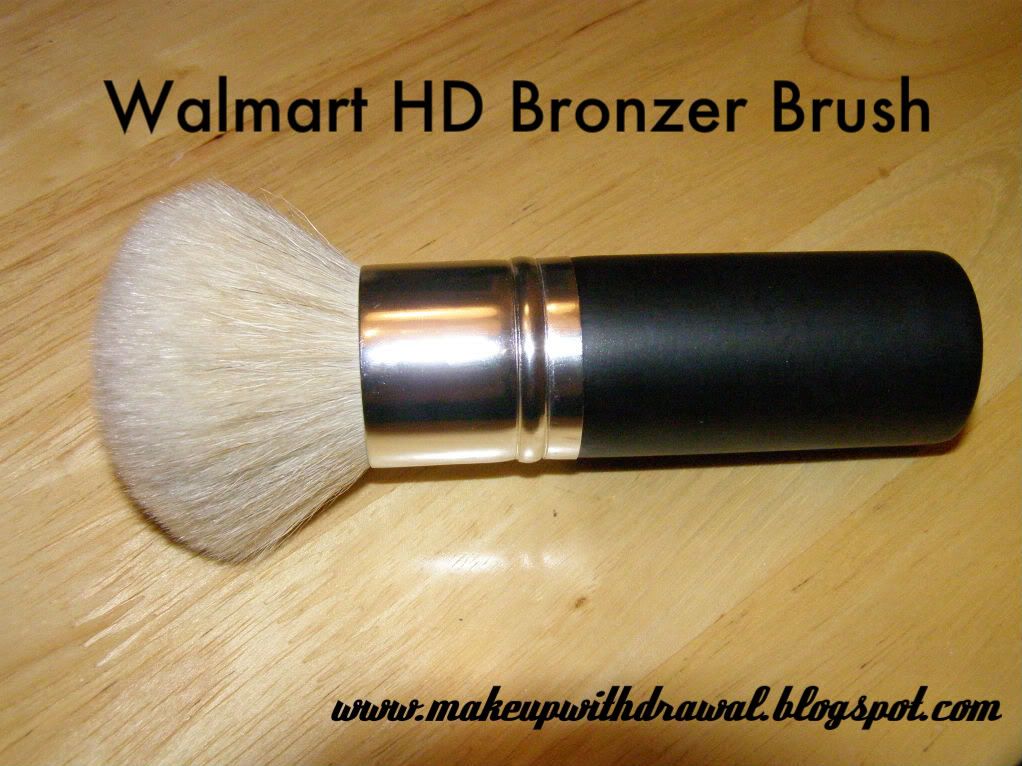
This brush, excuse my language- is badass. It really is. I paid about $7, and it's most definitely worth every penny. It's so soft, and has the densest bristles I've ever had the pleasure to have held in my hands. It's great for powder foundation, setting powder, bronzer, mineral makeup (though with mineral makeup I feel like there's some waste) pretty much anything where you want to cover a lot of area with a soft, light hand. Hmm, you know what this reminds me of? Pictured on the left, is the Professionnel Platinum Bronzer Brush #48, which costs $35 at Sephora. Gee, $7 or $35? Thanks, Walmart. One thing to note, when washing this brush, you HAVE to dry it upside down. Why? If you don't, water will collect right under the bristles, in the metal cap where it's glued to the handle and after sitting there for a while, it'll smell awful. Learn from my mistake- I had stinky water leaking all of my hands when I tried to use it a couple hours after washing. Now, I tie a string around the handle and hang it from a clothes hanger. 
Not bad for $18 total, right? I can't wait to go back there to try some other brushes.

Packages

Wednesday, February 10, 2010
I keep receiving stuff in the mail that I ordered a few weeks ago. They really do seem to make my day, like mini presents I sent in advance to myself. It started snowing again last night, so I fear I will be trapped indoors for another two days. This will help tide me over.
My three arrivals were Missha Perfect Cover BB Cream, pixi Eye Bright Kit, and three Prestige Total Intensity liners.
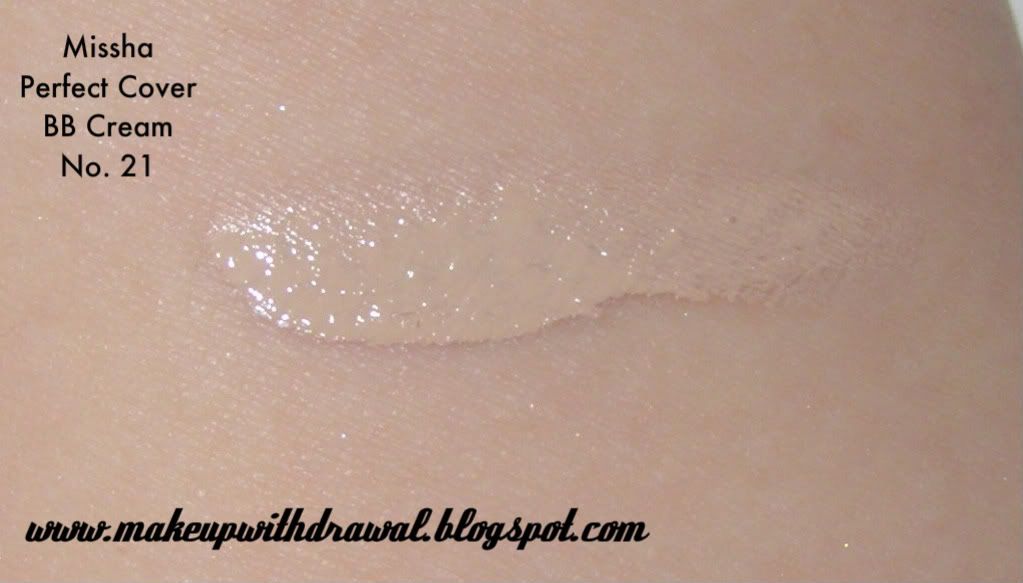
Let's start with the first item, the BB Cream. This was a brand new product that I had never tried the likes of. This is what it's supposed to be primer, foundation, concealer, acne medication, wrinkle reducer, SPF moisturizer and whitener all rolled into one. Mind blowing, isn't it? When I first read about bb creams (blemish balm creams) my jaw literally dropped. I wondered why we didn't have a United States counterpart. But then I realized, a by product of capitalism is that maximizing products was a must- the cosmetic corporations probably would make considerably less if all they had was one miracle product. However, I did manage to get a pretty good deal on this cream. If you buy it directly from the Missha site, it'll run you $25 plus s/h. I bought it from a seller on eBay (based also out of Korea, I believe) and paid about $11 total, free shipping. I've been told that it's quite cheap overseas, and the company that makes it jacks up the price for U.S. customers.  Based on the reviews, I picked the shade No. 21 which though matched my wrist perfectly, is a little light on my face. The consistency is like that of tinted moisturizer, but it's much more opaque and offers more coverage. I had hoped that I wouldn't have to wear a primer with it (the ingredients include quite a bit of silicones) but it definitely looks better with a layer of primer. I would definitely also wear lots of moisturizer underneath if I had dry skin. I wouldn't say that it takes the place of all the products that it claims to, more like it's a super foundation with added bonuses. Now, I have only used it a few days, so I'm not yet sure what the effects are like, but I'll be sure to update about it.


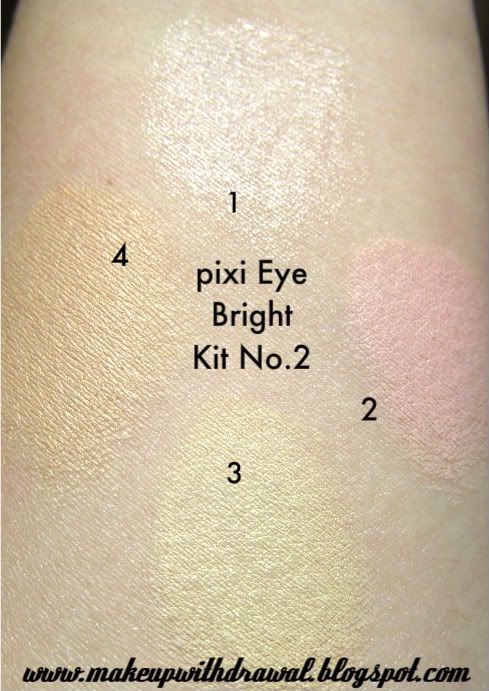
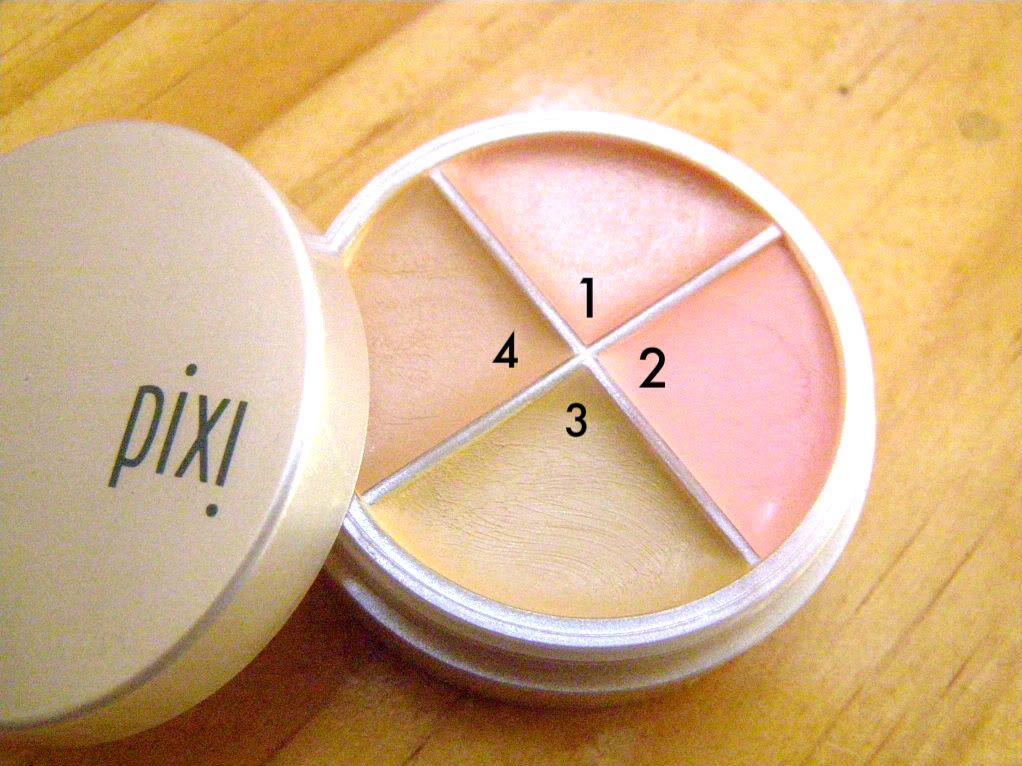
On to product number two! Step right up, pixi, let's see what you have to offer. I saw this Eye Bright kit (No. 2) on eBay with free shipping and bid on it. I ended up wining and got it for less than $6. That's certainly a steal, because it's $24 at Target. No. 2 is supposed to be for Medium/Tanned shades, I believe but matches my NW/NC20 skin very well.  
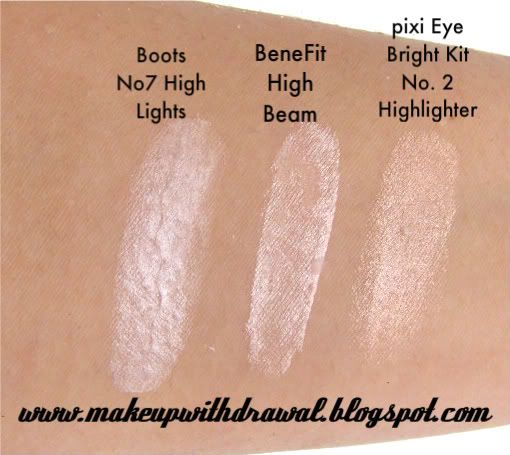
It contains 2 concealer shades, one salmon pink correcting shade and a highlighter. The concealer colors are very sheer, but I'll be honest- you have to moisturize like a madman or else the concealer will cake up and emphasize fine lines, wrinkles and dry skin. Also, you want to use a synthetic concealer brush (like this one) and use light brush strokes. 80% of the time, I find that people don't use concealer correctly and blame it on the product instead of their technique. My favorite part of this wheel is the highlighting color. Some highlighters have a lot of pearly sheen (Boots No7 High Lights and BeneFit High Beam, for example). But this highlighter is just softly luminous with very understated shimmer. I wish I could buy the highlighter alone! I don't think I would shell out $24 for this, but under $10? I'd grab more in a heartbeat. 


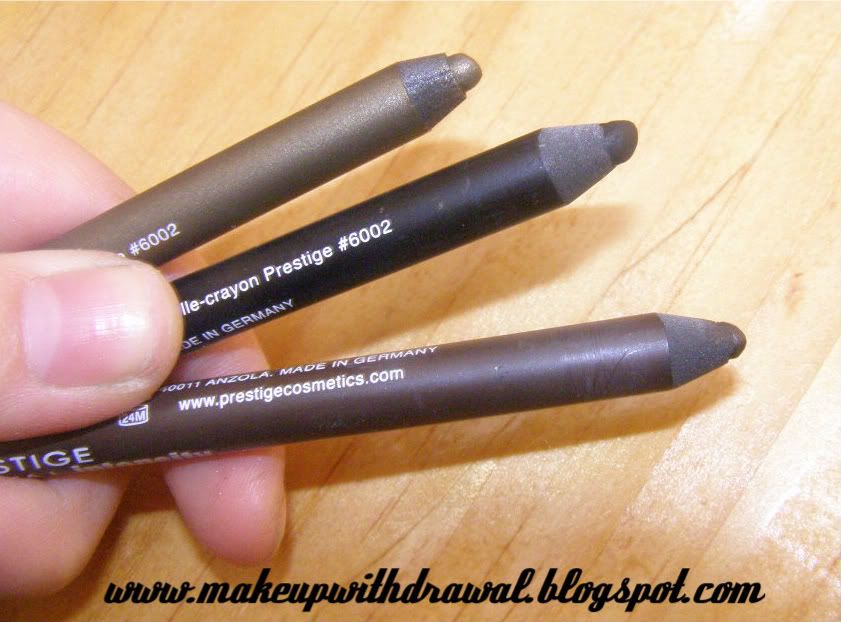
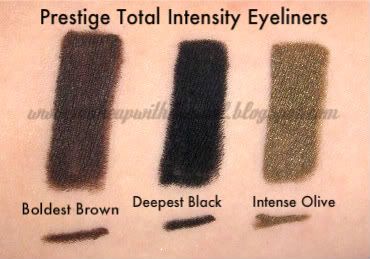
Last, but not least (in fact, my favorite!) are the three lovely Prestige Total Intensity Eyeliners that I bought. I had been craving MAC's Feline Kohl Power, but alas it was limited edition and I couldn't get my hands on some. Someone told me that Prestige TIs were comparable- and the best part? Super cheap! Still, I searched high and low for these babies (5 drugstores, 3 grocery stores) and eventually, managed to get them off of a fellow MUAer. I managed to get Intense Olive, Deepest Black and Bold Brown.


Let me just say, that I'm going to have to invest in a good thesaurus to find the words to describe how much I love this eyeliner. The first thing you notice is the amazing consistency, it's smoother than a con artist's lies. I have never, ever used an eyeliner that is so intensely black as the Deepest Black. The closest I've gotten is Estee Lauder's Artist Eye Pencil in SoftSmudge Black, and let me tell you- in comparison, it's a dull charcoal. I'm almost afraid to wear this black everyday- it's such a smoldering black, I'm not sure I can handle it. The brown color is actually very dark, upon my eyelids it looks black (or at least, the kind of black you would get with other brands of liners) but the contrast is much less startling. Olive, is a tricky little fiend. When swatched on my wrist, it looks and photographs as a dirty gold- a sandy brown with shimmer. However, paired with a salmon shimmer shadow on my eyelid, it definitely has hints of dark green.
Before I go any further, I have a confession to make. I wore eyeliner to bed last night. But before you gasp in horror- let me explain! I wanted to put the liners through the ultimate long lasting test. I wore olive on one eye and deepest black on the other. Olive pretty much stayed put, only the corner of my eye lost a bit of liner. There was some smudging with the black- although it was such a sexy, dirty, I-partied-too-hard-last-night and still looking stunning, I can't even fault it for that. 
Pros: Insanely rich, deep color- very opaque and pigmented. Long lasting, ridiculously smooth. Cheap! I am definitely going to get my hands on the other colors.
Cons: Not entirely smudge proof. My eyes are a little hooded and oily, so I did get a few rainbows after a couple of hours- but they were faint. The Deepest Black color also made my lids tingle a bit- some wearers might be allergic. Not for tight lining- if you wear it on the waterline and have contacts- it will stain them! Hard to find.
Also, it's a very thick pencil- kinda hard to get a thin line, but wonderful for sultry, imperfect smoky eyes. 
Definitely worth checking out. 


Whew, what a long post! Thanks for staying for the whole ride- let me know what you think!

High Beam Dupe

Tuesday, January 19, 2010
So a couple of weeks ago, I posted this video about a very good BeneFit High Beam dupe. Here's the video, the answer is below!

The High Beam is on the right side of the screen, the Boots N*7 High Lights is on the other hand.

Generic Value Products Silk Treatment Review

Tuesday, December 29, 2009

What a great find! I was trying to find a good pressing medium for my self made eyeshadows and a quick google search led me to a few different sites and videos that all recommended that Biosilk was a great alternative to CoastalScents.com's EZ Prez Medium. Which if you remember, I disliked because the packaged leaked like crazy and I wasn't too thrilled about the oil layers that separated within 2 minutes of being initially shaken.  The ingredients of GVP's Silk Treatment are exactly the same as Biosilk, but I guess in slightly different proportions because it is a bit thicker. Now, I like the Biosilk dupe just fine, a few drops is all I need for making the dry ends of my hair feel ridiculously smooth yet not oily. I like pressing pigments with it as well, the thicker formula makes for less mess! EZ Prez Medium has fewer ingredients, but the GVP dupe has the same ones and more- fragrance and preservatives. Preservatives, yuck- you say? Not so fast, those dreaded parabens allow the formula to suspend its ingredients evenly. I'm not too worried because I'm using such a small amount, a couple drops per eyeshadow pan and the pay off is fantastic. Not to mention the price! 6oz for about 6 bucks with my Sally Beauty Supply card, what a deal! The medium is about 10 bucks for 2 oz and Biosilk is 13 for about 2.5 oz. I feel like I'm paying for an actual product instead of a fancy sleek bottle. After all, isn't that what matters the most?

Make Up For Ever Flash Palette vs Urban Outfitters Pigment Palette

Sunday, December 20, 2009


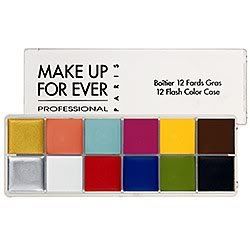
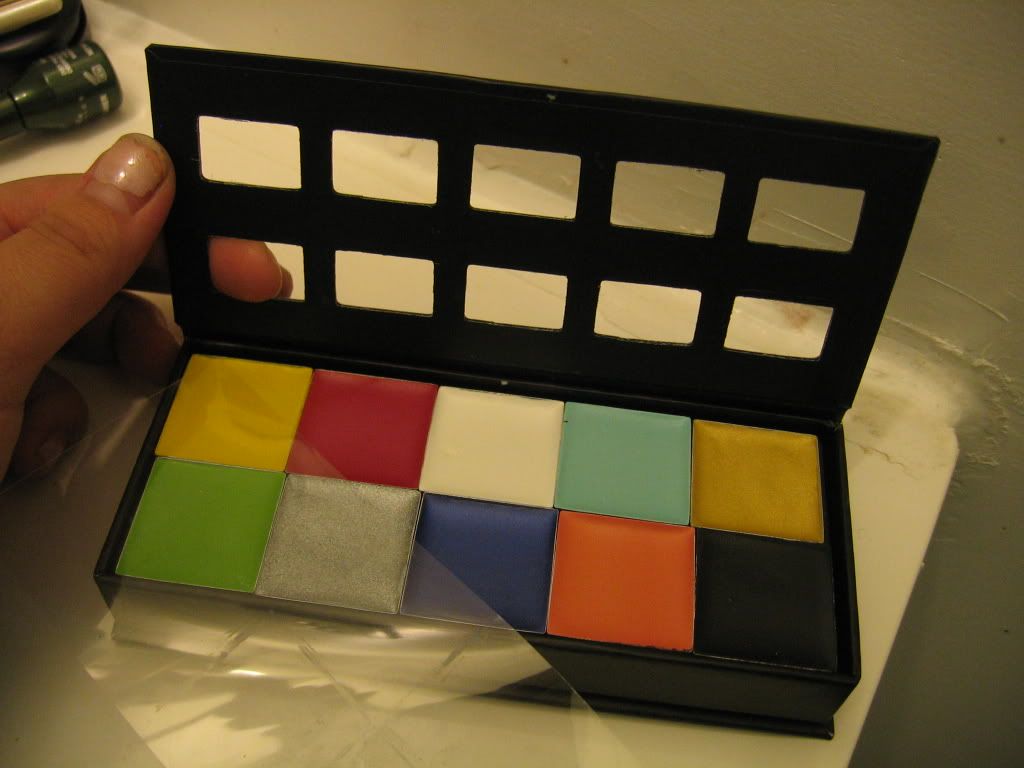
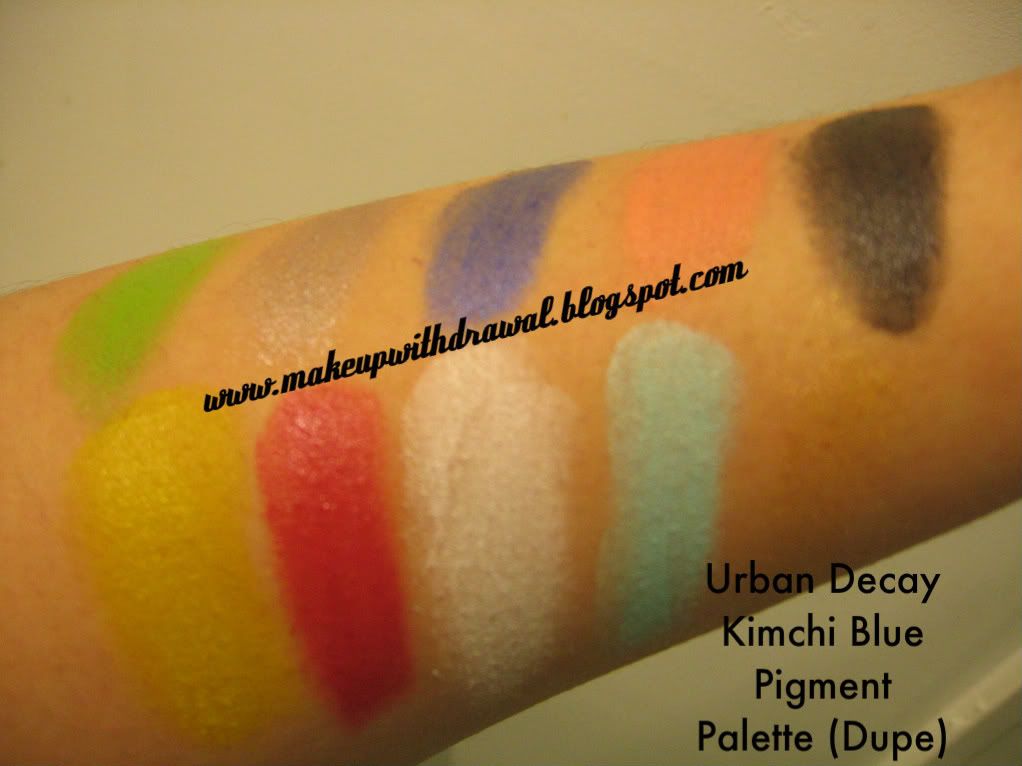
These two look the same, right? The MUFE palette goes for a hefty $95 (Oh my!) whereas the Kimchi Blue I picked up on sale for a mere $8. Now, though they may appear similar on the surface, let me tell you that they are very different. The MUFE colors are highly pigmented and you need the tiniest bit to create an opaque look. The Urban Decay dupe colors are more sheer and it takes a bit of product to build them up so that they are no longer translucent, or in the case of the metallic shades- no amount of product will achieve that opaqueness. The dupe is also more greasy, more likely to crease. However, with a good amount of primer and a setting powder you can do many looks with it, but you don't get as many colors as the genuine thing.
Also, the U/O product has somewhat low quality packaging, you have to save the plastic sheet that comes with it and glue it to the cover or else dust and grime can contaminate it.
So the bottom line is, save up for the real deal (or buy the primary colors and the dupe to start your collection). The Urban Outfitters dupe is a quick fix, but it's no substitution for the fantastic MUFE Flash colors. I'll still use the U/O dupe colors as bases for eye shadow and Halloween makeup, but they just doesn't mix like the other one.
Cost: $95 for the Make Up For Ever Flash Palette found at Sephora or the MUFE site. ~$12 for the Kimchi Blue Pigment #1 Palette at Urban Outfitters.

MAC Fix+


I bought a new bottle of MAC Fix+ and realized that I had started to take this product for granted- not once have I commented on it's versatility. It's a refresher, makeup setter and skin prep-per all in one spray bottle. As I peruse the internet and the many makeup forums that dwell there, it becomes clear that there are two teams with different party platforms when it comes to Fix+. There are those who buy it 5 bottles at a time and refuse to think about a cruel makeup world where it doesn't exist and there are those who believe that a homemade glycerin dupe is just as good. I think I'll pave the way for a third party.
It's true that the main ingredients are water and glycerin (I believe that many homemade recipes ask for about a 5 to 1 ratio, respectively) but there are many other ingredients as well. Those would be cucumber extract, matricaria extract, camellia leaf extract, Castor oil, caffeine, perfume and preservatives. I bet your immediate thought is, yuck, preservatives. However, it's not such a bad thing, if you were to make your own dupe, you'd have to make a new batch every week or so because there's nothing in it to keep it from going rancid. I personally don't like the smell of Fix+, and I can't justify $18 dollars for face perfume. Instead, I use the other aspects to rationalize the purchase. The caffeine energizes and is supposed to tighten your skin cells. The extracts leave your face feeling really clean, I love misting a bit on when I'm stressed, it immediately gives a flushed face a cold, calm sensation. 
The primary use however, is to set makeup. This is particularly important if you wear mineral foundation like I do. I feel like though the coverage I get from powder is great, it doesn't last all day because there's no smoothers or binders like silicone. A setting spray like Fix+ adheres (I'm not sure that 'adhere' is the best word to use when talking about skin... but it'll do) makeup to your face and give it a dewy appearance (youthful dewy, not greasy). 
The bottom line is that in a pinch, if I'm every out of Fix+ I'll make a quick glycerin dupe. However, I will continue to buy it and use it sparingly.
Cost: $18 at your local MAC or maccosmetics.com

DIY Mineral Makeup

Wednesday, December 16, 2009
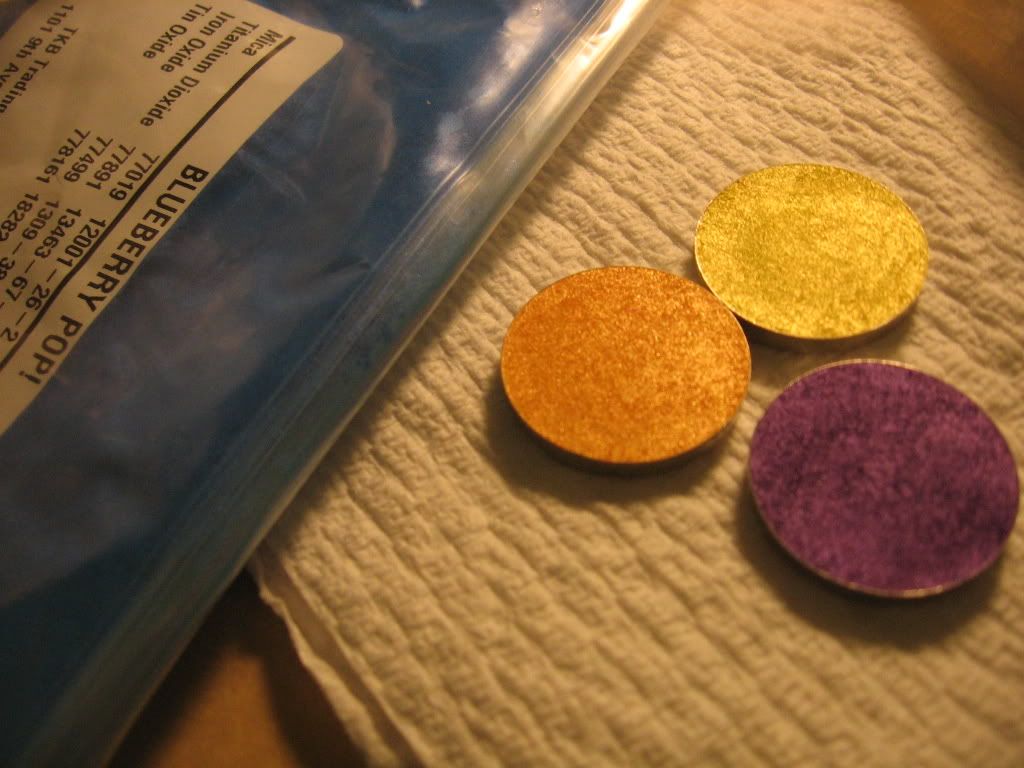
Ok, so I haven't posted in a about a week, but with good reason. A week ago, I got my orders from CoastalScents.com and TKBTrading.com. It was better than Christmas. I had ordered an EZ Eyeshadow kit from TKB as well as some samples of mica to supplement it (various metallics and neutrals). I also bought some 12 slot empty magnetic 26mm eyeshadow palettes (and smaller slotted ones to fill up as presents!) from CS, empty 5g jars and shrink wrap (the professional in me demanded quality packaging even if the recipients are my friends and family) from TKB and other odds 'n' ends.

The point being is that in the past week, I've been so busy playing alchemist that I haven't even noticed the time fly.  I even ordered some more stuff immediately, so that I would have plenty to play with.
I can't help but say great things about both TKB and CS. TKB amazed me with the eyeshadow kit, I'll be honest, for $19 I wasn't expecting much. But it came with a ton of mica, so much that even though I've made roughly 15 colors of about a tablespoon each of powder, I'm no where close to running out. $19 dollars for the ability to customize my eyeshadow colors? I'll take that, thank you very much. On top of the great price, the mineral eyeshadow I made was so so so good, I'll have to bust out the thesaurus to properly declare my love for it. The color payoff is unbelievable. I don't understand why most of the mineral eyeshadow colors I see play it safe with 'gentle' shades. The colors I formulated almost made my eyeballs pop out, that's how vivid they are. Great staying power but the consistency still needs a little work- I'll have to tweak the ingredients a bit. However, used wet the shades are simply beyond stunning.
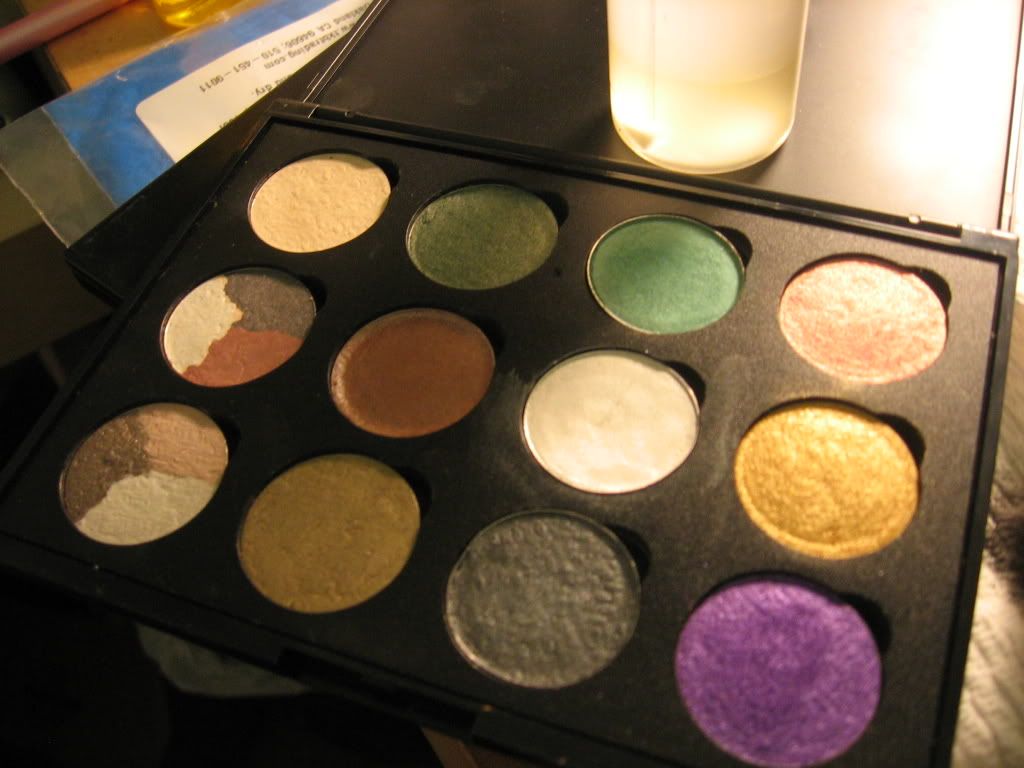
I made a really good dupe of MAC Vanilla (which saves me a ton of money because I use it so often!) and made a few colors that were really similar to some MAC pigments that I had. Think about it: if you even match two MAC colors, you've already paid for your purchase. You can find a video on how to match colors  on the TKB site.

I also bought a bottle of EZ Prez Pressing Medium from Coastal Scents to press all my creations. I liked the formulation, it left my homemade mineral shadows very smooth. It's important to use a medium with silicone to bind mineral makeup together, or else it ends up dull and flakes easily. However, with pigments such as those from MAC, you can just use rubbing alcohol. What I didn't like is that when I got the pressing medium, it had spilled quite a bit out of the bottle (about 1/4 of the product) and into the bag it was in and quite messy. The spilled medium even dissolved the lettering on the label of the bottle, pretty freaky. The bottle is also hard to use, you end up spilling and leaking more of the fluid than you actually end up using. Crappy. I'll buy some from a different company next time. Here's the colors I made (the photo with the named colors) and some of my old MAC and Chanel colors that I depotted/mixed/pressed.