Showing posts with label Artistry. Show all posts

Graphic Liner Look

Thursday, March 27, 2014
I stumbled upon this beautiful look by Jordan Liberty and had to do something similar. I went for a light goldenrod sparkly eye instead though.


Galaxy Lips

Saturday, March 15, 2014
My husband makes his dislike for glitter quite clear yet it was his idea for me to try these rather editorial galaxy lips.

My galaxy nails were one of his favorite nail designs and lately he has wanted me to GALAXY ALL THE THINGS. I went with lips because they weren't practical in the least bit.

I used:

NYX Jumbo in Black Bean, Wet'n'Wild Pandora shadow, Impulse Cosmetics Matte Opaque Lipstick in Melancholy, Space Cadet, Blow, Run Away and Smoking Gun. Random glitter. Bobbi Brown Crystal Gloss.

Despite his ardent hatred of glitter, Morgan thought these were pretty neat, especially once I blew the picture up.


Mehron iNtense Pressed Powder Pigments Earth Palette: Review, Swatches & Looks

Saturday, January 11, 2014

Earlier this year, I reviewed the shades in the Mehron iNtense Pressed Powder Pigments Fire Palette (click here to check that review out) and really fell in love with the extremely bright colors and high pigmentation. I found myself longing for the other two palettes so that I could own all 24 beautiful shades so with Black Friday sales, I treated myself to one of them, Earth. 

The palette comes in a simple paper box, bearing the Mehron iNtense logo. 

It houses eight shades with the names written on the bottom of the palette. Each pan is roughly 36mm. The case is sleek and black. 
There's a slot for a brush, a synthetic one is included. 
 The brush is thin, soft and rounded; not especially great for use with these dry matte pigments. It doesn't pick up much pigment to pack on color nor does it blend well. It's really better suited for creams so I've repurposed it as a concealer brush.
These are swatches done over primer. Left to right: Red Earth, Desert Sand, Earth Crust, Mountain Moss, Carbon, Graphite, Night Sky and Morning Sky.

Carbon has the most frightening, outstanding pigmentation. I think this might be the truest matte black shadow I've owned. It's honestly almost too black, you barely need to touch your brush to apply it. All the shades have great pigmentation though Night Sky and Morning Sky were somewhat chalky.

The texture of these is definitely on the dry side, even for matte shadows. I think the wetter and creamier your base or primer is, the better the color impact. I find these shadows to look particularly well with creamy formulas like NYX HD Eye Base and LORAC Behind The Scenes Eye Primer and not so well with my NARS Smudge Proof Eyeshadow Base (looked a bit scaly/chalky, didn't blend that well).

Here's a few EOTDs I did featuring these shades.
Earth Crust on the lid, Desert Sand in the crease. Touch of Carbon in the outer V and on the lower lash line.

 Here we have Mountain Moss on the lid, Desert Sand in the crease. Yellow Spark (not in this palette, in the Fire Palette) in the inner corner. Earth Crust, Desert Sand and Carbon on the lower lash line.

In short you get six shades that are great to work with, just absolutely phenomenal pigmentation and two shades that are a bit finicky and chalky, but still vibrant. Regularly priced at $52.95, they are a steal if you can get them on sale. Speak of which, at the moment Cherry Culture has them for 50%! I definitely bought the last palette, Wind, without a second thought. I really absolutely love working with these Mehron iNtense shades, they are a joy to use and photograph.

 Products featured were purchased by me, for my own use. For additional information, please refer to my Disclosure Policy.


Zombie Pub Crawl Makeup (Braiiiiins!)

Sunday, October 9, 2011
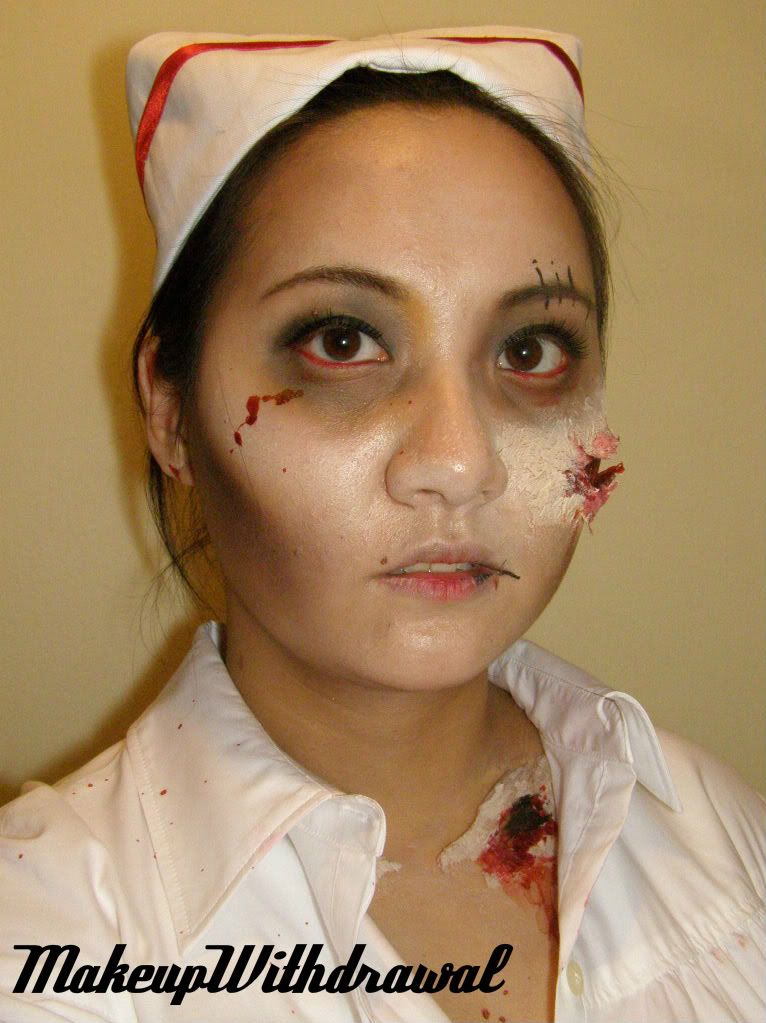
Last night, I attended the annual Twin Cities Zombie Pub Crawl and had an absolute blast. It was so much fun sitting in bars with other zombie patrons, seeing zombie entertainment and zombie dancers. My friend remarked that this must be what it's like to live in Halloweentown (Disney flashback, anyone?). There were so many people participating that the people not dressed as the living dead and covered in blood where the ones who looked out of place! I really wish that this sort of thing could happen more often. 
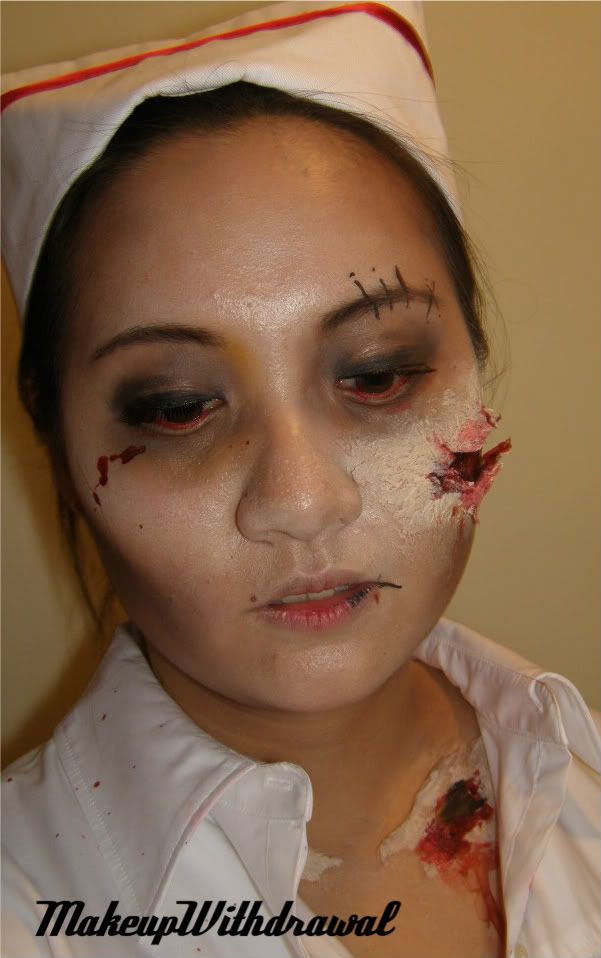
As you can see, I went as a zombie nurse. I forgot to take a picture with my red cross eye-patch, which I regret.
Makeup took about 2 hours. The cheek wound actually looks like it blends in, but the flash on my camera makes it appear fake, unfortunately.


I used: 
Brows: NARS Bali shadow, L'oreal Lineur Intense  for the stitches
Eyes: UDPP, Rock & Republic Fatalistic shadow, MAC Copperplate, MAC Goldenrod, Illamsqua Daemon shadow, La Femme Eyeliner Sealer, LORAC Beige shadow, false lashes
Face: NYX Highlighting liquid, Ben Nye Conceal All Wheel, LORAC Smokin shadow, the darkest purple matte shade from Wet'n'Wild Lust palette, Urban Decay Deslick in a Tube, BECCA Fine Loose Powder in Sesame. 
Wounds: Gelatin/water mixture, tissue paper, theatrical blood, MAC Blacktrack Fluidline, Ben Nye Conceal All Wheel
Lips: MUFE Full Cover Concealer, theatrical blood, L'oreal Lineur Intense 

WHAT DO WE WANT? 
BRAAAIINS!
WHEN DO WE WANT IT?
BRAAAIINS!

Has anyone else done any zombie makeup before? I'd love to see!


Products featured were purchased by me for my own use. For additional information, please refer to my Disclosure Policy.

Dangerously Pointy: Stiletto Nails

Thursday, February 3, 2011
Hello again!
Weeeee, second post of the night. I'm on some sort of roll.
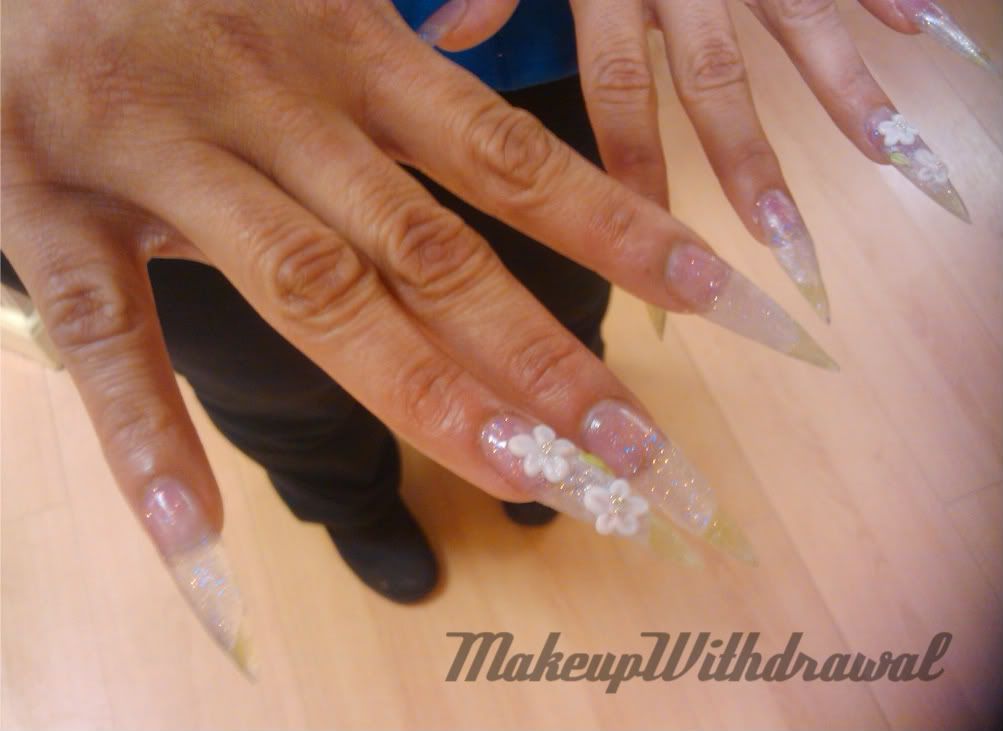
So yesterday, if you remember- I promised pictures of some of the work I've been doing at school. I'm very luck to have a student teacher who whole heartedly embraces the idea that students need to practice even the most outrageous techniques and happens to be a very gracious guinea pig.
I'd never actually tried sculpting stiletto nails before- heck, I only watched one YouTube video about them and had only a basic grasp of how to form them. The 3D sculpting I had tried a few times, but without much success.
For this nail set, I combined the two. These aren't everyday nails, that's for certain! I'd say that these are most definitely fantasy length nails. While I created these nails, we had an animated discussion about how she was going to cut hair, cook, go to bathroom etc- her basic daily tasks. She's somehow dealing with them (what a trooper!) and says that she uses her new pointy talons to poke her husband when she's less than pleased with him.
So, I'm really pleased with how it turned out for a first time attempt. Next time around, I hope they're neater, the flora is formed better (and that I can master new 3D designs) and it doesn't take me so darn long to do them (five hours).
I used: CND Rentention+ Liquid, INM Tutti Fruiti Collection Powder Paints Colored Acrylic, OPI Competition White, CND Clear Powder, tiny decorative metallic balls

Yeah, I'm kinda nuts. I really like doing the insane, tacky, over the top nails.

Lace & Pearl Look

Saturday, January 8, 2011

Hello Readers!
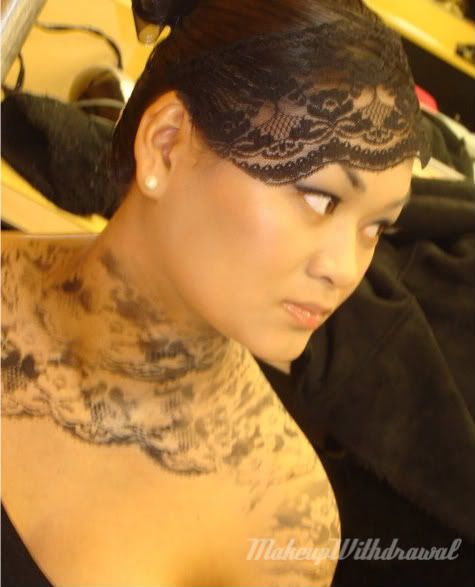
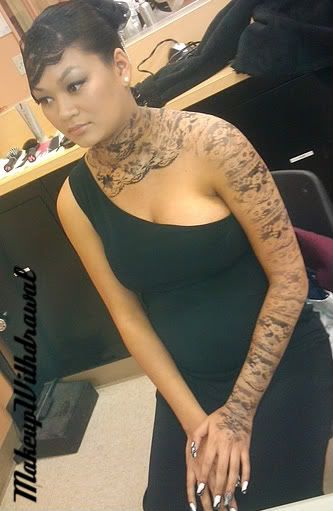
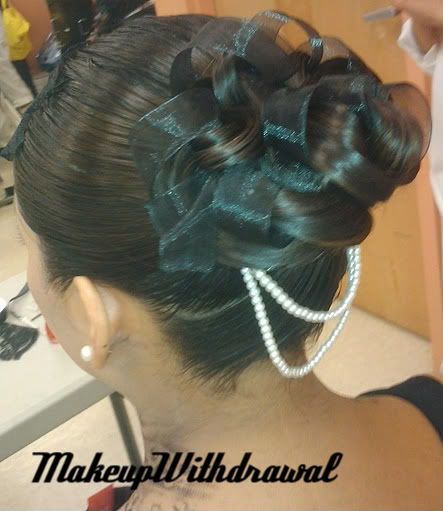
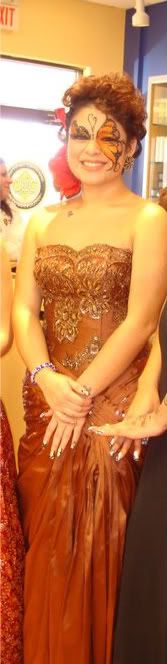
I wanted to show you a bit of what I've been working on in class. Last week our teacher gave us free reign and let us use a whole class day to create a 'total look'. My classmate Troung let me use her as a model and this is what I came up with! Another one of my classmates, Sandra worked on her hair while I did makeup and nails.
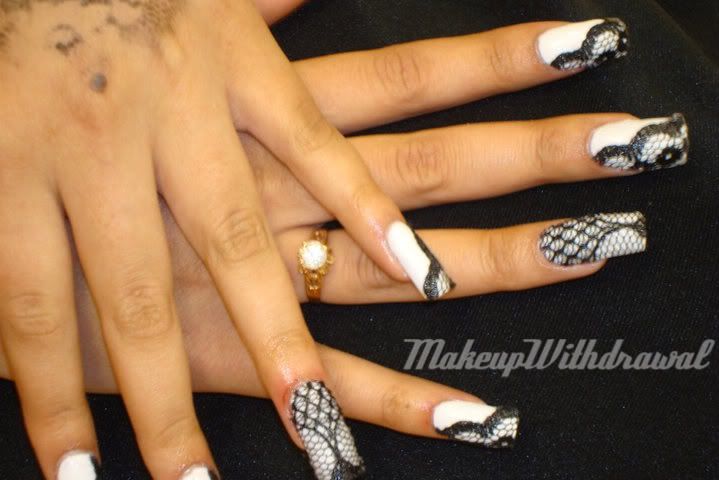
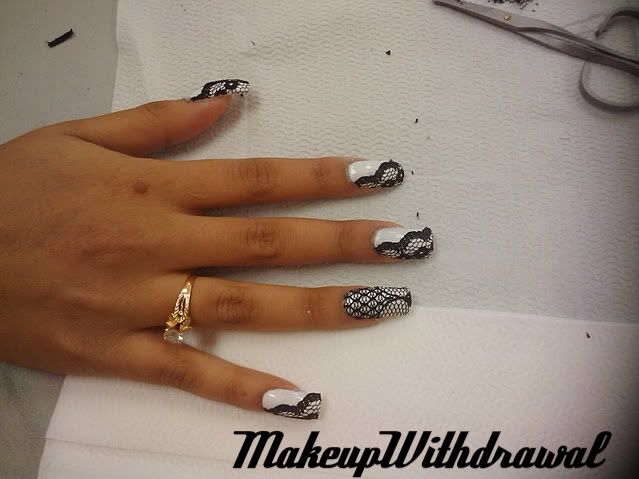
I used repetition of lace and pearls throughout the look, starting with her finger tips.

I started with acrylic nail enhancements (using CND products), then painted the nails a soft pearly-white. I then overlaid the lace with Odyssey Nail System's Gel Me Now. Boy did I learn a lot about working with lace! It's much harder than I thought it would be- it has a tendency to shrink and fray.

Man, I hope I look this beautiful when I'm pregnant!
 I used lace and e.l.f. Cream Eyeliner in black and Savvy cake liner in black to stamp Troung's neck and arm.
That didn't come out nearly as crisp as I had hoped, but I was pretty pleased with the effect overall.
For her face, I used:
Brows: La Femme Brow Sealer, Ben Nye Taupe Brow Pencil
Eyes: Urban Decay Primer Potion, Stila Kitten, Milani Storm shadow, e.l.f. Cream Eyeliner in black and falsies.
Face: Graftobian HD foundation, MAC Plum Foolery blush, Smashbox Green Room Bronzer, Boots N*7 High Lights
Lips: Bobbi Brown Crystal Gloss


It was such a fun hands on learning experience, I wish we could do it again!
Oh- I also wanted to show you my friend Vina's creation.

Her model was our pal April, isn't her work exquisite?


Thanks to Nuket for the pictures, Troung for being my model, Sandra for the work on the updo and Sandy for the dress!

Have a great weekend, everyone!

Love,


Jeweled Black/Silver Mardi Gras Mask!

Wednesday, December 15, 2010
Hello!
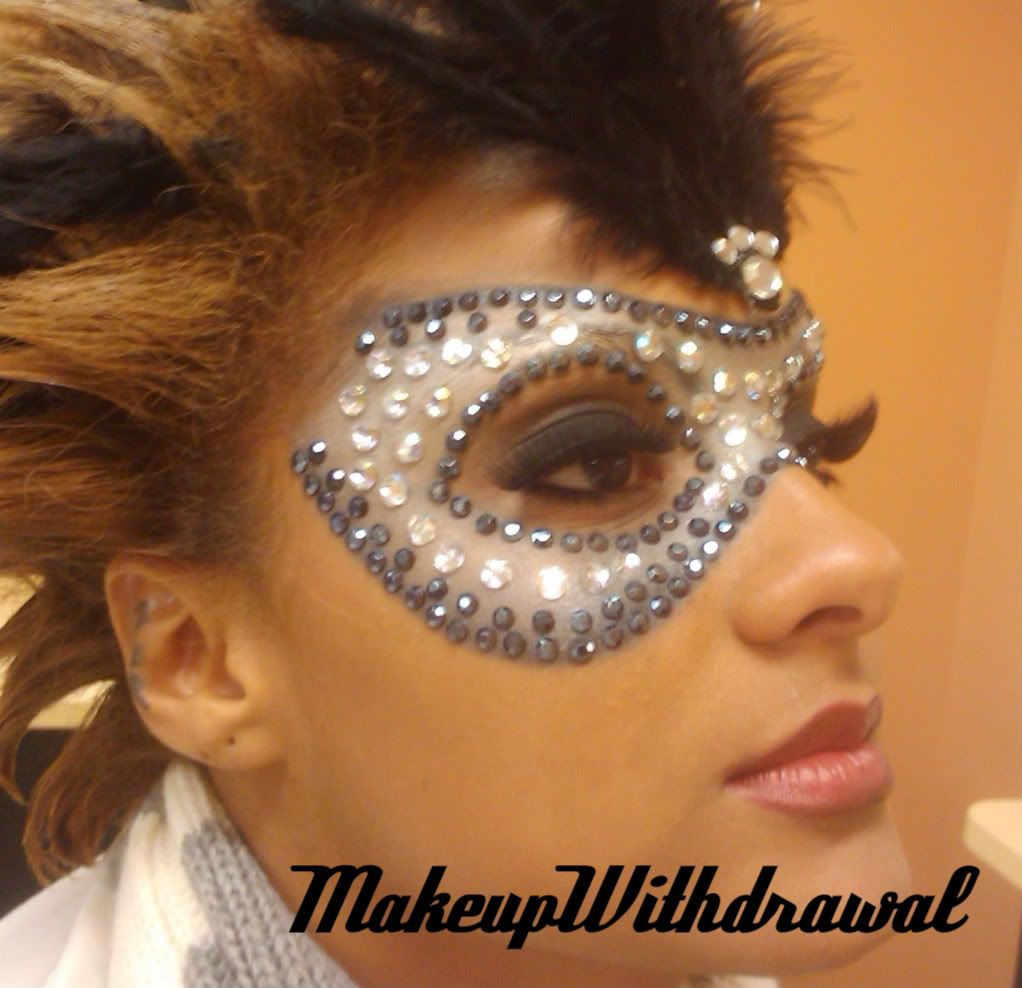
I did something that extremely time consuming today, and thought I'd share with you the fruit of my labors. For five hours, my lovely model Erica sat still while I did both her hair and makeup. The rhinestones took up most of the time, taking about two and a half hours to painstakingly glue to her face. One by one.
All I have to show you is a crappy cell phone picture that neither flatters the model, nor does justice to my work! Alas, that's all I have- but if any of my class mates took any better pictures, I'll post them later.
I used:
A crap ton of rhinestones, feathers, DUO glue.
UDPP, Ben Nye Light Concealer Wheel, Victoria's Secret Foundation, NYX Hebe Black Label Lipstick, Prestige Total Intensity Deepest Black liner, Urban Decay Perversion shadow, Bobbi Brown Chrome Silver shadow, Rock & Republic Chain Link shadow.