False Eyelashes Fervor (Introduction to Materials)
Saturday, March 27, 2010
I am thoroughly obsessed with my eye lashes. It started when I was 10, and took a close look at my mother's eyes. Her upper lashes were sparse and were just like mine, stick lashes that stuck straight out. What really frightened me was that at the age of 45, she had NO lower lashes left at all. Now, I realized that I'll never have a luscious fringe of soft, dainty lashes that I can flutter to flirt with, but I really would like more than the five lower lashes that I've been stuck. Recently, a few lash growing serums have entered the market (even prescription Latisse) and I've started trying products like RapidLash (I saw it at my closest beauty store for $40, but it's cheaper online at places like Amazon).
 In the mean time, I'm going to fake it, and talk about my love of false lashes.
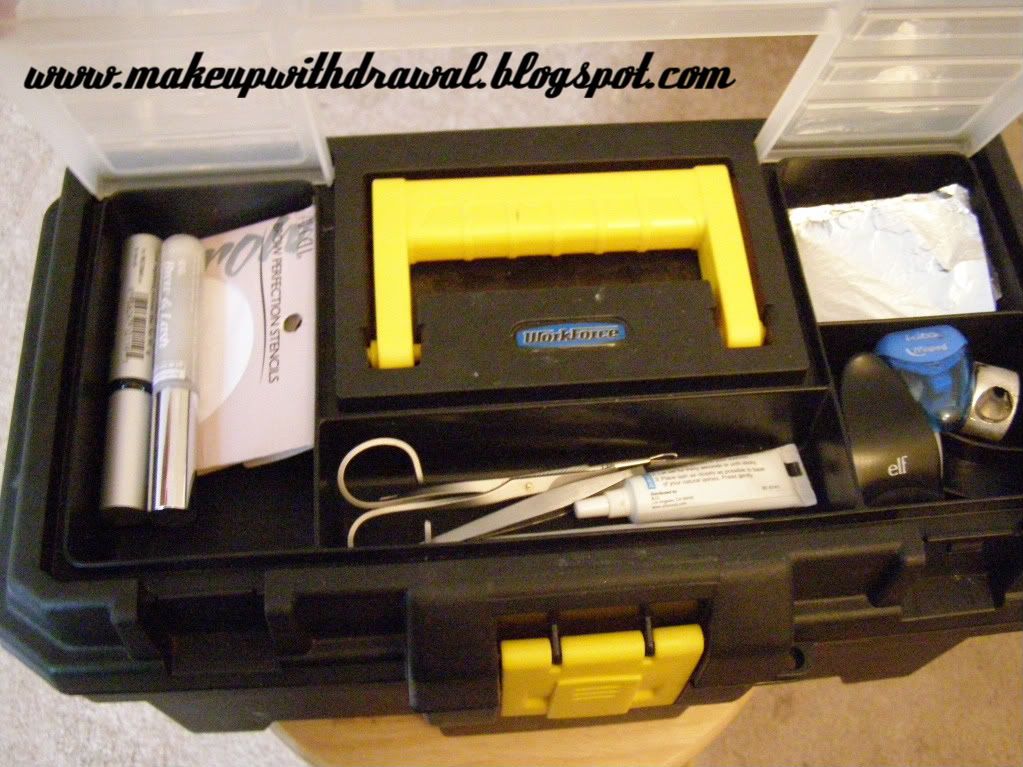
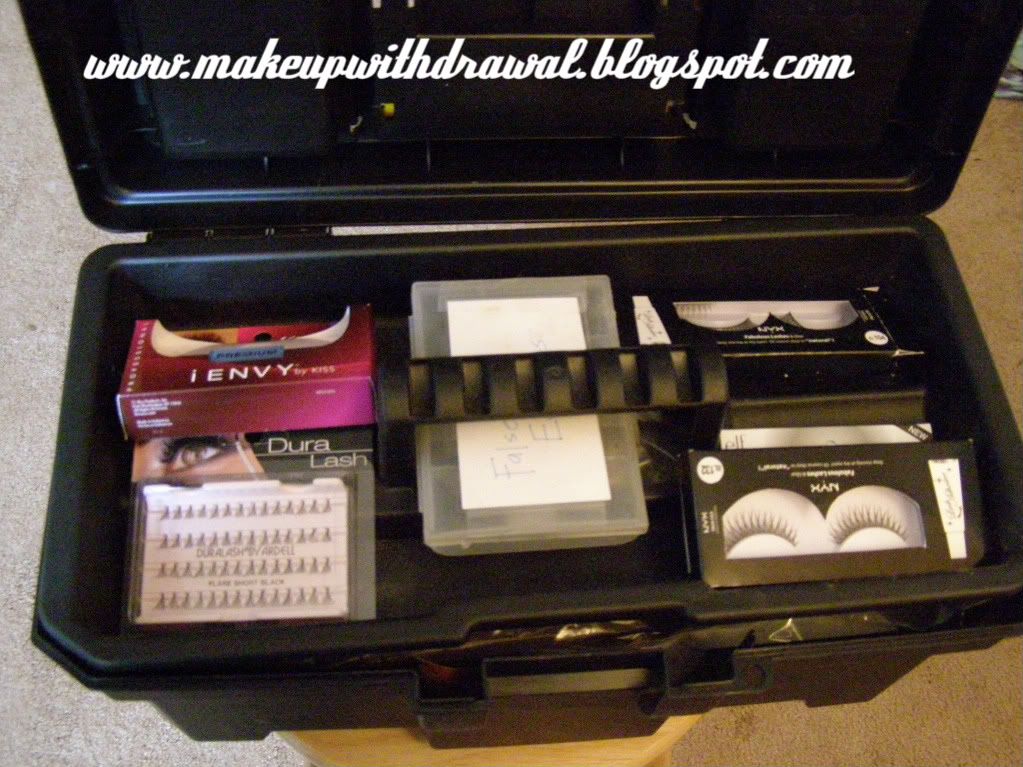
I have a kind of kit for my brows and lashes, a tool box full of tons of false lashes and lash related accessories.
 First, and most important, the glue. If you're using cheap lashes (like ones found at drugstores or beauty shops) don't ever, ever use the glue that comes with it. It is almost always rubbish. I use DUO eyelash adhesive, which is the kind sold by MAC ($8) but you can find it at most any Walgreens or drugstore for around $6 (or online- Duo Eyelash Adhesive, Clear-White - .25 oz
 ). It comes in two shades, Clear-White and Dark. Currently using the clear, but when I run out I think I'm going to switch to the dark stuff because I imagine it'd help blend the falsies in better. Pros? Cheap, it holds my lashes on all day, and does dry to a nice clear which is easily covered up by eyeliner. A small tube also lasts a really long time, been using mine at least 3 times a week for the last 6 months, no where close to running out. The cons? It smells kinda funky, like latex and fish, which is actually normal. It also contains latex, so for those with allergies- the brand Quo (Canadian, I believe) makes a latex free glue.
 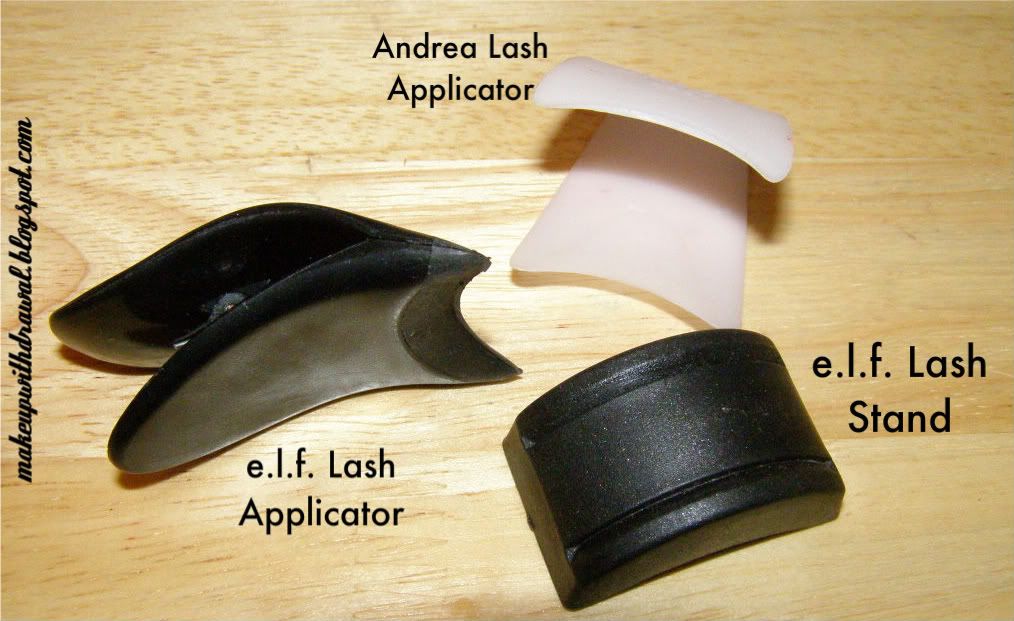 Now take a look at these odd gizmos. Those familiar with false lashes might recognize them as lash applicators and a lash stand. The pink one is from Andrea and it came with an Andrea starter kit for about $7. It is, in my opinion, worthless. It's a piece of cheap plastic folded in half. I actually found that when trying to put on lashes with it, it got in the way and made things harder. The e.l.f. one I like quite a bit (from the Hollywood Lashes Kit from e.l.f., $3). It's a clip, with rubber tipped edges so that it holds the lashes snugly but doesn't damage them. How to use this tool? Open the clip, place the lashes into the clip, let it clamp down gently and shape the curve of the lash band to fit your eye shape. It's great for beginners or those with shakey hands. This lash stand, also by e.l.f. is a MUST have if you plan on reusing your lashes. No kidding. I really struggled with reshaping my falsies before I found this cheap little thing (also in the e.l.f. Hollywood Lashes Kit). It looks simple enough, a small plastic arched form with two grooves in it. After I wash my falsies (I have a video on that, not the best quality, but you get the idea - here- ) I take them while they are still damp and set them in the grooves and add a couple of drops of so that water tension holds them in place while they dry. Last but not least, if you decide to reuse your lashes- you need a place to store them. Keeping them in their original boxes works just fine- but this is what I do to save space. I bought a cheap small storage box from the craft store, with separators (for things like beads ) and a packet of labels. Label each well, and ta da!
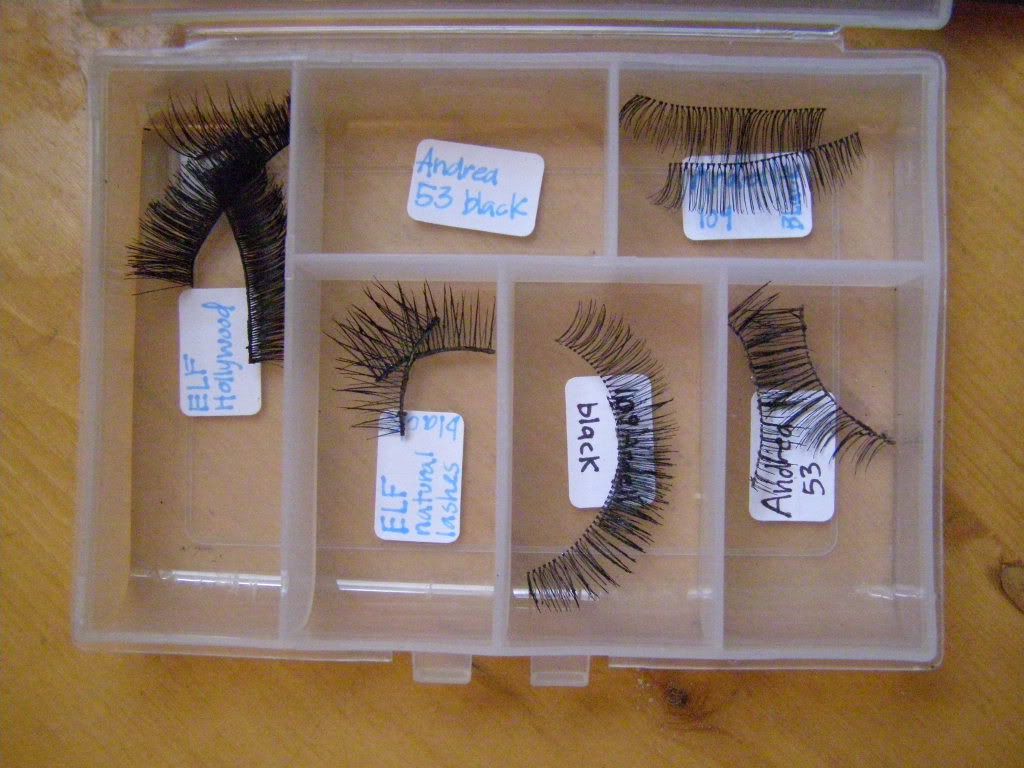
In the mean time, I'm going to fake it, and talk about my love of false lashes.I have a kind of kit for my brows and lashes, a tool box full of tons of false lashes and lash related accessories.
Today I just want to talk about some of the extras associate with falsies, and not the actual lashes and technique quite yet.
For Full False Bands:
First, and most important, the glue. If you're using cheap lashes (like ones found at drugstores or beauty shops) don't ever, ever use the glue that comes with it. It is almost always rubbish. I use DUO eyelash adhesive, which is the kind sold by MAC ($8) but you can find it at most any Walgreens or drugstore for around $6 (or online- Duo Eyelash Adhesive, Clear-White - .25 ozNow take a look at these odd gizmos. Those familiar with false lashes might recognize them as lash applicators and a lash stand. The pink one is from Andrea and it came with an Andrea starter kit for about $7. It is, in my opinion, worthless. It's a piece of cheap plastic folded in half. I actually found that when trying to put on lashes with it, it got in the way and made things harder. The e.l.f. one I like quite a bit (from the Hollywood Lashes Kit from e.l.f., $3). It's a clip, with rubber tipped edges so that it holds the lashes snugly but doesn't damage them. How to use this tool? Open the clip, place the lashes into the clip, let it clamp down gently and shape the curve of the lash band to fit your eye shape. It's great for beginners or those with shakey hands. This lash stand, also by e.l.f. is a MUST have if you plan on reusing your lashes. No kidding. I really struggled with reshaping my falsies before I found this cheap little thing (also in the e.l.f. Hollywood Lashes Kit). It looks simple enough, a small plastic arched form with two grooves in it. After I wash my falsies (I have a video on that, not the best quality, but you get the idea - here- ) I take them while they are still damp and set them in the grooves and add a couple of drops of so that water tension holds them in place while they dry. Last but not least, if you decide to reuse your lashes- you need a place to store them. Keeping them in their original boxes works just fine- but this is what I do to save space. I bought a cheap small storage box from the craft store, with separators (for things like beads ) and a packet of labels. Label each well, and ta da! For Individual Lashes Clusters:
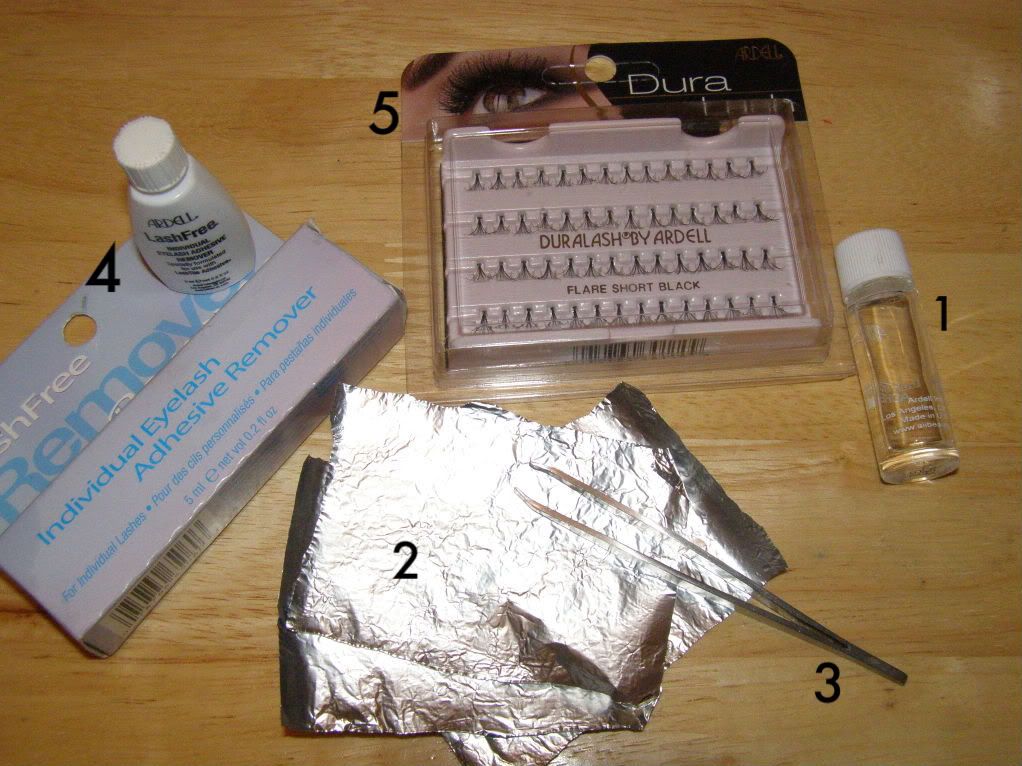
The stuff you need for individual lashes differs from the supplies needed for full bands. Individual lashes are actually supposed longer lasting than full bands, you're 'supposed' to get weeks of use out of them according to Ardell, who makes the glue necessary- LashTite. LashTite reminds me super glue, it really does. And like super glue, I found out that it can glue your fingertips together (an unfortunate isolated incident, I swear). So, take a look at the picture above. 1- LashTite, semipermanent glue that dries quickly to a hard glossy finish. 2- Something to put the glue on, I use scraps of aluminum foil. 3- A pair of tweezers. Not your good tweezers that you use for plucking but the cheap 99-cent kind you have lying around in a drawer somewhere. 4- LashFree (found at beauty stores like Sally's or online). Please, please do not mess around with individual lashes without the glue remover. I'm saying this from personal experience. They look great when you first put them on, but after a few days, they get a little wonky and they get bent into weird directions and you'll want to take them off. You can't just pull them off because they're glued into your lash line. Nothing you have at home will remove them easily (trust me, I tried- oils, hot steamy showers, makeup remover, nothing). I had a bald patch in my lash line for a few weeks as testimony to this fact. 5. Individual Lashes, I'll talk about these during the actual tutorial.
Alright, tune in soon for the next installments- in which I'll talk about the actual lash process!
<3, M
All products featured in this post were purchased by me, for my own use.


Thank you so much for posting this! I hope to get some cheap falsies to test drive soon. :o)
ReplyDelete:D Did you get the ones you ordered off Ebay yet? You have to tell me if they're any good, I'm always trying to stock up on falsies!
ReplyDeleteI did, actually they are quite crappy. Very difficult to cut and very drag. :o( FAIL.
ReplyDelete