Tutorial: Wild Taped Look
Friday, October 14, 2011
Finally, the tutorial I promised. What I like about this look is that you are only limited by your creativity, you can create your own version very easily by tweaking it here and there.
You will need:
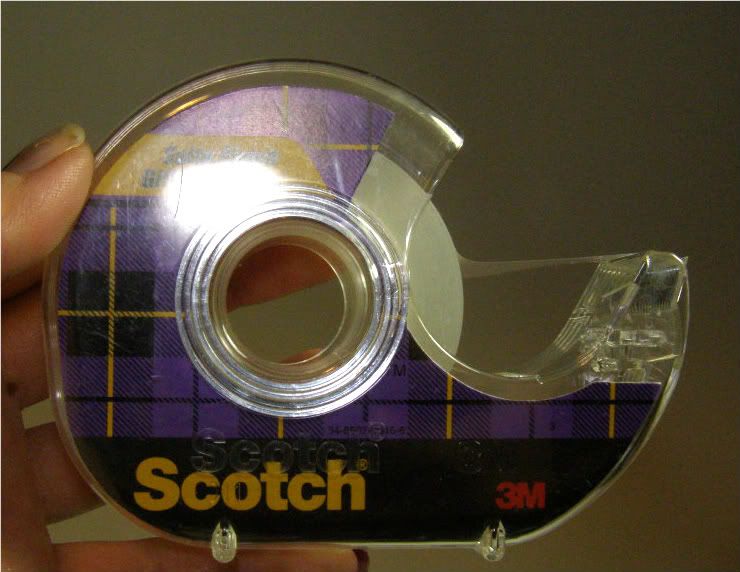
-Scotch tape
-large face brush
-Face powder (doesn't really matter whether it is pressed or loose)
-scissors (I used manicure scissors for precision)
-two or more coordinating shadows (I prefer loose, sparkly ones and you'll see why)
-eye primer
-your usual makeup (foundation, concealer etc if you wear it) and a variety of eye brushes (whatever you normally use)
Optional: a slick substance such as Vaseline, eyebrow wax, cleansing oil etc... (to make sure nothing adheres to your brows, you'll understand later)
I went ahead and applied foundation and concealer to the rest of my face. Some time there is no telling where the design might lead to, and it's much easier to have foundation and concealer under your design rather than trying to conceal around it later on.

Prime your eyes. Not just your eyelid but your lower lid and above the brow as well. Depending on how large of an area you want to do your design, you might want to apply eye primer in even more areas. Use a synthetic concealer brush to apply the primer, giving an even application. If your design crosses over an eyebrow, use a drop of petroleum jelly or cleansing only to coat the brow, to make sure the tape doesn't stick and that you don't receive an unplanned brow waxing.
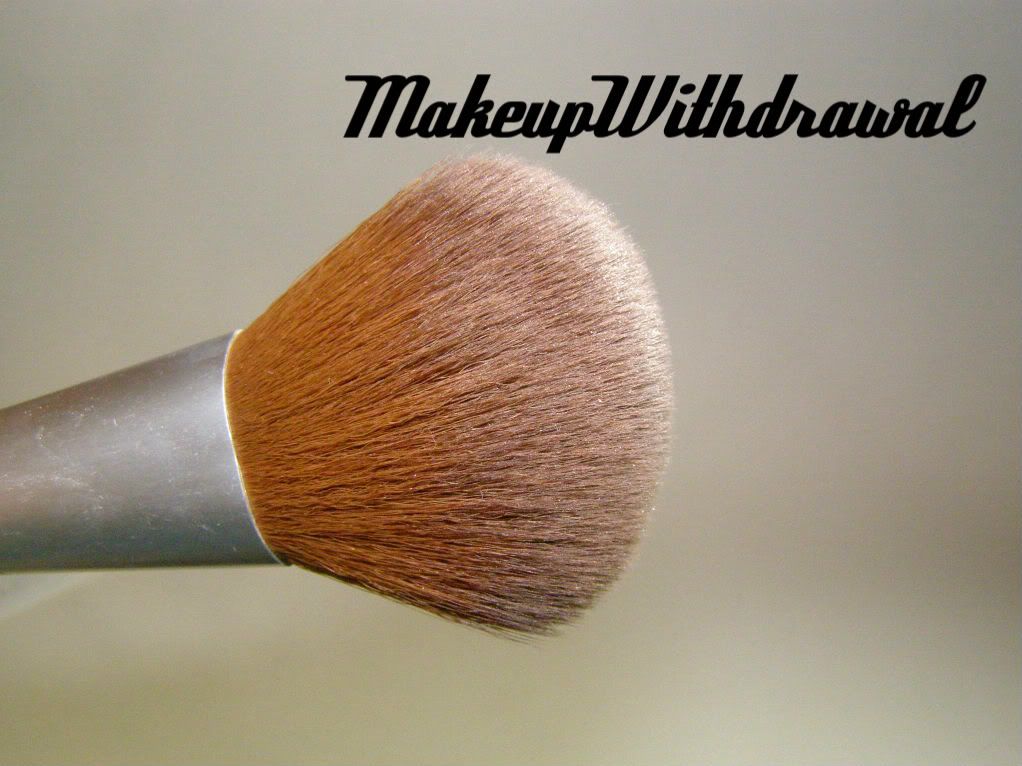
Take your large fluffy face brush and swirl a bit of face powder onto it. Swirl it around the lid and make sure to tap off the excess. That's the key to getting the perfect amount of powder. Too much and your tape won't stick, and you won't get a clean precise image.
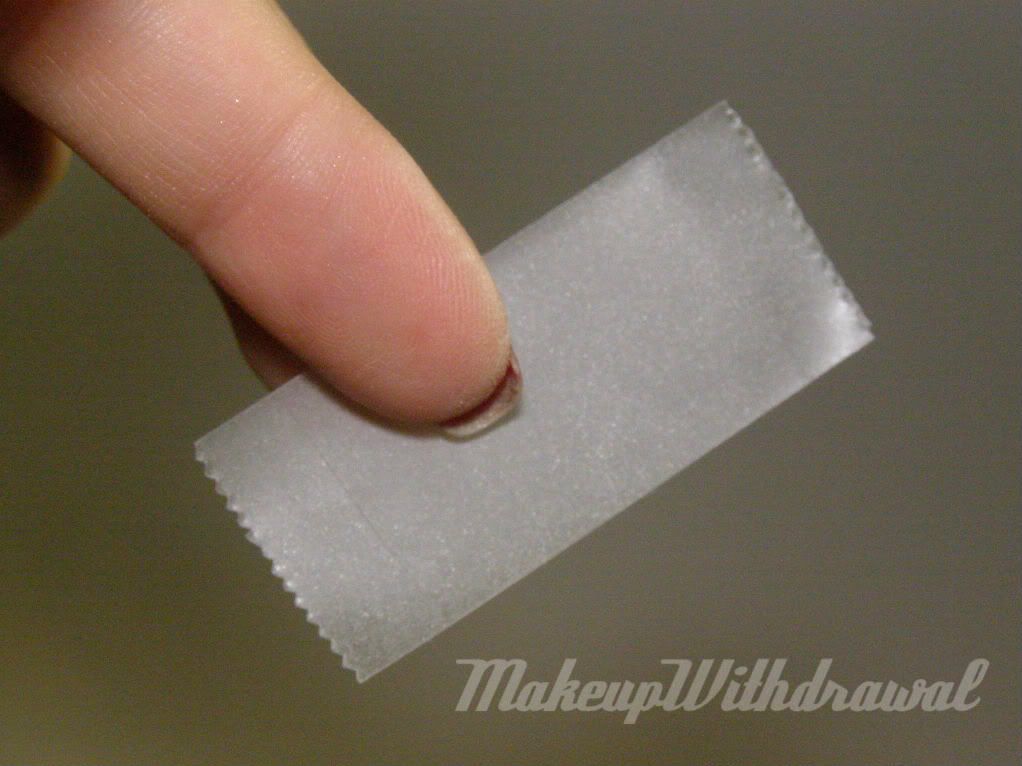
Cut a piece of tape for yourself and lightly dust the sticky side of the tape until it is visibly covered. The perfect amount is when the tape is still tacky but it isn't hard to peel off. (Since we're dealing with the delicate eye region, it's imperative that the tape comes off easily for safety!)
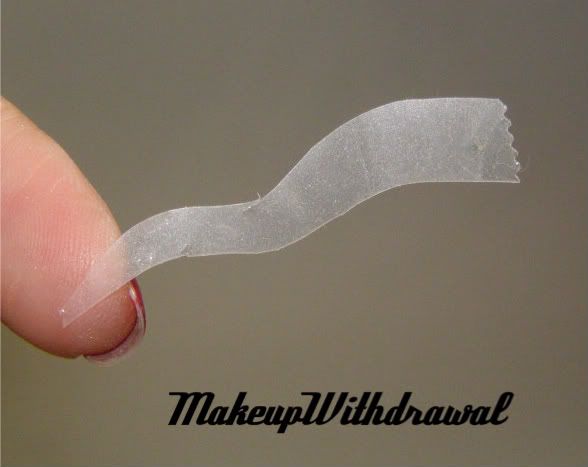
Using your scissors, cut designs into the tape.

Lightly position your tape onto your lid. Press down once they're in place. I recommend looking down into handheld mirror so that you can lay it across your lid... and you'll still be able see.
Step 5
Use a small brush to dab a tiny bit of your adhesion product to the skin that's left exposed. You will only need a very small amount, over doing it leads to "bleeding" images. You just want the skin to be tacky enough to pick up shadow, not gooey and overly wet.
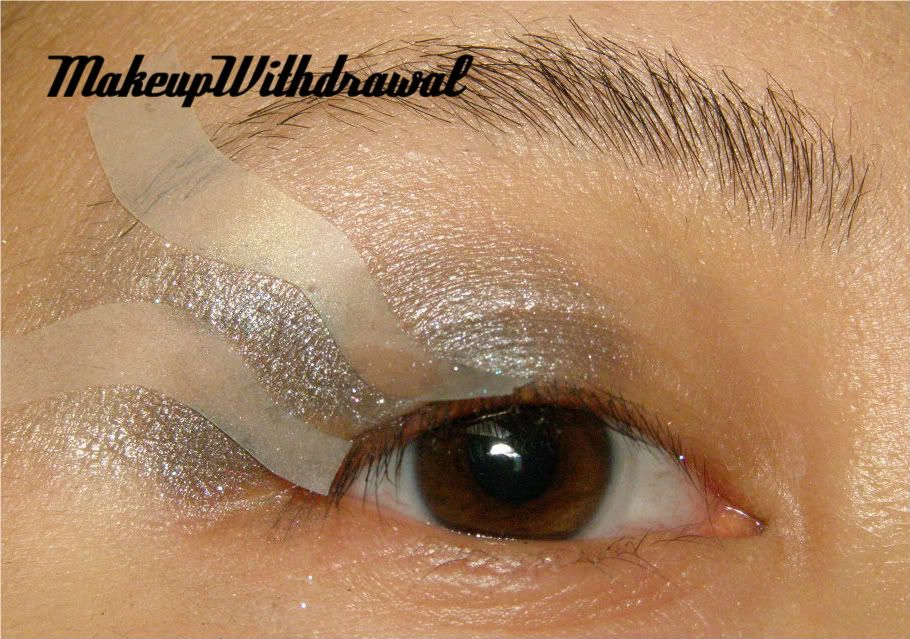
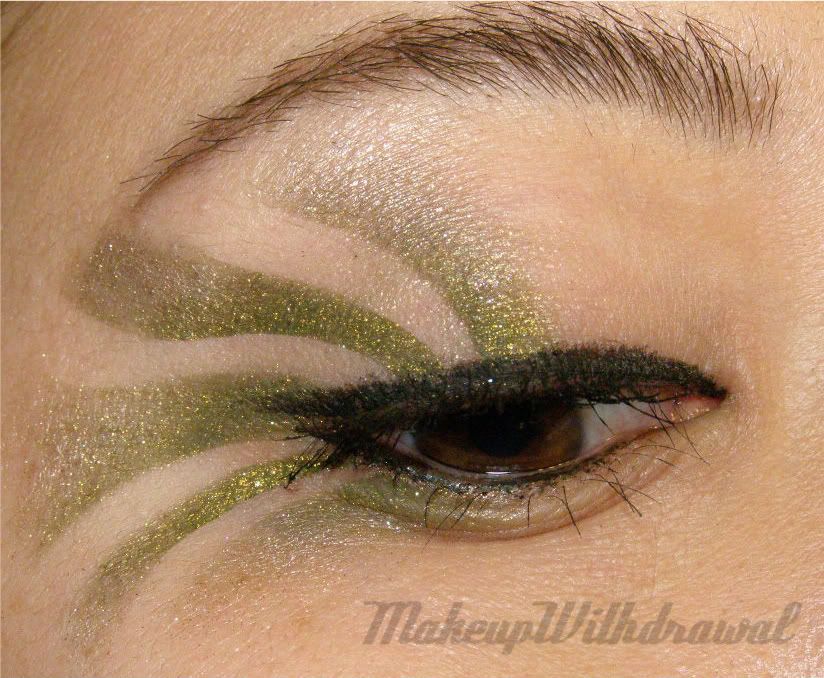
Take one of your shades of eye shadow. Using a small brush (or even a q-tip or sponge applicator) dab one color in the regions closest to your lash line. Take your other color(s) and fill in the other regions. Here, I did the darker shade closer to the lash line and the lighter color further away.
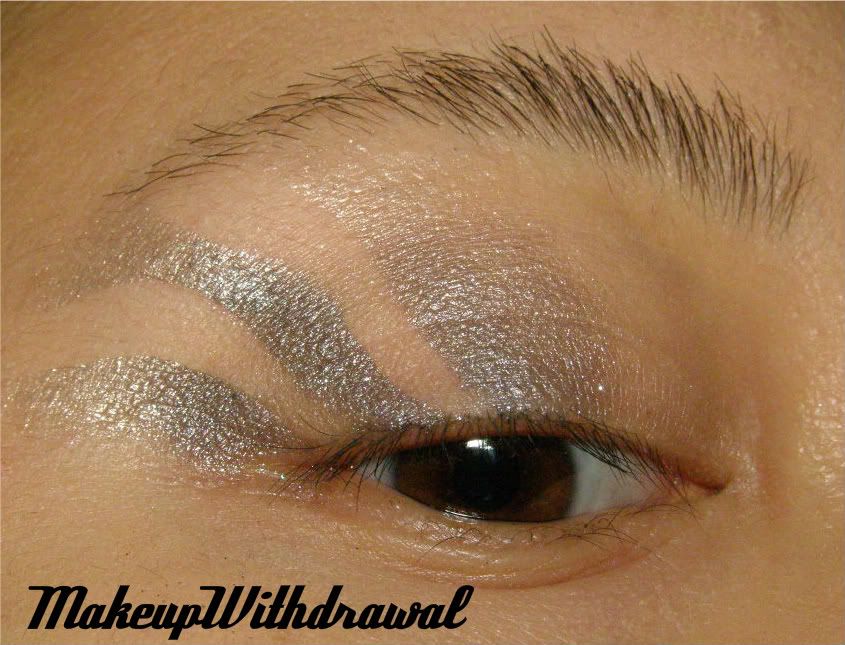
Carefully remove the strips of tape. If you need to do any cleanup, use tissue, makeup wipes or q-tips to carefully clean up smudges.
 |
| In case you were wondering, the shadows I used were Shiro Cosmetics Midna and Temple of Time. |
Apply eyeliner and mascara as you see fit. Fill in brows, curl your lashes or if you choose to- you can even add falsies, glitter, crystals etc.
Remember, you're only limited by your imagination! Try these to customize your look:
-Have patterned scissors from scrapbooking? Use them to create neat and perfect taped patterns.
-Use stickers that are shaped like hearts, stars to create more interesting shapes.
-Try using a variety of shadow colors. Play with mattes, shimmers, glittering shades.
-Try combinations of colors that represent a theme. School or sports teams colors work great, as do schemes of colors such as rainbows, jewel tones, complimentary colors etc
Here I used the tape to create am outline for a perfect, yet simple masquerade mask.
Note: Please be careful when using tape near your eyes. It's a very delicate region, use utmost caution and personal judgement. If you've experienced allergic reactions to adhesives in tape before, don't try this look!
If you end up trying this, I would love to see what you come up with! You can email me at mimi@makeupwithdrawal with pictures.
Have a fantastic weekend!
Love,
Mimi


No comments:
Post a Comment
So, what do you think?
Please be respectful and do not spam links. If you'd like to link back to your own site, please use the feature in Disqus that allows you to do so.
Thanks!